Operating the H Cameras for Digital and Film Photography 55
You now specify the desired imprint by watching the LCD display on the camera grip (shown
in the next section, Camera Operation) and operating the controls around the display. You
have six options for imprinting the fi lm. Follow the steps below:
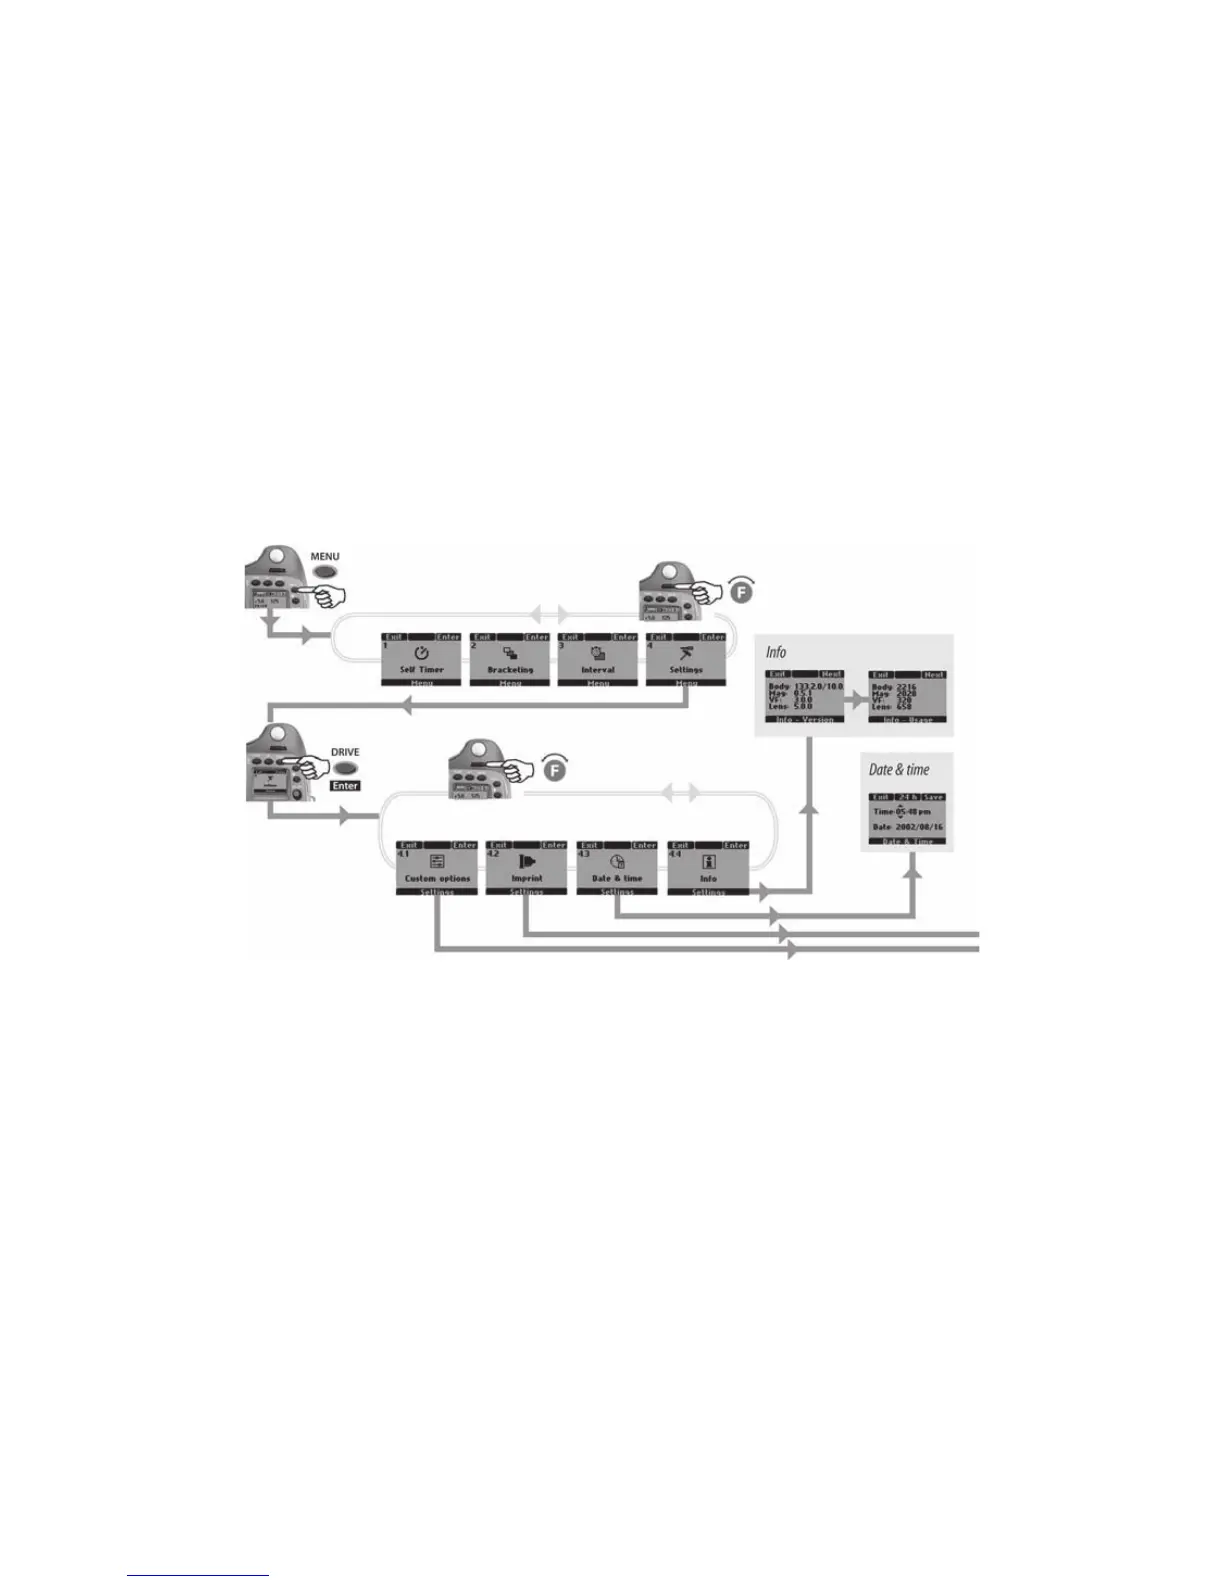
1. Press the Menu button next to the display, and turn the front wheel until SETTINGS appears.
2. Press the ISO/WB (Drive) control, and turn the front wheel until IMAGE INFO (Menu 4.2) appears.
3. Click Enter (Drive) control and turn front wheel if necessary to 4.2.1 IMPRINT TYPE. From here
on, functions only work with a fi lm magazine, not when a digital sensor unit is attached.
4. Click ISO/WB (Drive) control, and turn the front wheel to access six options for imprint combi-
nations (Figures 4-9 and 4-10):
● IMP. TYPE 1: Prints all relevant exposure information.
● IMP. TYPE 2: prints basic exposure information aperture, shutter speed, and exposure correction.
Figure 4-9 The operating procedure for imprinting.
● DATE & TIME: Prints date and time only.
● TEXT & DATE: Prints the preset custom text and the date.
● TEXT & INFO: Prints the preset custom text and basic exposure information.
● TEXT: Prints the preset custom text only.
If you want to imprint only type 1 or type 2, select the type by turning either the front or the
rear wheel, and then click the ISO/WB (Drive) button.
Text Setting
If you also want to imprint text, press Menu and turn the front wheel to SETTINGS, turn the
front wheel to show TEXT (Menu 4.2.2), and click the ISO/WB (Drive) button, which brings
up the text display. Turning the front wheel moves the cursor sideways, and turning the rear
wheel moves it up and down. This allows you to choose the desired letters or symbols. The
screen can show only three lines of characters at a time, but you can scroll up or down by