Operating the H Cameras for Digital and Film Photography 73
In all automatic light measuring modes, you can bracket by using the rear control wheel,
only if the wheel function is programmed appropriately. This is done with custom option,
REAR WHEEL and QUICK ADJUST. Program this option into the camera as described under
the section Custom Options. Turn the rear wheel to YES (the default setting). Save the setting
by clicking the ISO/WB (Drive) button.
Turning the rear control wheel now adjusts the exposure by changing the aperture only
in Shutter Priority mode (S) and changing the shutter speed only in the Aperture Priority (A)
setting. Set to programmed (P) or (Pv); the camera will decide which one to change. In all
cases the adjustments are indicated as or on the display and in the viewfi nder. Because
the indications appear in the viewfi nder, you can bracket without removing your eye from
the fi nder.
Automatic Exposure Bracketing
Automatic exposure bracketing in
1
/
3
-,
1
/
2
-, and 1-stop exposure increments on up to nine
frames on the H3D models (up to fi ve on earlier models) can also be programmed into the
camera (Figure 4-22).
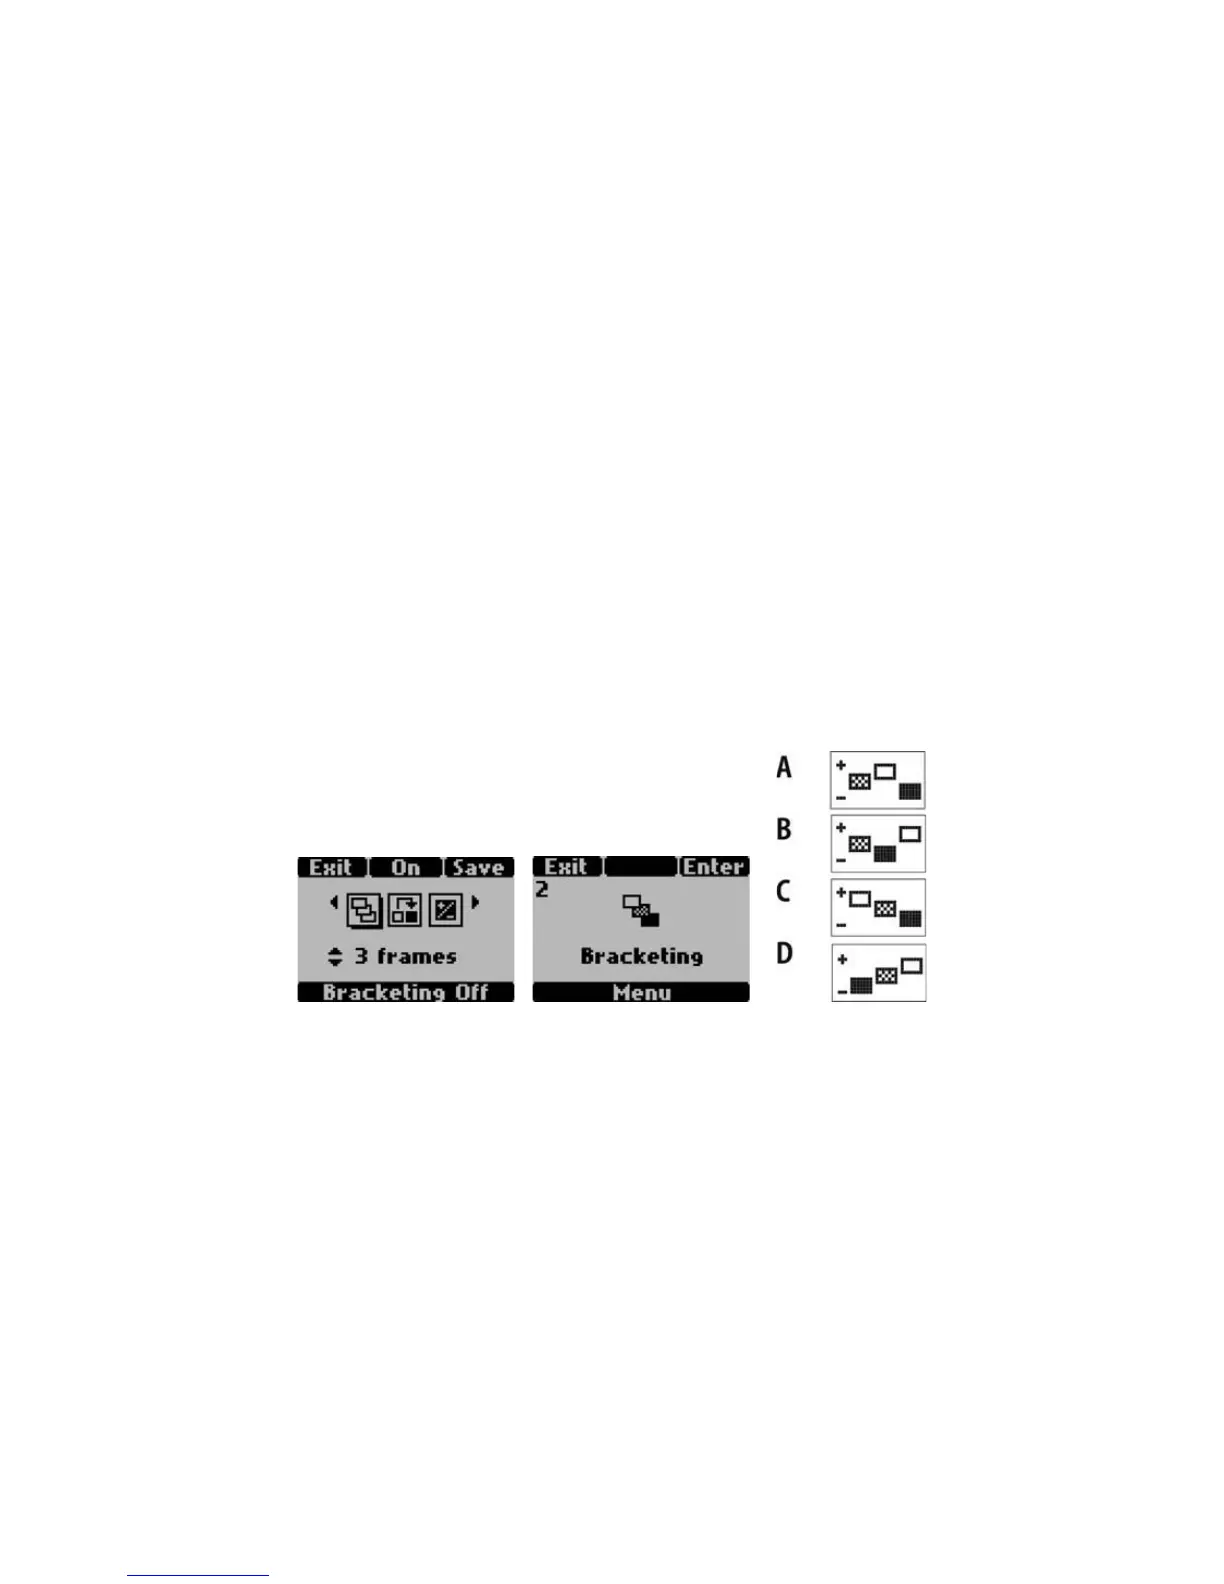
Figure 4-22 (1) The grip display for automatic bracketing. (2) The bracketing sequence
options: A, Normal/over/under; B, Normal/under/over; C, Over/normal/under; and D, Under/
normal/over.
21
With the camera set to the Continuous Drive mode, the exposures are made automati-
cally while the release is kept pressed, and the camera stops when the cycle is completed. In
the Single-frame mode, the bracketing cycle is made by pressing the release for the number of
frames. If you no longer need or want automatic bracketing, click the Esc (ON/OFF) button. If
you do not do this, exposure bracketing stays programmed in the camera and subsequent pic-
tures will be made with the programmed bracketing compensation rather than the exposure
determined by the meter. This is true even if the pictures are taken in a completely different
location and after the camera has been deactivated.