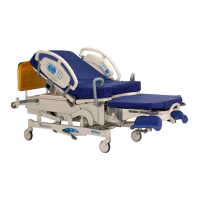
2.3 Foot Section Malfunction
Chapter 2: Troubleshooting
2 - 12 Affinity® Four Birthing Bed Service Manual (195826 REV 2)
2.3 Foot Section Malfunction
The foot section motor does not operate. If the motor operates, but has other problems, go to “Foot
Drive Operation Failures” on page 2-15.
1. The other bed functions operate, and the foot section does not operate on the opposite siderail.
Yes No
Troubleshoot the siderail control panel. Go to Procedure 2.1 on page 2-9.
2. Use the Bed Up control to raise the bed to the highest position.
3. Make sure the bed is not in the Trend-like position.
4. Remove the top motor cover (see Procedure 4.1 on page 4-3), and disconnect the foot section
motor (P6) and the head section motor (P4) from the logic control P.C. board (see Figure 2-2 on page
2-3).
Make sure that you observe the foot section when you move it while connected to the P4 connector of
the logic control P.C. Board. This procedure bypasses the electronic position limiters of the foot section.
Make sure that the foot section does not hit an obstruction or the floor. Equipment damage can occur.
5. Connect the foot section motor to the P4 electrical connector on the logic control P.C. board. The
foot section moves when the Head Up or Head Down control is pressed.
Yes No
Replace the foot section motor (see Procedure 4.9 on page 4-17) and go to “Final
Actions” on page 2-9.
6. Connect the foot section motor to the P6 electrical connector on the logic control board. Connect
the head section motor to the P4 electrical connector on the logic control board. Set the multimeter
to read DC volts (V DC).
7. Put the positive multimeter lead on pin 1 of the P6 connector, and the negative multimeter lead on
pin 2 of the P6 connector. The voltage measures 24-35 V DC when the Foot Up control is activated,
and -24 to -35 V DC when the Foot Down control is activated.
Yes No
Adjust the foot limit potentiometers (see Procedure 4.10 on page 4-19). If this solves
the problem, go to “Final Actions” on page 2-9. Otherwise, go to Step 9
8. Go to Step 11.
9. Set the multimeter to V DC. Put the negative multimeter lead on pin 1 of the R9 resistor and the
positive multimeter lead on pin 3 of the P6 connector. The voltage measures 4.5-5.5 V DC
Yes No
Replace the logic control P.C. board (see Procedure 4.21 on page 4-36).
10. Set the multimeter to V DC. Put the negative multimeter lead on pin 1 of the R9 resistor and the
positive multimeter lead on pin 6 of the P6 connector. The voltage measures less than 0.25 V DC.
Yes No
Contact Hill-Rom technical support.
11. Replace the foot section motor (see Procedure 4.9 on page 4-17), and go to “Final Actions” on
page 2-9.