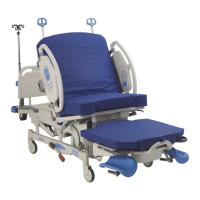
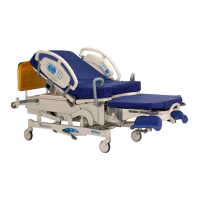
4.10 Foot Limit Switch Adjustment
Chapter 4: Procedures
Affinity® Four Birthing Bed Service Manual (195826 REV 2) 4 - 19
4
4.10 Foot Limit Switch Adjustment
Tools: Small screwdriver Tape measure
The foot limit switch adjustment should be done whenever the bed’s foot system is serviced, such as
when the foot motor is replaced, when the hilow switch is adjusted, and during preventive
maintenance.
ADJUST THE FOOT LIMIT SWITCHES
1. Make sure the bed is operational with the hilow system correctly installed and connected.
2. Set the brake/steer pedal to the brake position.
3. Make sure the bed is out of the Trend-Like position.
4. Make sure that the head section is in the flat position.
5. Use the Bed Up control to raise the bed to the highest position.
6. Remove the mattress.
7. Remove the top motor cover (see Procedure 4-1 on page 4-4).
8. Use the Foot Up control to raise the foot section so that the top of the foot section is 1.75 to 2.25
inches (4.5 to 5.7 cm) above the top of the seat section.
9. Adjust the LFU potentiometer (R5) as follows (see Figure 4-11 on page 4-20):
a. Turn the screw clockwise until the LED turns off.
b. Turn the screw counterclockwise until the LED turns back on.
10. Use the Head Down control to lower the head section to the flat position.
11. Use the Foot Down control to lower the foot section so that the top of the foot section is 6.0 to 6.25
inches (15.25 to 15.9 cm) below the top of the seat section.
12. Adjust the LFD potentiometer (R238) as follows (see Figure 4-11 on page 4-20):
a. Turn the screw clockwise until the LED turns off.
b. Turn the screw counterclockwise until the LED turns back on.
13. Use the Foot Up control to raise the foot section until it stops. Make sure that the top of the foot
section is 1.75 to 2.25 inches (4.5 to 5.7 cm) above the top of the seat section.
14. If necessary, adjust the LFU (R5) potentiometer.
• If the top of the seat section is below the correct range, turn the screw on the LFU (R5)
potentiometer counterclockwise until the bed stops in the correct range.
• If the top of the seat section is above the correct range, turn the screw on the LFU (R5)
potentiometer clockwise until the bed stops in the correct range.
15. Use the Foot Down control to lower the bed until it stops. Make sure that the top of the foot section
is 6.0 to 6.5 inches (15.25 to 16.5 cm) below the top of the seat section.
16. If necessary, adjust the LFD (R238) potentiometer.
• If the top of the seat section is below the correct range, turn the screw on the LFD (R238)
potentiometer counterclockwise until the bed stops in the correct range.
• If the top of the seat section is above the correct range, turn the screw on the LFD (R238)
potentiometer clockwise until the bed stops in the correct range.
17. Install the top motor cover (see Procedure 4-1 on page 4-4).
18. Do the “Function Checks” on page 2-5.