Tabletop electric components
44
4990851_002_00 – 2082262 – 2022-01-10
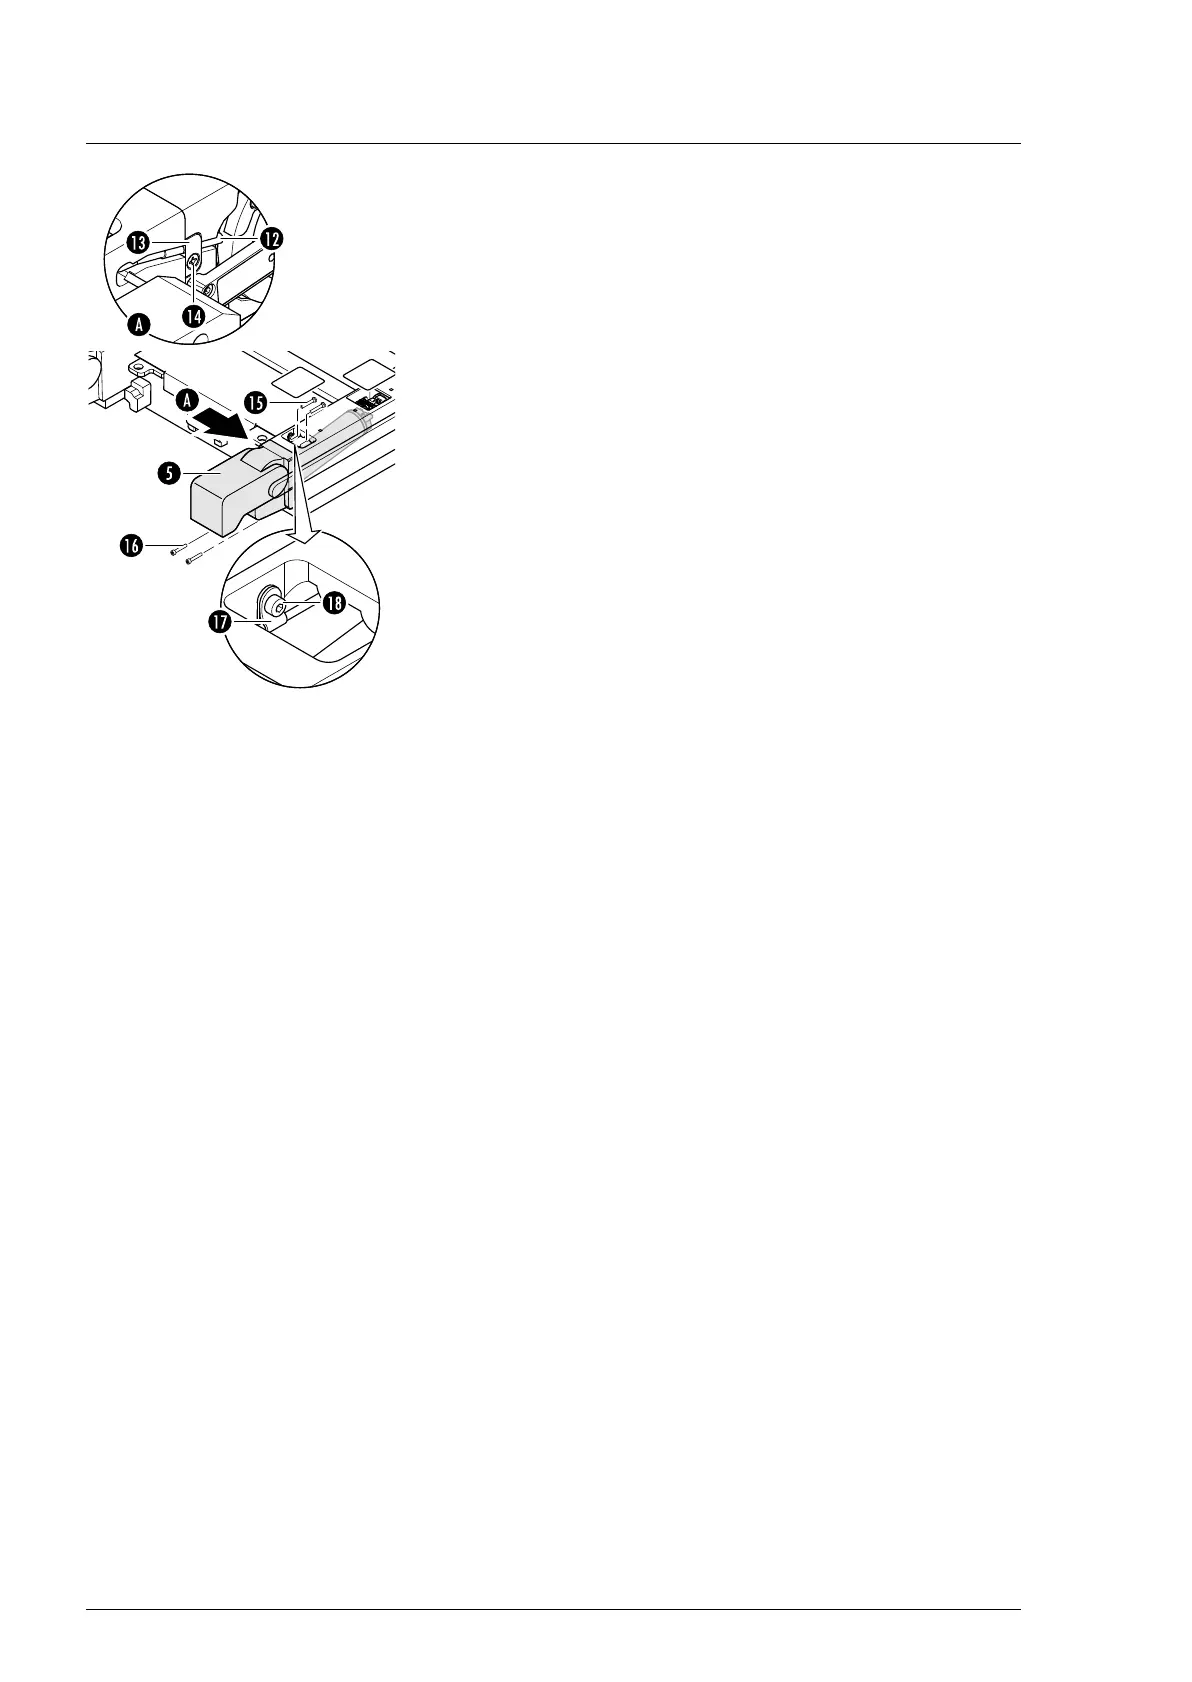
13. Remove the cable clip [17] in the foot-end opening of the seat
section bar (1 screw [18]).
14. Note the cable routing. Pull the plug of the sensor cable
W520 from the socket of cable W220/W320 through the
opening in the strut.
15. Remove the leg section hinge sensor [12] and the retaining
plate [13] (1 screw [14]).
16. Guide the plug of the sensor cable through the side opening
in the strut.
17. Unscrew the drive unit [5] from the strut (2 screws [15] from
above and 2 screws [16] from below).
18. Pull the drive unit [5] with the hinge off the strut and place it
safely on a level work surface.
Assembly 1. Carefully push the drive unit into the strut up to the position
stop and mount (2 screws from above and 2 screws from
below).
Ensure that the cables are not crushed.
2. Attention: Do not interchange the plug connections. Pay
attention to the wiring diagram on page 64.
Restore the original cable routing. Connect the plug of the
motor power supply cable.
3. Carefully guide the plug of the sensor cable through the side
opening in the strut.
Make sure that the insulation of cable is not damaged.
4. Attention: Do not interchange the plug connections. Pay
attention to the wiring diagram on page 64.
Restore the original cable routing. Insert the plug of sensor
cable W220/W320 into the W520 cable bushing.
5. Carefully remove slack from the sensor cable and mount the
cable clip in the opening in the seat section bar (1 screw).
6. Mount the sensor leg section hinge and the retaining plate (1
screw).
7. Attach the cover next to the power chain (3 screws).
8. Position and install the cover for the power chain (4 screws).
9. Check the alignment of the right and left hinges in relation to
each other. The two hinges must be at the same height.
Adjust the hinges if necessary (Chapter 16.2).
10. Switch on the operating table using the switch at the running
gear.
11. Adjust the sensor leg section hinge.
The zero position of the leg section hinge is set on the left
hinge and the end position of the leg section hinge is set on
the right hinge.
a) Carefully shift the leg section hinge into the switching
position.