11.2 Control and Monitoring Using a LAN Interface
168
11.2.1Connecting the 3196
Connecting method: Refer to the Quick Start Manual.
When connecting the instrument and computer through a hub:
When connecting the instrument and computer directly:
11.2.2Setting the 3196
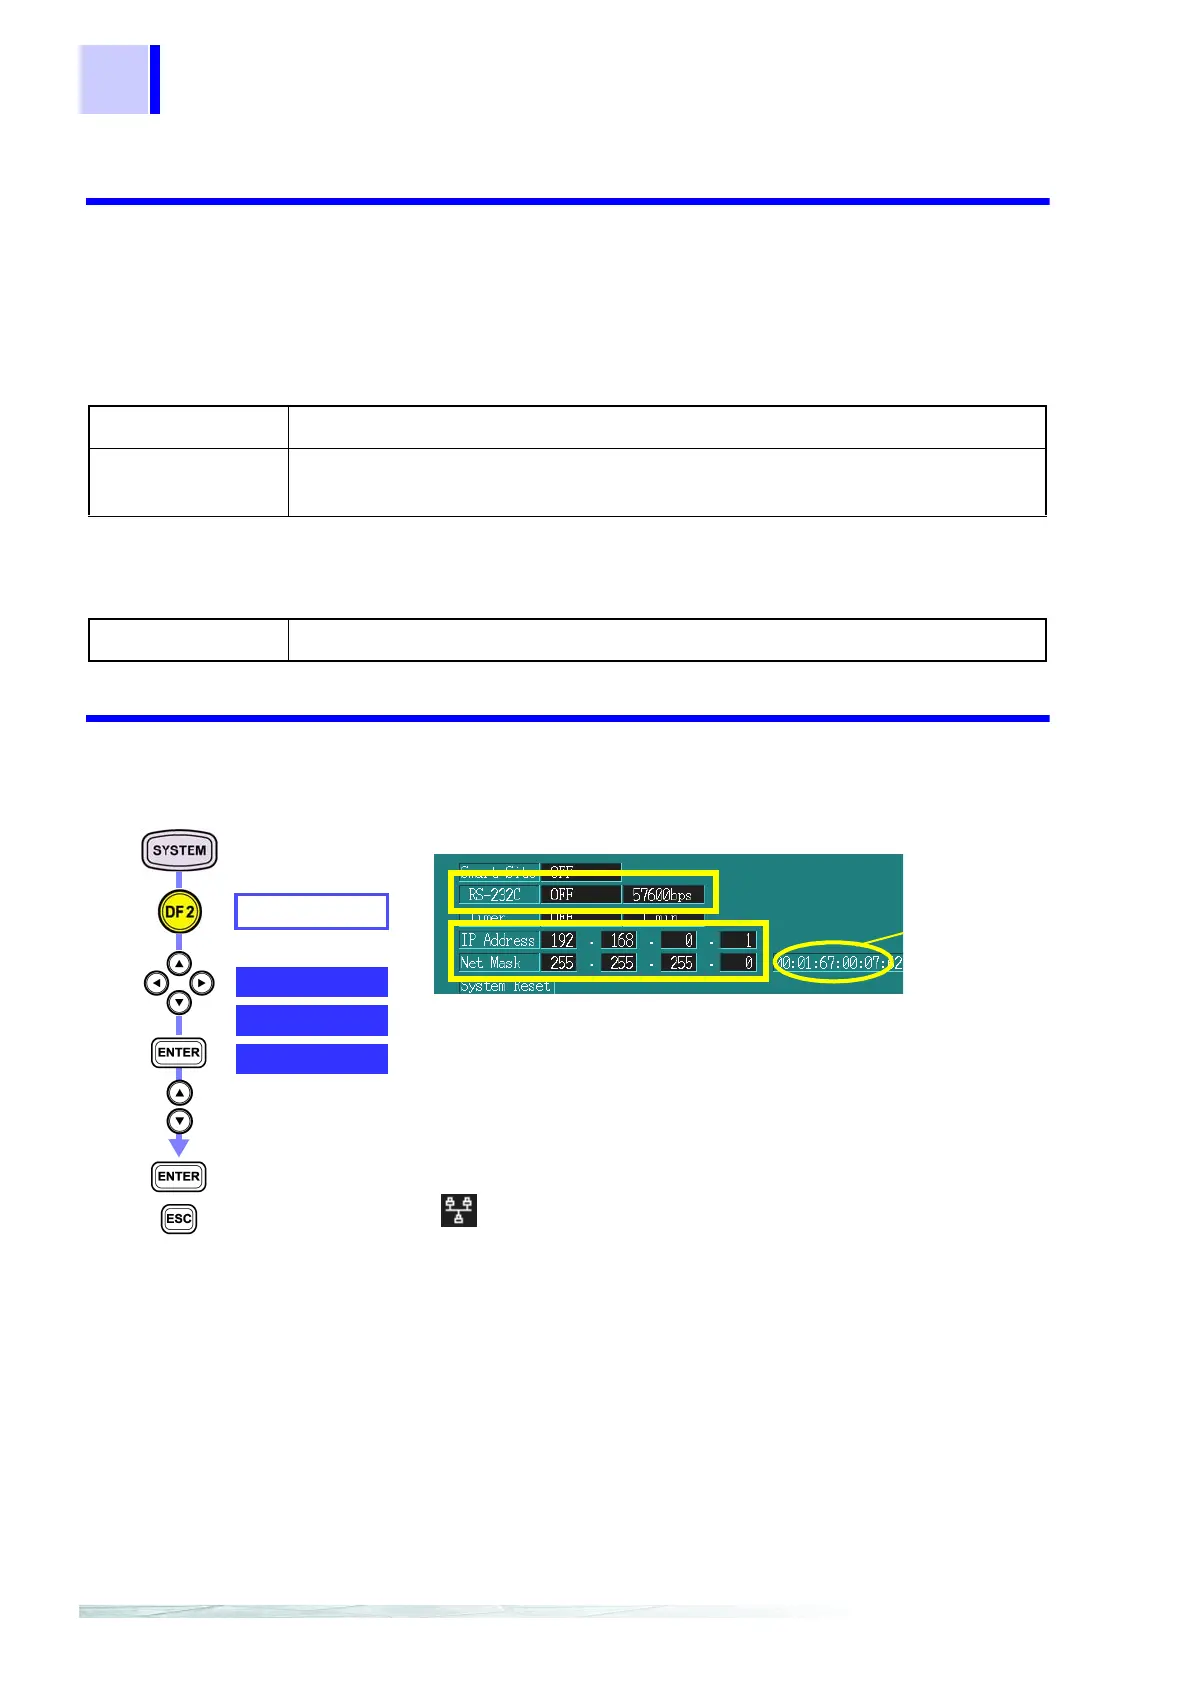
Configure connection on the instrument.
Prepare the following:
Hub A commercially sold hub.
10BASE-T cable Straight cable (9642 LAN cable, you cannot use the supplied cross conver-
sion cable)
Prepare the following:
10BASE-T cable Cross cable (9642 LAN cable, using the supplied cross conversion cable)
HARDWARE
RS-232C
Select from pull-
down menu
Confirm
Cancel
1. Set the connection point.
OFF or PRINTER
2. Set the IP address.
***.***.***
3. Set the subnet mask.
***.***.***
When the connection point is set to OFF or PRINTER,
lights on the upper left of the screen.
Example:
How to Set the Instrument’s IP Address and Subnet Mask
When the computer’s IP address and subnet mask are as
follows:
IP address: 192.168.0.2
Subnet mask: 255.255.255.0
IP address of the 3196: 192.168.0.1
Set the last numerical value only in the computer’s IP
address to a different number.
Subnet mask of the 3196: 255.255.255.0
Set to the same value as the computer’s subnet mask.
IP Address
Net Mask
MAC
Address