Page 158 SLG 700 SmartLine Level Transmitter User’s Manual Revision 8
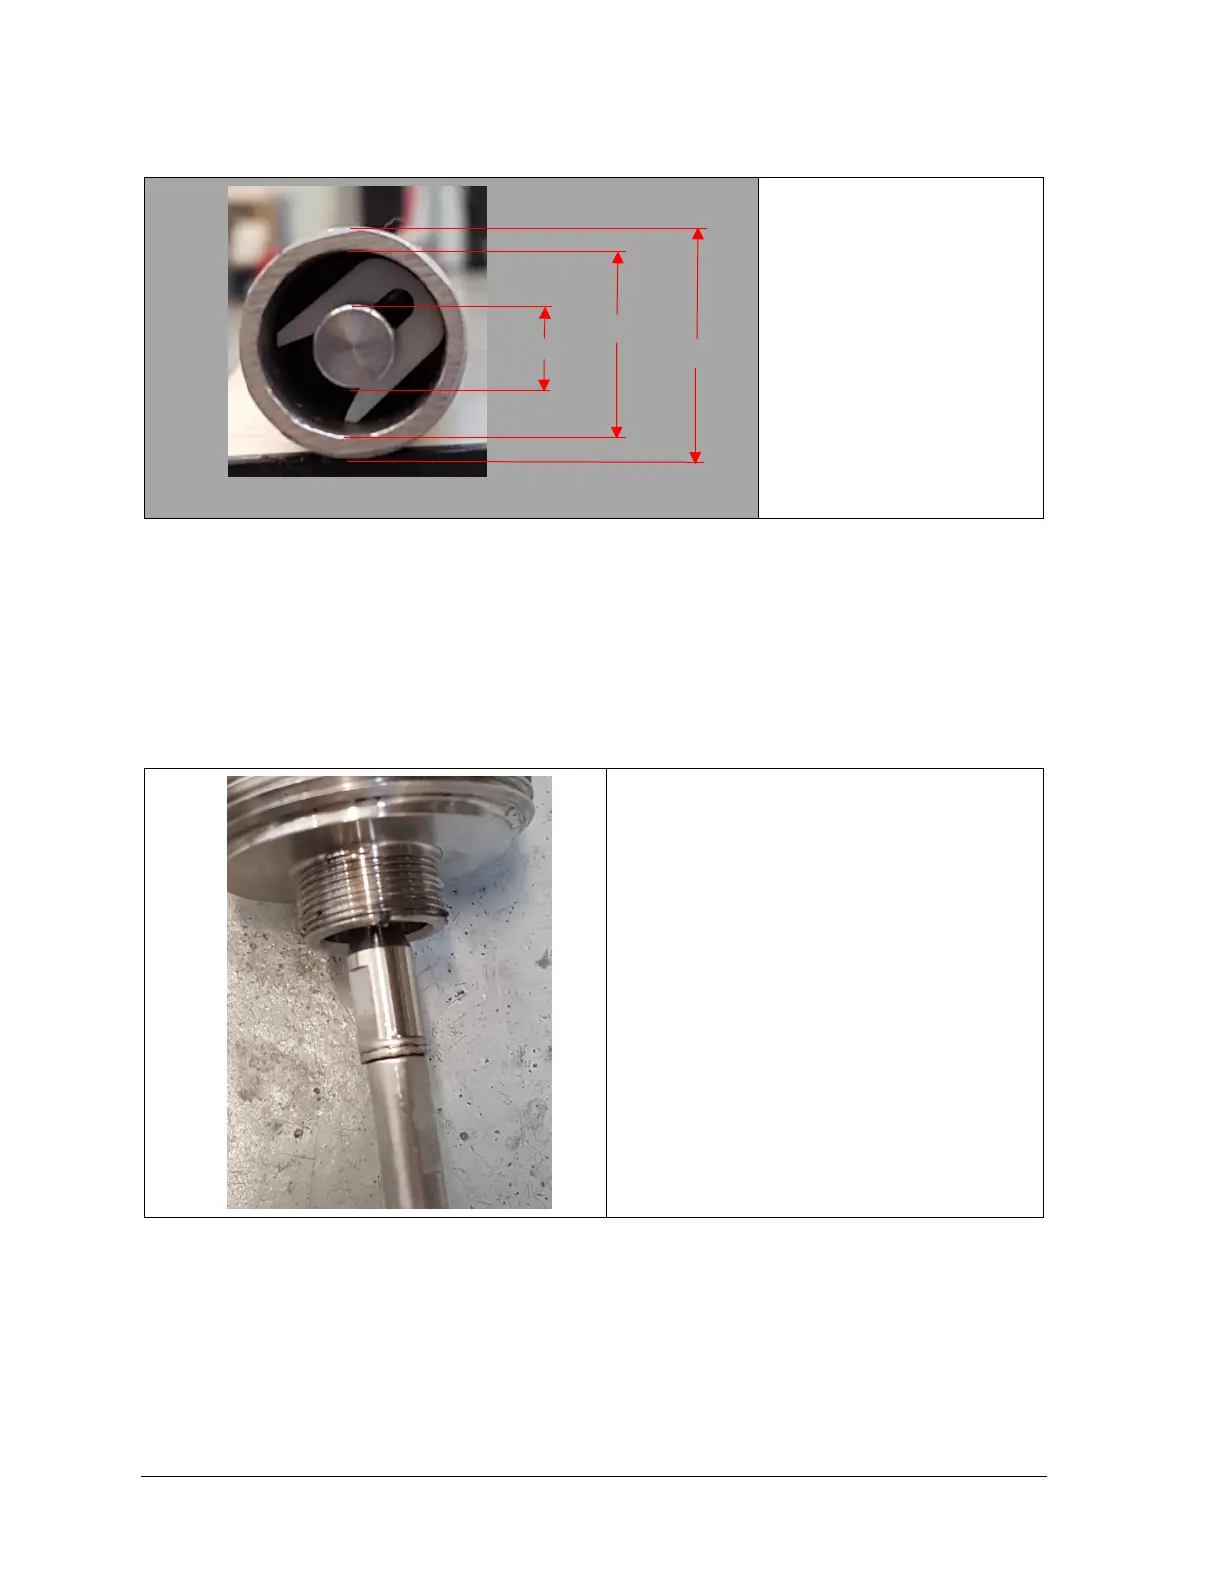
End spacer should be
easily visible from the end
of the tube.
Note that the end spacer is
changing with the R200
product release, however,
the spacing of the central
conductor with respect to
the outer conductor will
remain the same.
In some cases, the spacers may be jammed between the inner conductor and outer tube. If you
suspect this might be the case, it is possible to diagnose by measuring from the outside of the
tube to the central conductor using the depth gauge on a micrometer. The distance expected is
(7±2) mm.
2. There should be a nut and Nord-lock lockwasher on the threaded central conductor of the
process connector. The tapered end of the nut should face the body of the process connector
and the flat end should be in contact with the lockwasher.
Correct nut and washer placement.
3. Each section of the tube should be straight to within 2 mm.

 Loading...


