Chapter 7
Removing and Replacing Components
DVD I/O Board
212
Observe all ESD safety precautions before attempting this procedure. Failure to follow ESD safety
precautions could result in damage to the server.
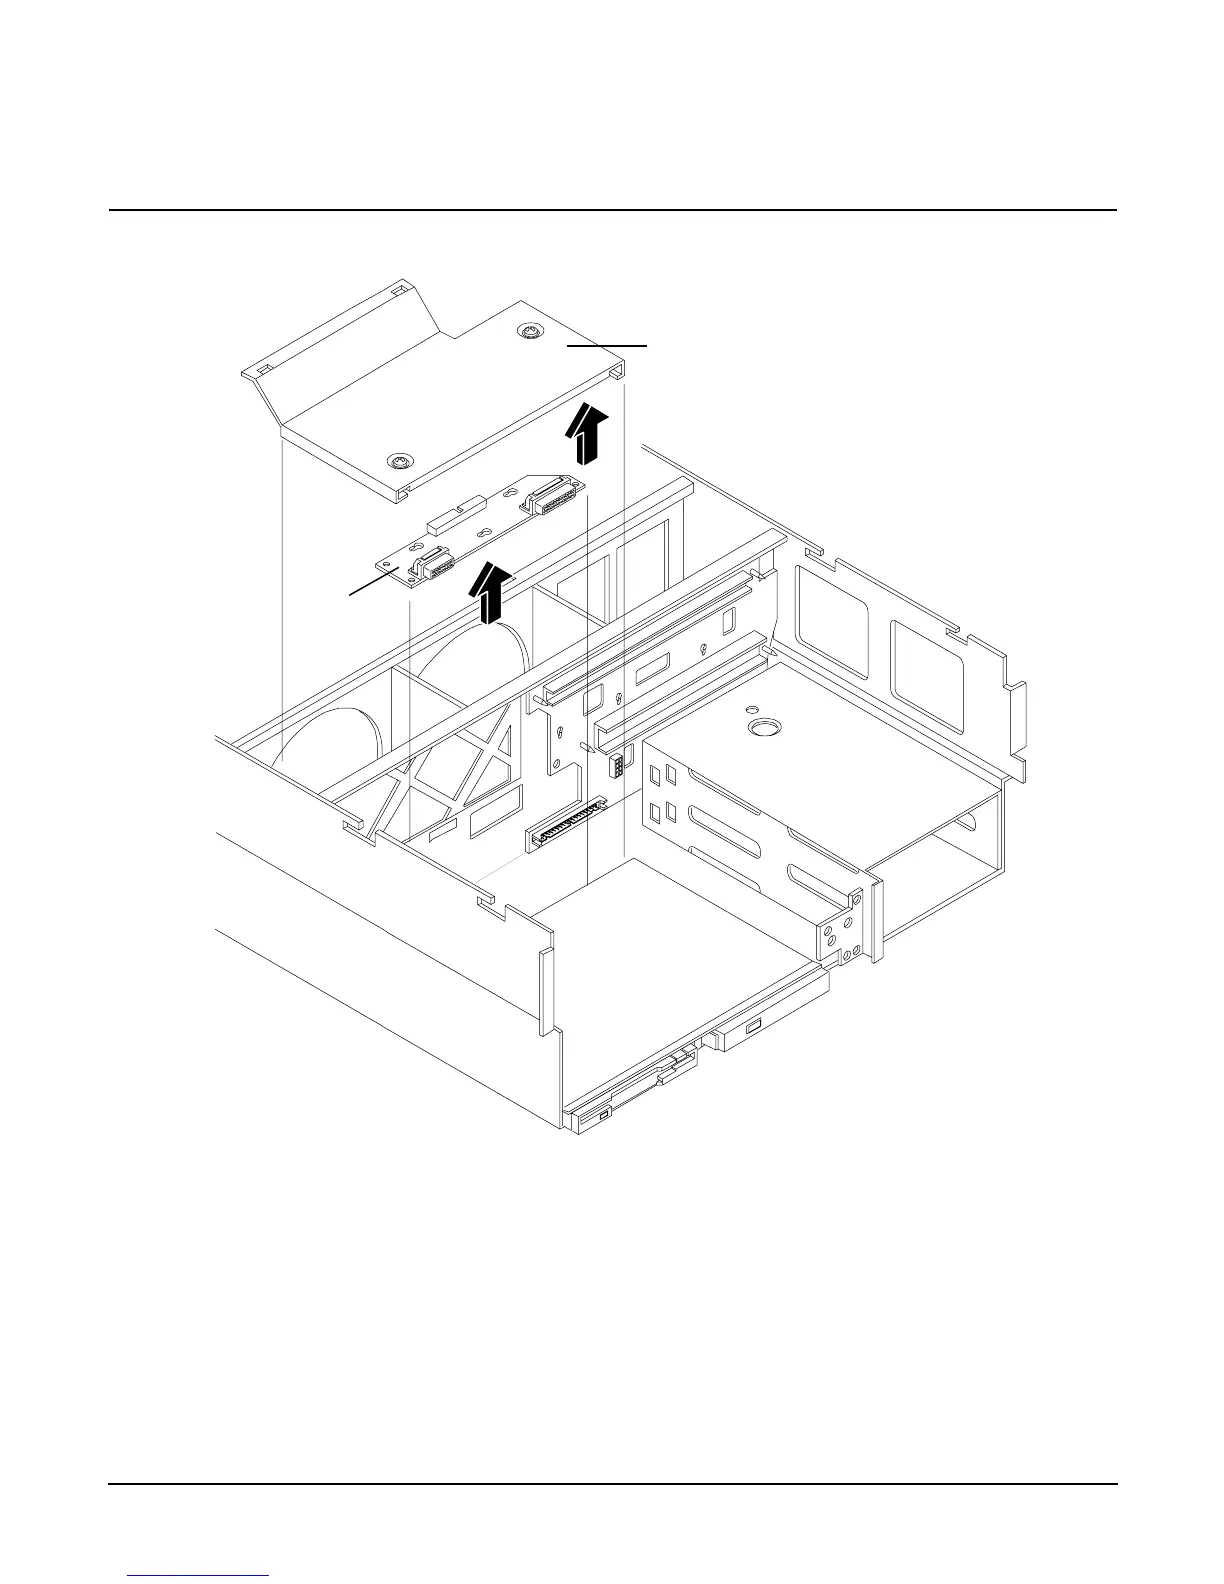
Figure 7-35 DVD I/O Board Removal and Replacement
Removing a DVD I/O Board
To remove a DVD I/O board, perform the following steps:
Step 1. If rack mounted, slide the HP Server out from the rack until it stops. See “Accessing a Rack Mounted Server” on
page 141.
Step 2. Remove the front bezel. See “Front Bezel” on page 144.
Step 3. Remove the front cover. See “Front and Top Covers” on page 145.
Step 4. Remove the memory extender board. See “Memory Extender Board” on page 151.
Cover
DVD I/O
board