Chapter 4
Installing Additional Components and Configuring
Installing Processors and Memory
42
CAUTION Do not modify the settings of the DIP switches located on the processor extender board. These switches are
for factory use. Failure to observe this caution will result in system failure.
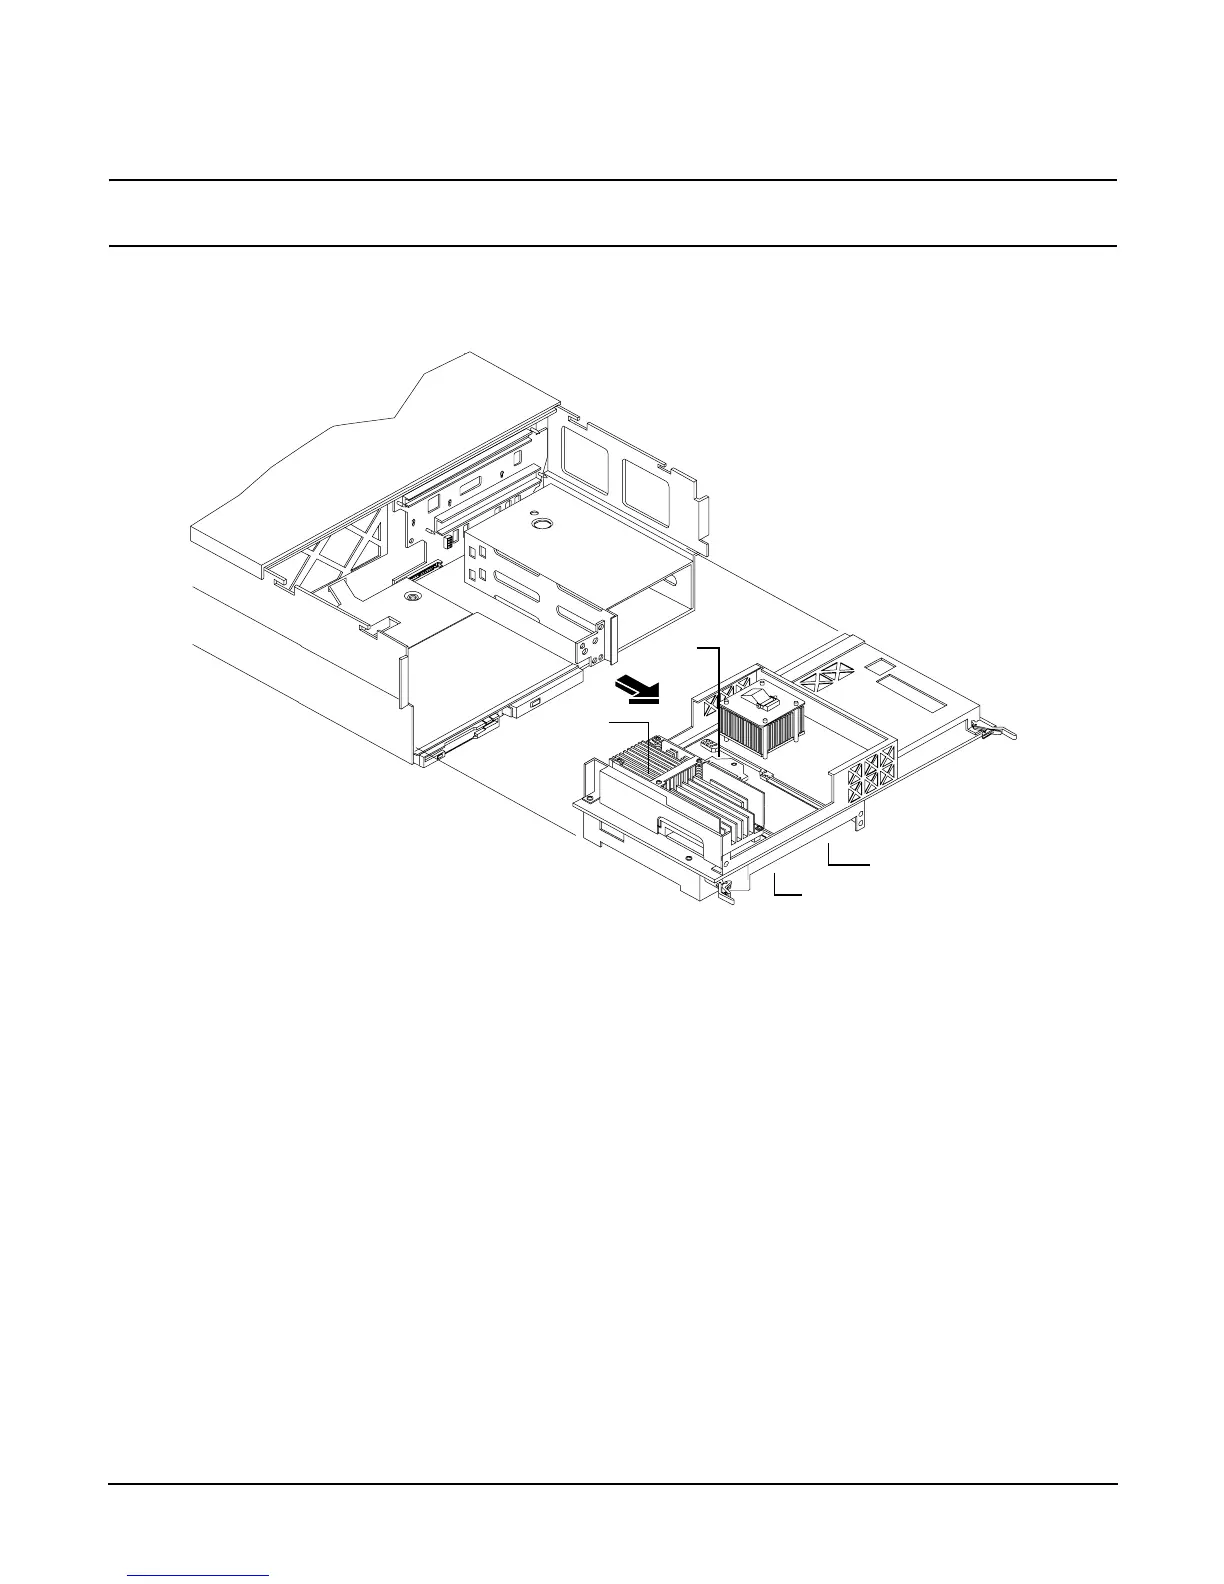
Figure 4-7 Removing the Processor Extender Board
Installing a Processor on the Extender Board
To install a processor on the extender board, perform the following steps:
Prior to installing a processor into your system, read the following instructions carefully and refer to Figure 4-11, Installing
Processor on Extender Board Example, for a complete understanding of this process.
Step 1. If rack mounted, slide the HP Server out from the rack until it stops. See “Accessing a Rack Mounted Server” on
page 141.
Step 2. Remove the front bezel. See “Front Bezel” on page 144.
Step 3. Remove the front cover. See “Removing the Front Cover” on page 145.
Step 4. Press the latch on each extraction lever located on each side of the processor extender board.
Step 5. Pull out on the extraction levers to unplug the processor extender board from the socket located on the midplane
riser board and pull the extender board straight out, Figure 4-8.
CPU 1
CPU 0
CPU 3 (under)
CPU 2 (under)