Chapter 4
Installing Additional Components and Configuring
Installing Processors and Memory
44
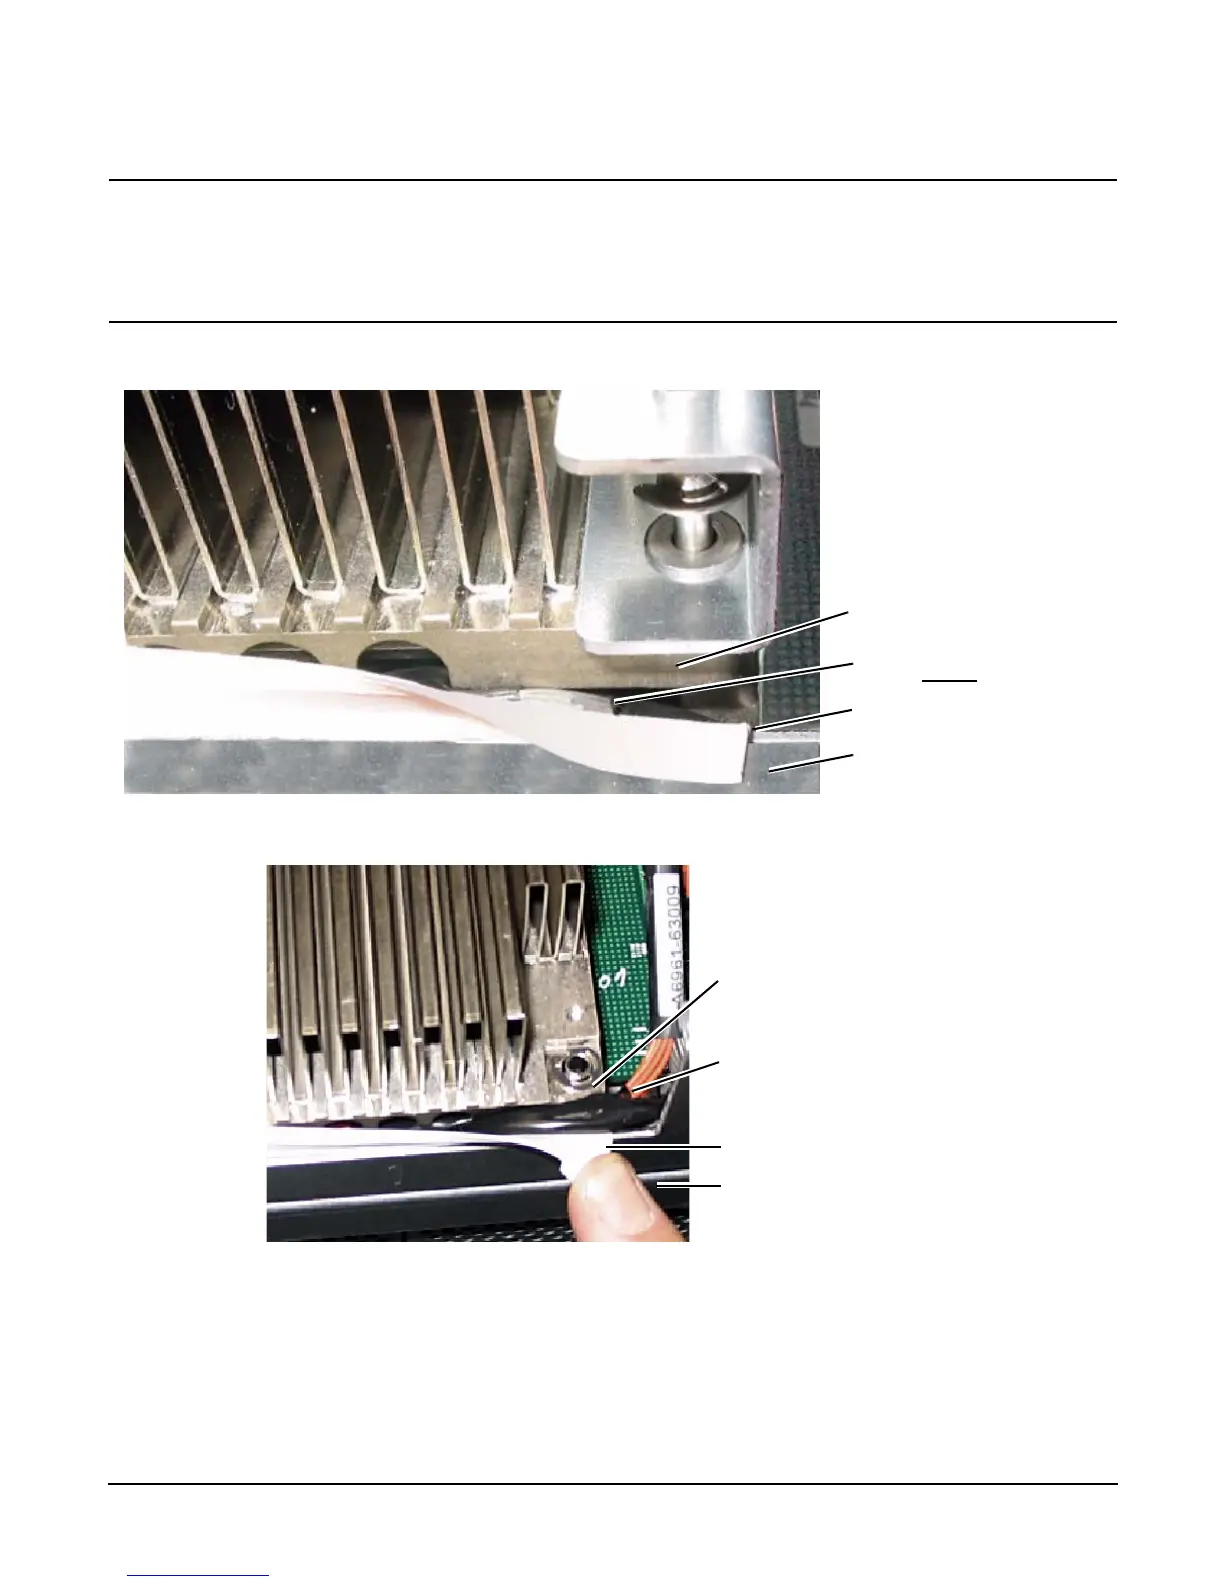
CAUTION Before locking the processor assembly into its socket, ensure that the power cable is not pinched
between the heatsink and sheetmetal frame of the extender board. Also, ensure that the two power
supply cable ends attached to the CPU assembly do not come unplugged from their sockets when
you move the cable into place under the heatsink. See Figure 4-9, “Processor Cable Placed
Correctly,” and Figure 4-10, “Processor Cable Placed Incorrectly.”
Figure 4-9 Processor Cable Placed Correctly
Figure 4-10 Processor Cable Placed Incorrectly
Step 9. Lock the assembly to the socket by rotating the cam on the socket 180 degrees clockwise, using a 2.5 mm driver
(Allen wrench).
Heatsink
Cable is placed correctly
and is under
the heatsink
Protective plastic sleeve
Sheetmetal frame
Heatsink
Cable is placed
incorrectly and is
pinched between the
heatsink and the
extender board frame
Protective plastic sleeve
Sheetmetal frame