09/01/13www.HandiQuilter.com Installaon | 3.25
7. If necessary, use the manual engagement/
disengagement tool to align the white gear with the
Flexirack. Insert the end of the tool into the hole at
the front of the EZ Carriage.
8. Carefully li the quilng machine and place it on the carriage so the wheels engage the white carriage
tracks, making sure not to set the wheels on top of the stch regulator cable (this is easier to do with
two people – one at each end of the quilng machine). The stch regulator cable should be laying
across the carriage in such a manner that it ends up between the front and rear wheels of the quilng
machine when it is placed on the carriage.
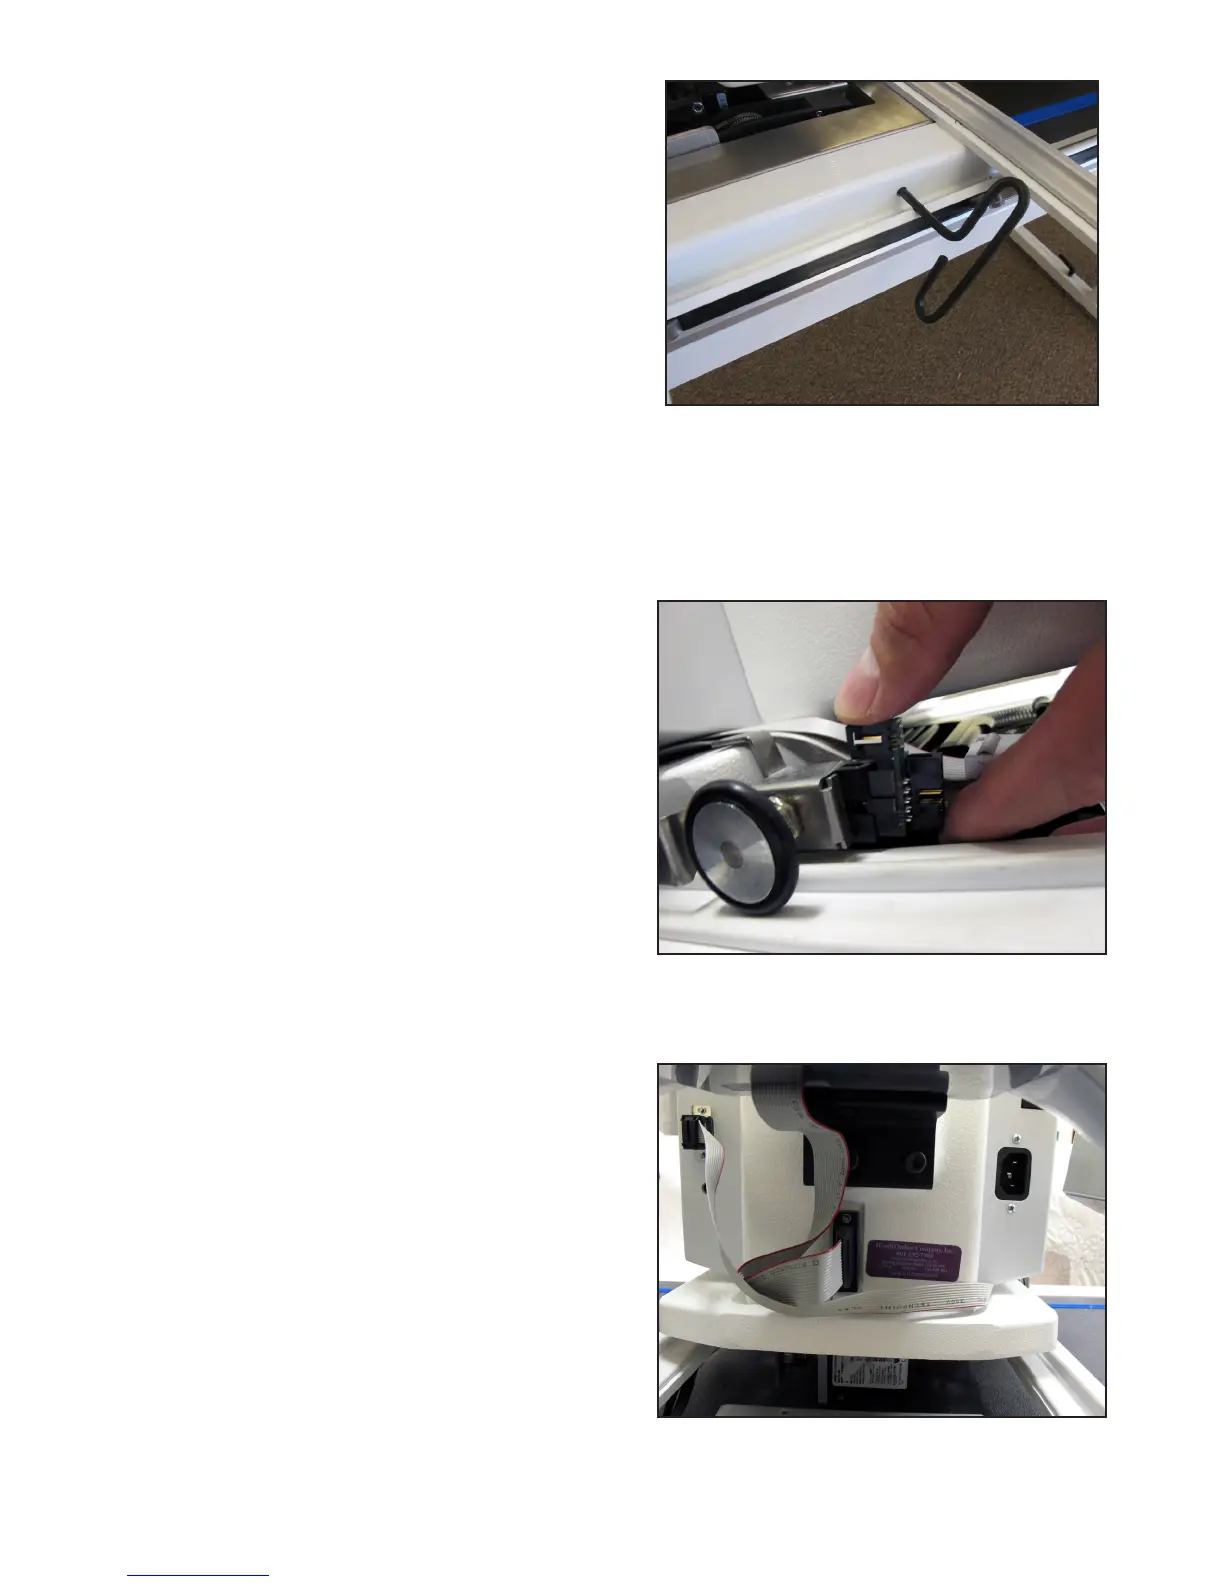
9. For HQ Sixteen only: Plug the Stch Regulator
Adapter Board (see Parts List, item T) into the Y-axis
stch regulator encoder.
10. Plug the middle connector on the gray stch regulator cable into the Y-axis stch regulator encoder
(the stitch regulator encoder mounted to the rear machine wheel).
11. To prevent the stch regulator cable from dragging
across the motor assemblies during operaon, route
the nal secon of the stch regulator cable around
the back of the quilng machine and plug the 9-pin
D-sub connector into the C-Pod.