e90apc12
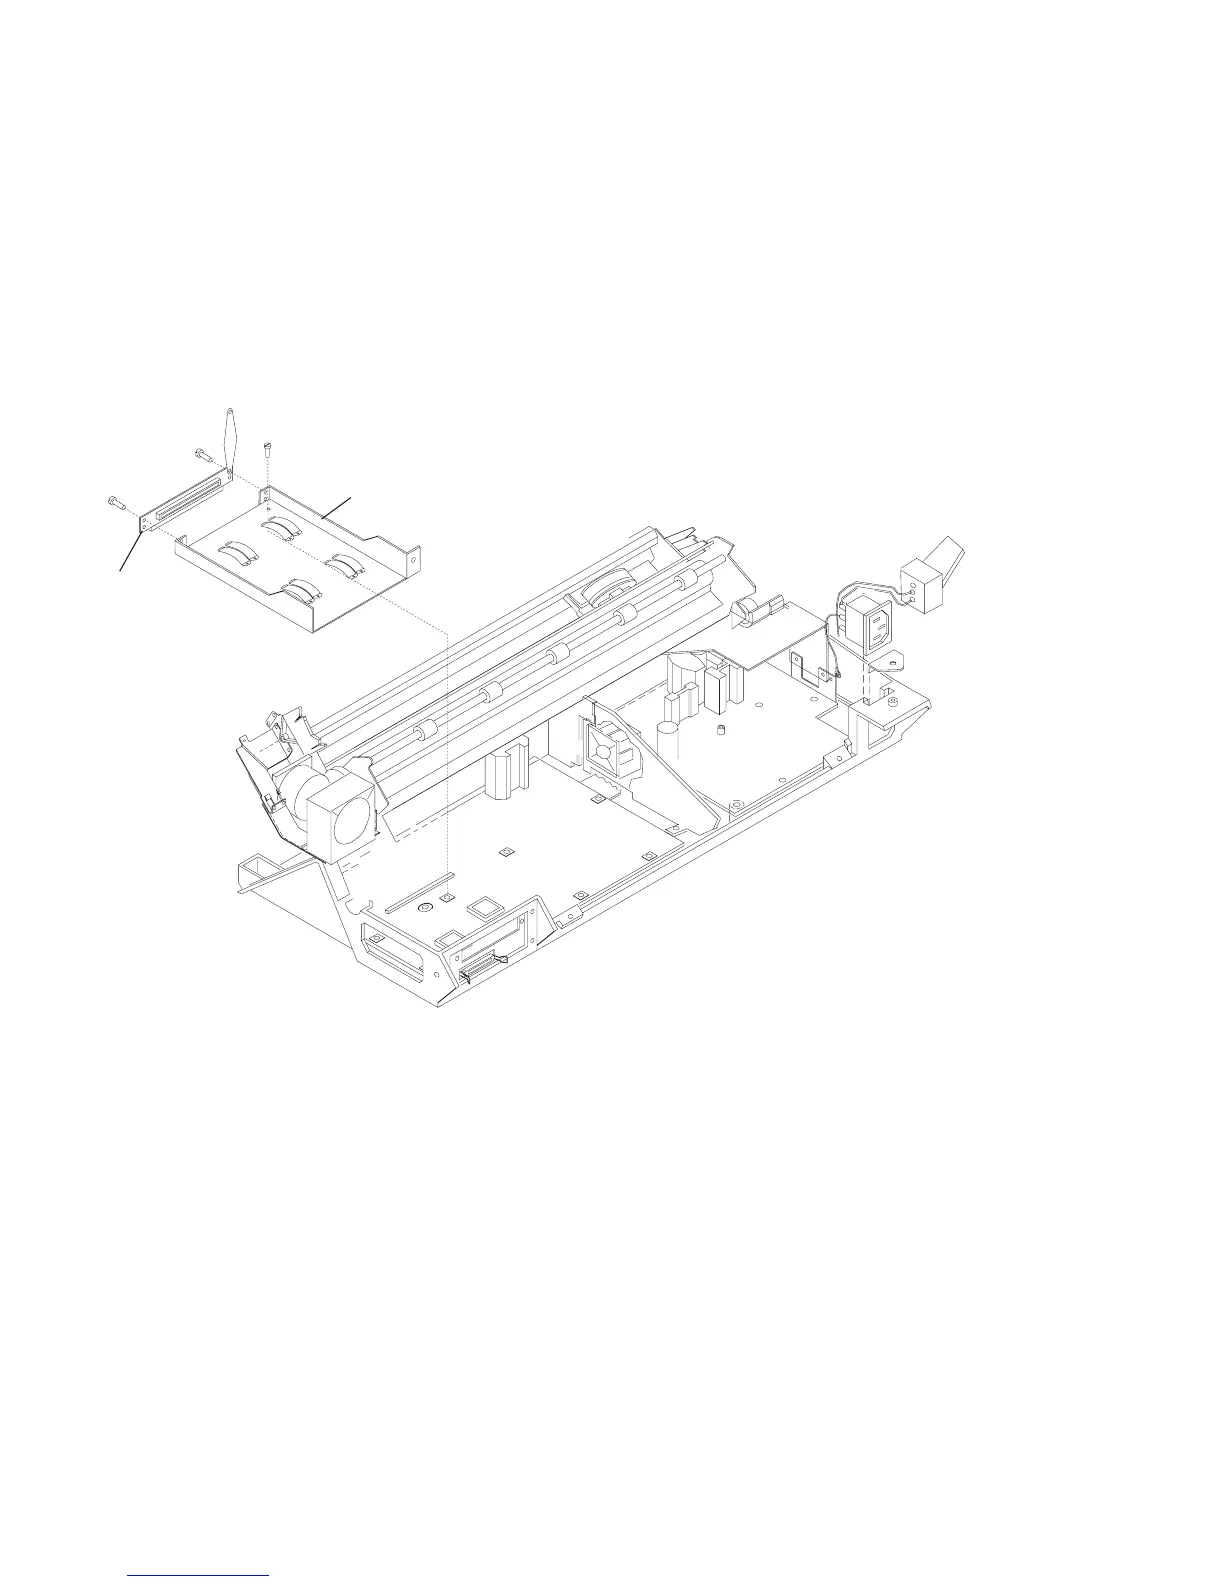
Interposer
Connector
Attachment card
Guide Assembly
5. Grasp the rear of the ACGA near the right support post and gently lift up until the Assembly detaches from the
Main Board. The ACGA is in a tight spot, so when it comes free it will be necessary to move the ACGA
carefully to the right in order to completely remove it from the printer.
6. If you wish to remove the Interposer Card, remove the 2 M3x4 screws securing the Interposer Card and the
ground strap to the ACGA.
Chapter 5. Removals and Adjustments 365