5. Align the power cord with the power connector on the power supply and the bracket with the
power-supply handle.
6. Push the power cord into the power connector on the power supply.
7. Carefully push the bracket against the power-supply handle to force the spring clip (1) over the
leading edge of the handle.
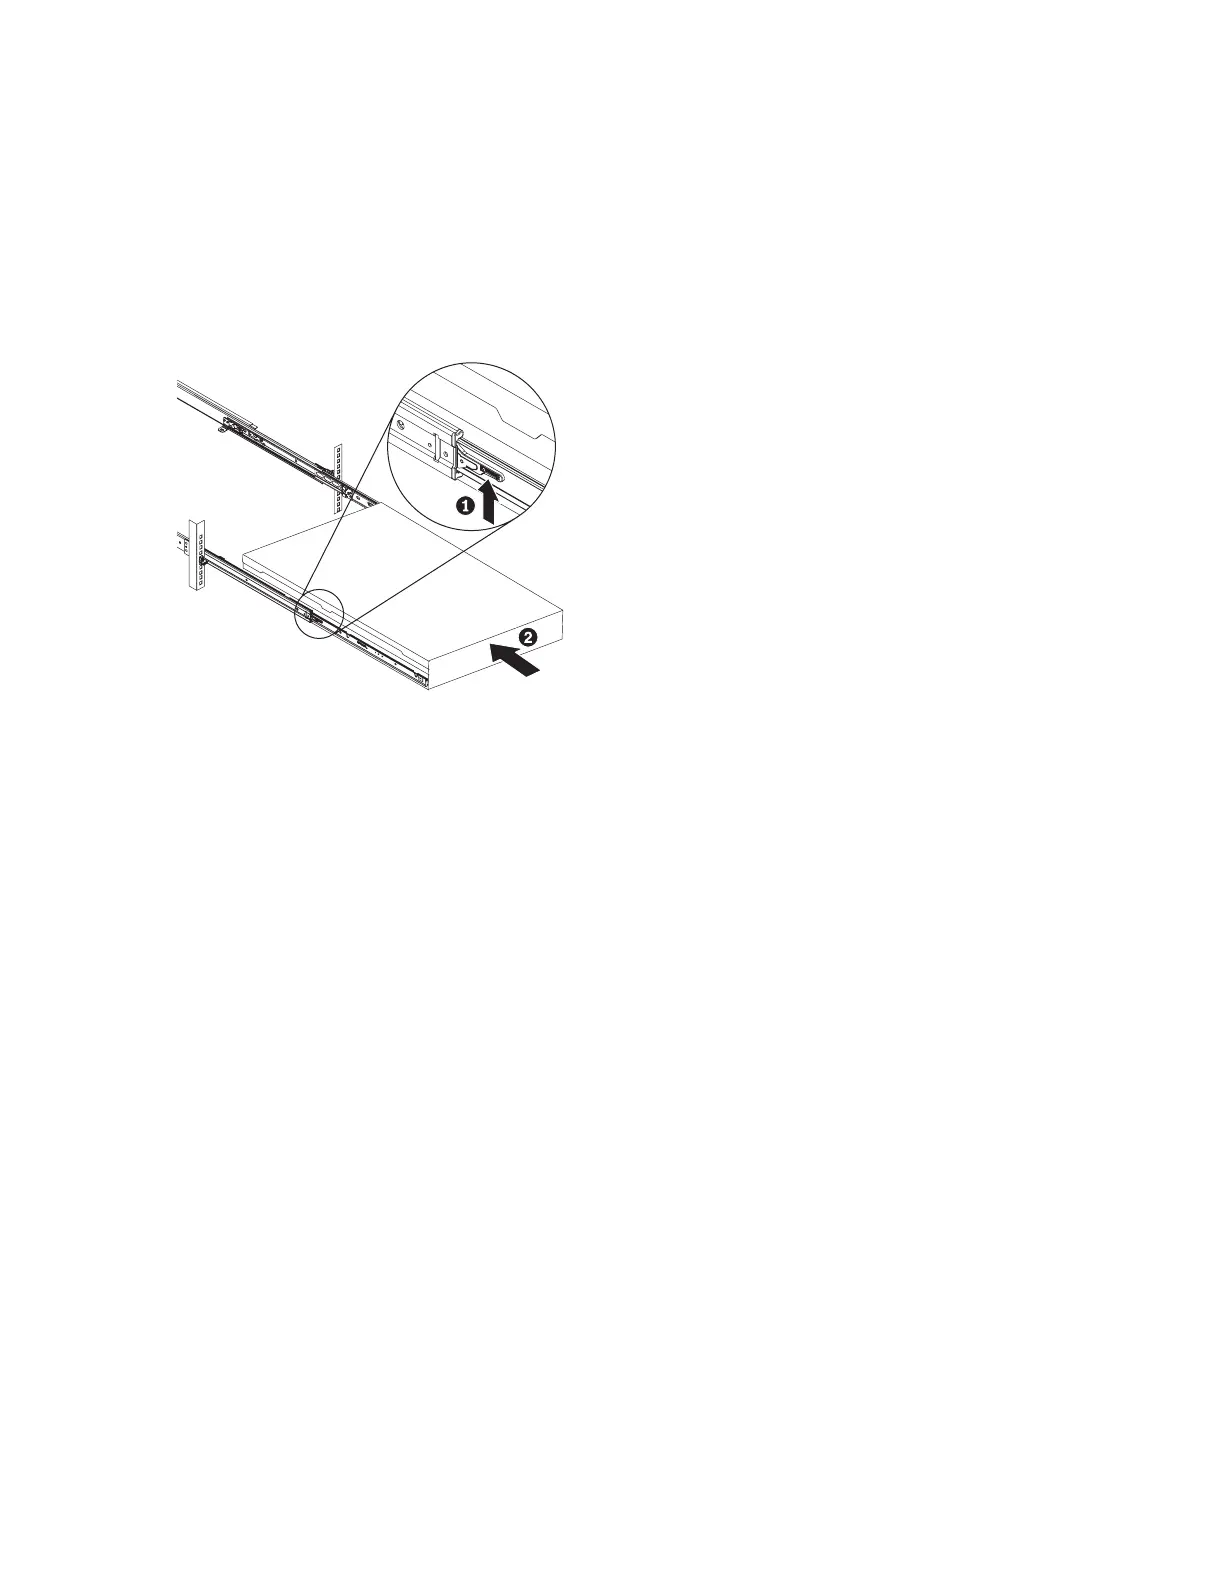
8. Lift the locking levers (1 in Figure 25) on the slide rails and push the server 2 all the way into the
rack until it clicks into place.
9. Turn on the node.
Replacing the SAN Volume Controller 2145-8A4 cable retention bracket
The cable-retention bracket attaches to the back of the SAN Volume Controller 2145-8A4 node. It is
connected to the back of the node with the screw that already holds the rear plate of the power supply in
place.
To attach the bracket, perform the following steps:
1. Insert the power cable in the node.
2. Unscrew the retaining screw 1 that is located next to the power cable socket three full turns, but do
not fully remove the screw, as shown in Figure 26 on page 42.
svc_bb1ka055
Figure 25. Raising the SAN Volume Controller 2145-CF8 or 2145-CG8 locking levers of the slide rails of the rack
Chapter 2. Removing and replacing parts 41