From the front of the rack, line up the two pins on the rear of the slide rail in the selected U on the
rear of the rack. Push the rails so that the pins go into the holes and slide the rails into the rack to
lock the rear of the slide rails into the rack.
4. Prepare the front end of the slide rails, as shown in Figure 50.
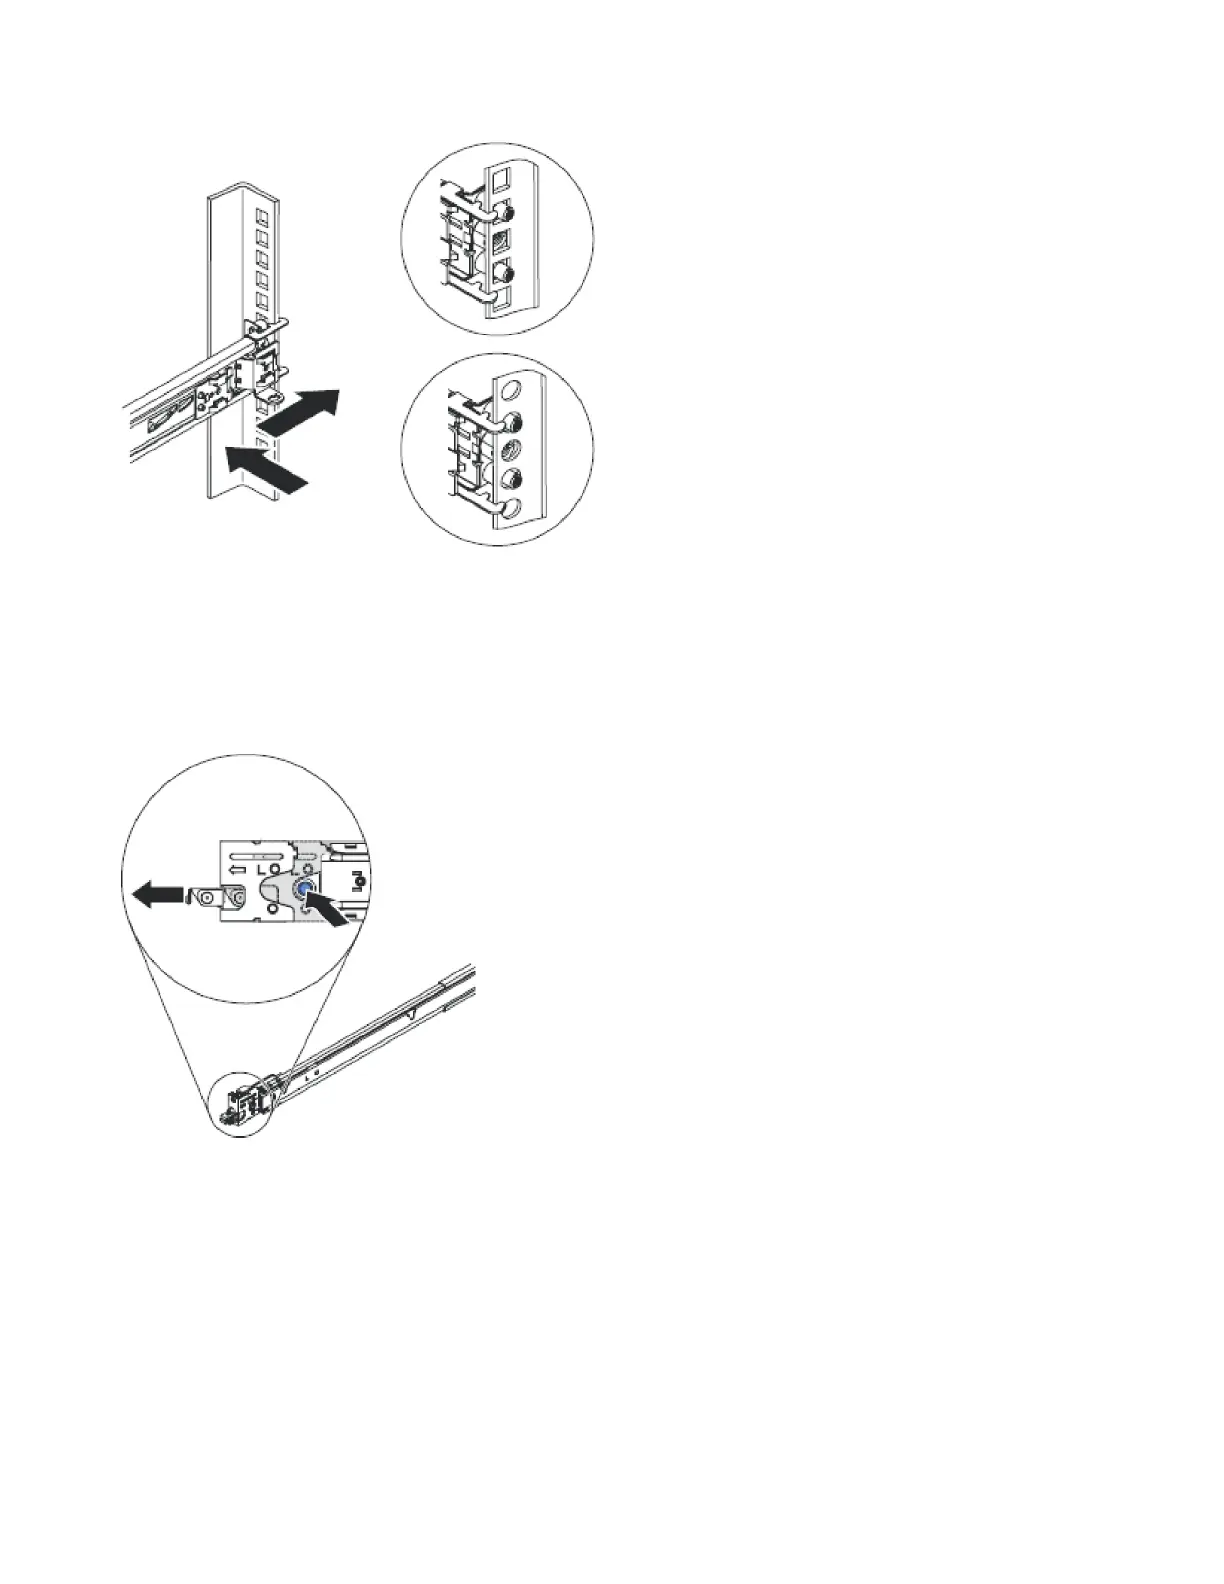
Push the blue button to allow the latch to slide forward. Then pull the slide rail forward and pull the
latch on the front of the rail in the U on the front of the rack. Adjust the length of the rail.
5. Install the front end of the slide rails, as shown in Figure 51 on page 69.
Rear of rack
Figure 49. Installing the rear end of the slide rails
Figure 50. Preparing the front end of the slide rails
68 IBM SAN Volume Controller Hardware Maintenance Guide

 Loading...


