Affinity
2.0
Additional Information Page 77
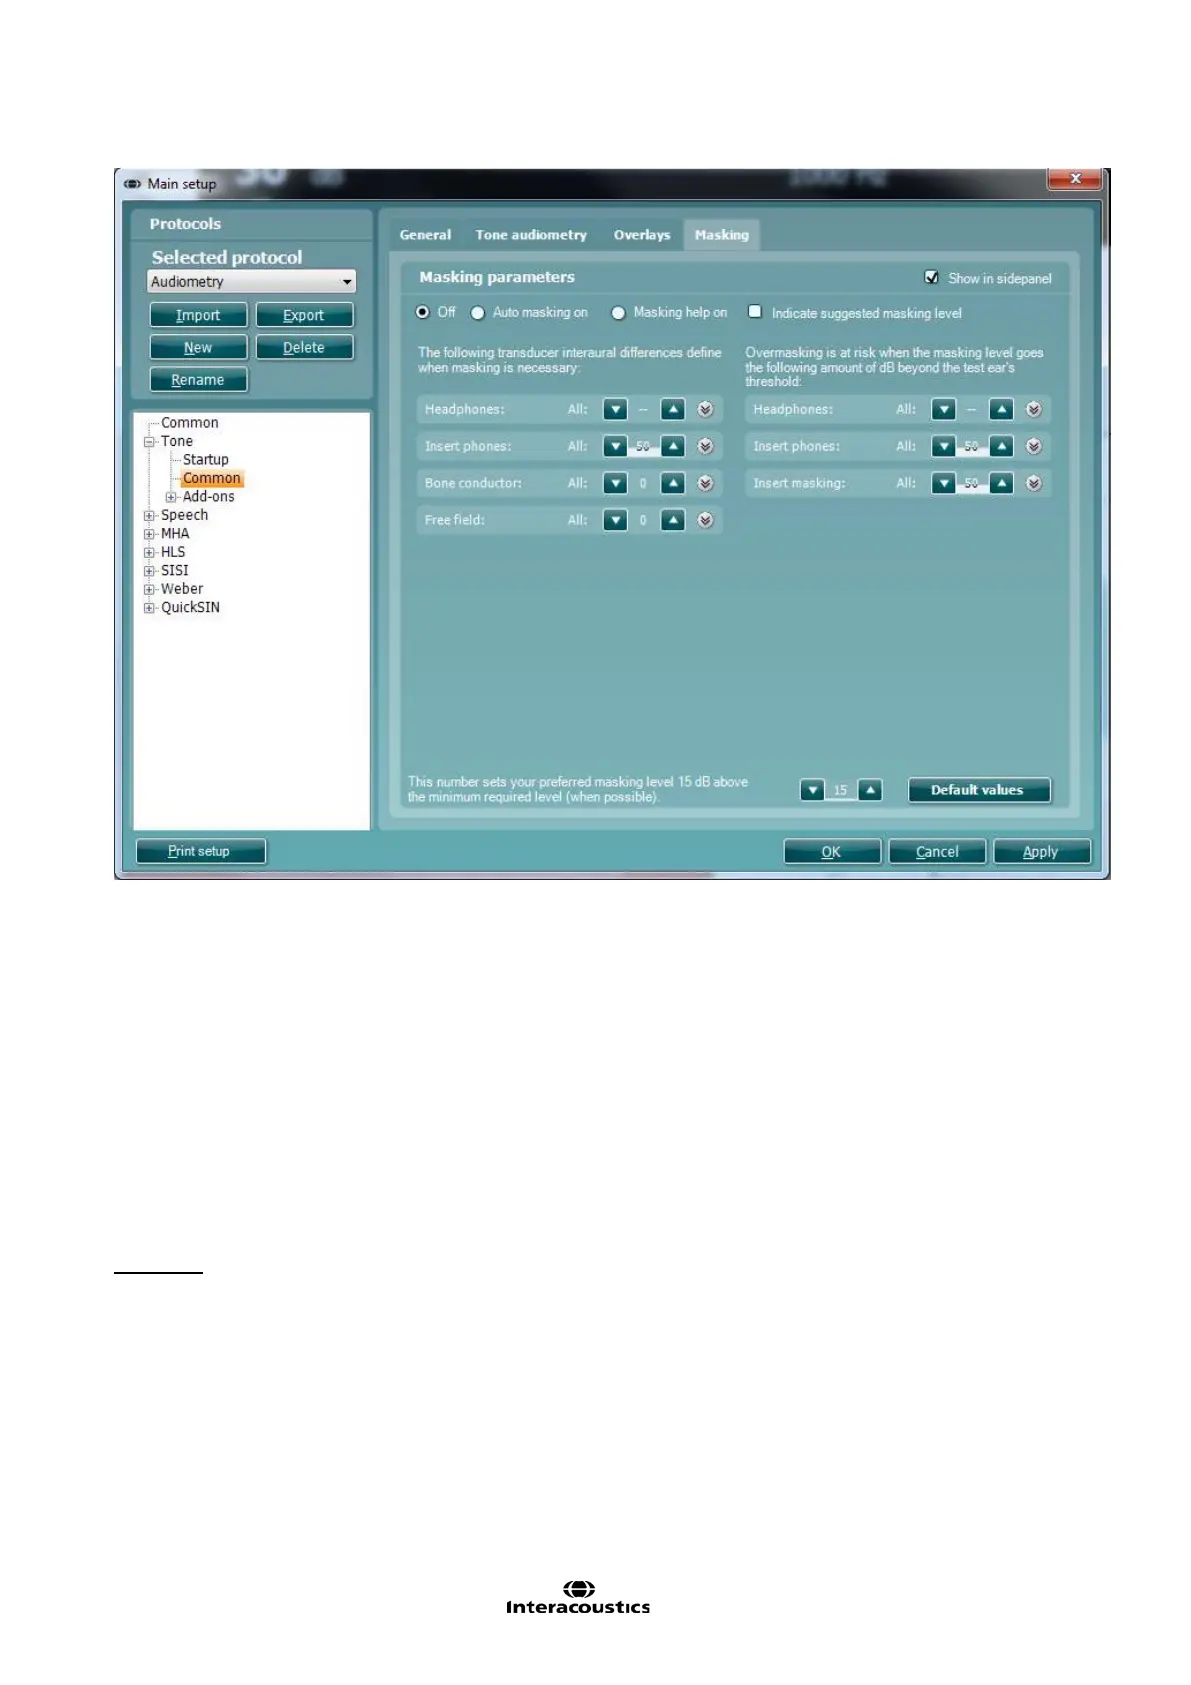
27) Masking Tab: In this section, the tester can decide if Automasking or Masking Help should be turned
on. The user can also change the interaural differences as well as the default values for over masking.
a. Auto masking on: masking will start automatically where required
b. Masking Help on: a light in channel 2 will indicate if masking is required and whether there is
undermasking or overmasking occuring
c. Indicate suggested masking level: will suggest the masking level that should be used
In this section the user can configure their Automasking feature by adjusting the interaural difference
levels depending on the transducer selected. They can also adjust the level at which the transducer will
be overmasking.
For more details, please refer to the Automasking and Masking Help Quick Guide in Appendix 4
Keyboard:
To enter the Keyboard options for tone testing unfold the Tone options and click Keyboard. This is used set
up macros for the dedicated Affinity
2.0
/Equinox
2.0
audiometry keyboard shown below (if this is used).
The screen display (shown below) allows you to set up most of the keyboard buttons according to individual
preferences. Multiple functions can be added to a single button and if done so all commands are executed
when the keyboard button is pressed. Some functions have additional options after they are added to a
keyboard button; for example toggling through the available outputs.
Note: The keyboard functions have to be set up for each test individually.