Executing the inspection
Main inspection view
75
Executing the inspection
Main inspection view
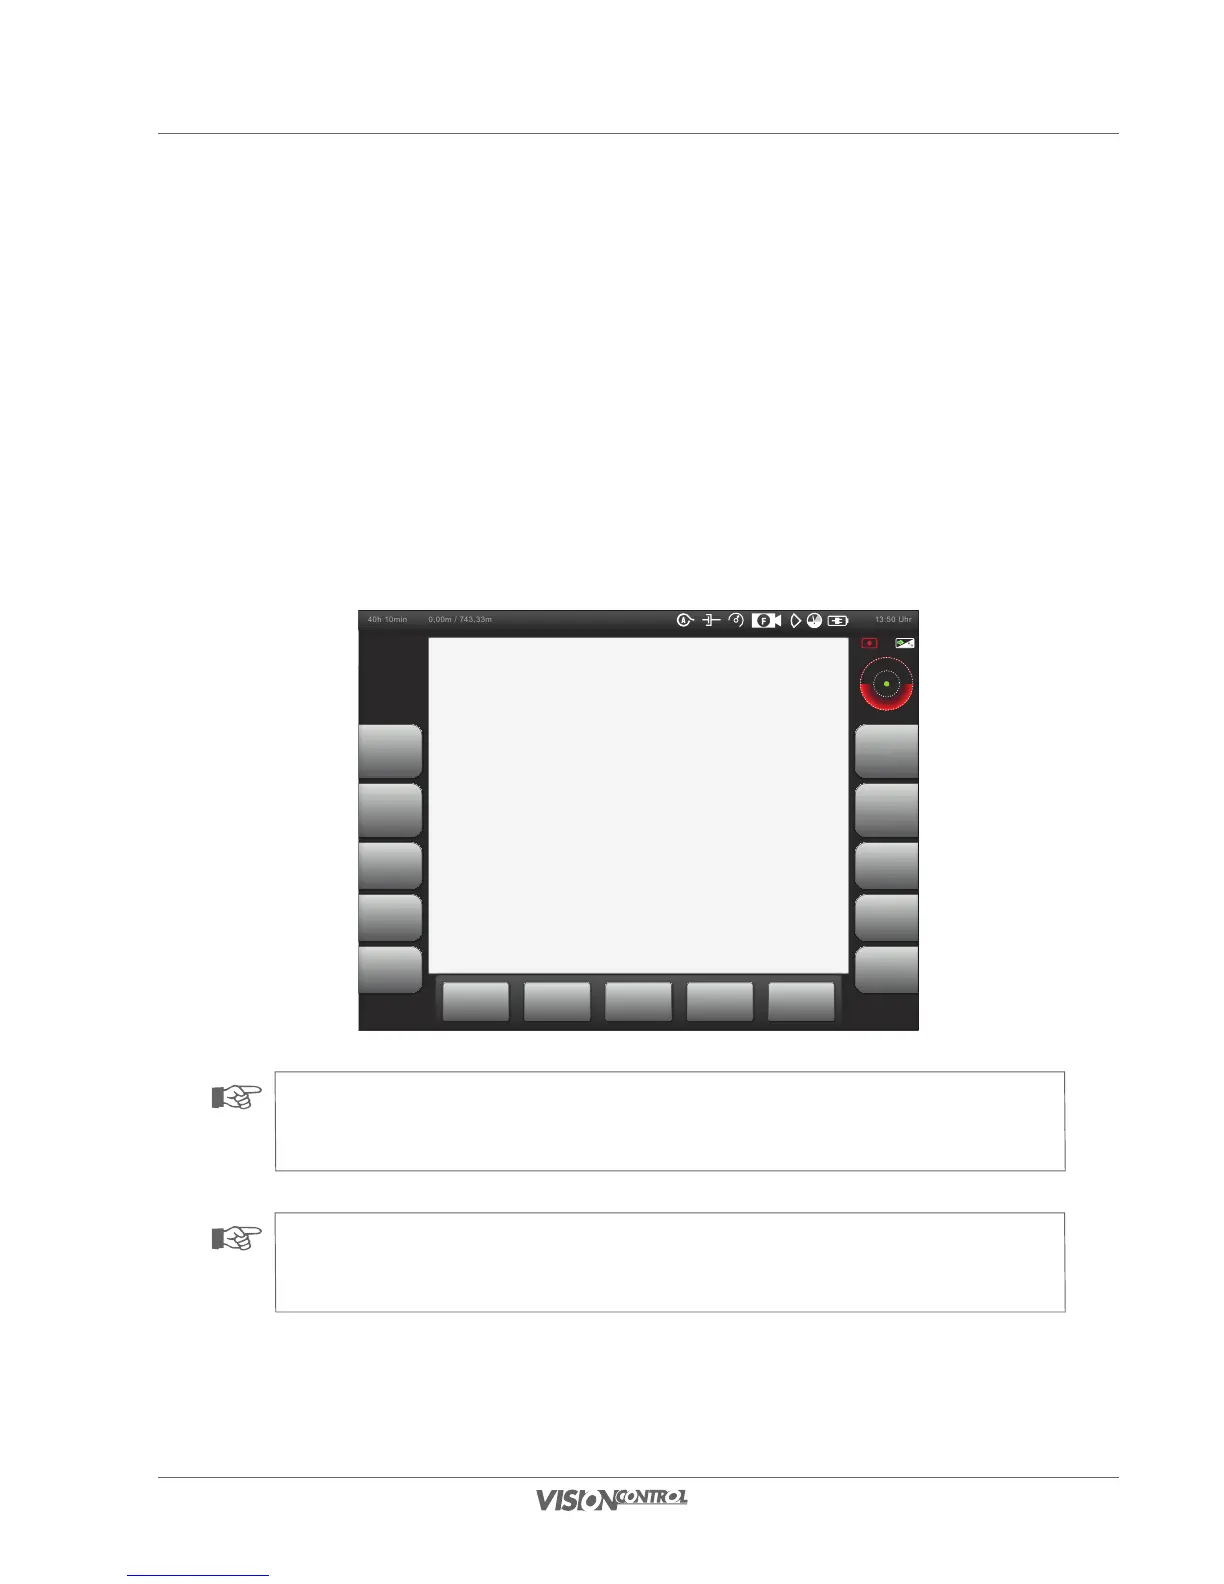
After you have configured the settings on your VISIONCONTROL control panel you can start with the inspection. You see the main inspection
view, in which the touch screen buttons (L1 – L5 & R1 – R5) are located on the left side and on the right side of the touch screen. The functions
are always referenced with the buttons L1 – L5 and R1 – R5, and thus can be triggered via the touch screen as well as via the hardware buttons
on the VISIONCONTROL control panel. In the lower area there are additional touch screen function buttons that change depending on the
selected task menu. Status messages are displayed in the upper and upper right area of the touch screen. The current video image of the inspection
camera with the overlaid inspection texts is displayed in the middle of the touch screen.
40h 10min 13:50 Uhr0,00m / 743,33m
NOTE!
The main inspection view can be changed over to full-screen mode at any time by activating the R5 button. See Seite 27 for
more information in this regard.
NOTE!
The joystick on the VISIONCONTROL control panel is only assigned to camera control if you are in the main inspection view. In
system dialogs the joystick has a navigation function.