3─68
3
3.6 DISPLAY OWN SHIP’S TRACK
y
y y
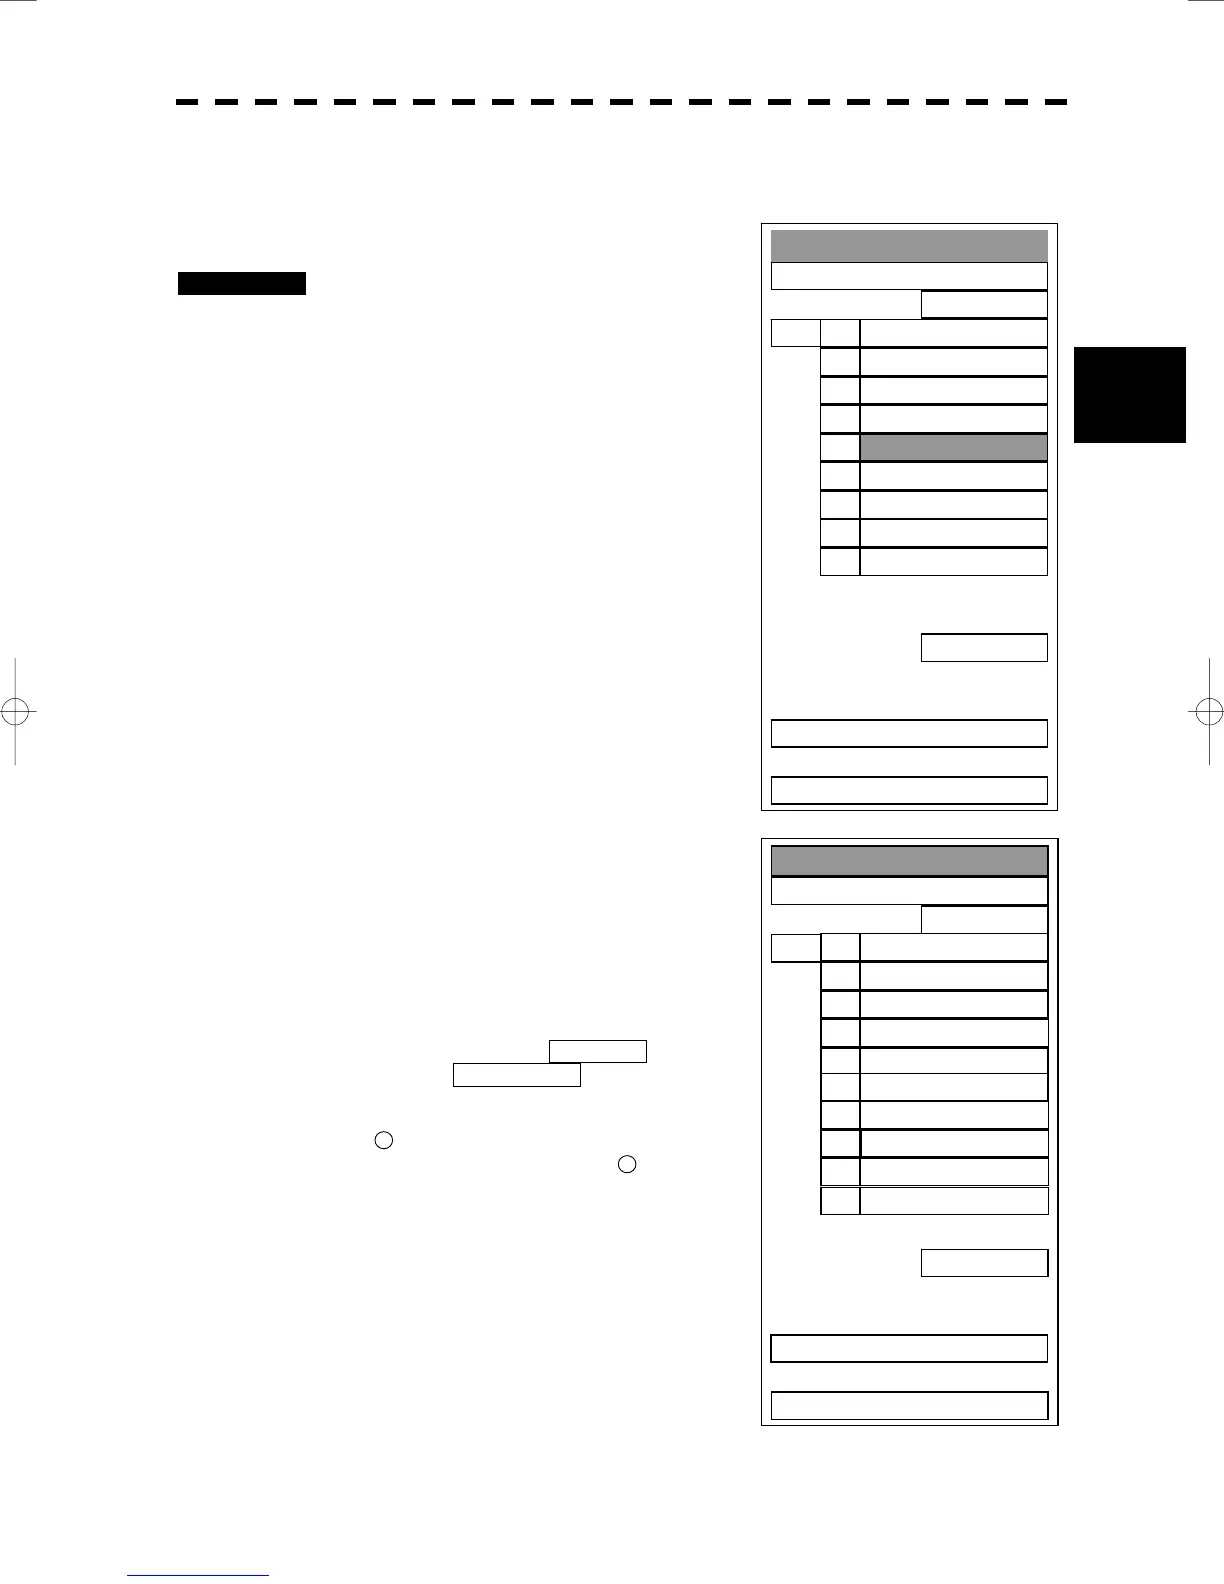
Own Track Setting
1. Own Track Interval
1 min
2. DISP Own TRK Colour
ALL
3. CLR Own TRK Colour
WHITE
4. Own TRK Memory
OFF
5. TRACK
6. T
7. Num/Vector Display
OFF
9. NEXT >
0. EXIT
3 sec1.
5 sec2.
10 sec3.
30 sec4.
1 min5.
3 min6.
5 min7.
10 min
8.
Next Page9.
Own Track Setting
1. Own Track Interval
1 min
2. DISP Own TRK Colour
ALL
3. CLR Own TRK Colour
WHITE
4. Own TRK Memory
OFF
5. T
6. T
7. Num/Vector Display
OFF
9. NEXT >
0. EXIT
30 min1.
60 min2.
1 nm3.
3 nm4.
5 nm5.
10 nm6.
0.1 nm
7.
0.2 nm
8.
Next Page
9.
Previous Page0.
3.6.2 Set Own Ship’s Track Data Storage Interval (Own Track Interval)
There are 10 preset time intervals and 4 preset range intervals that can be selected for storing own ship’s track
data.
Procedures 1 Press [RADAR MENU] key twice.
Press [9] key.
Press [1] key.
The Own Track Setting Menu will appear.
2 Press [1] key.
The Own Track Interval Setting Menu will
appear.
3 Select the storage interval number to
be set, pressing the numeric key.
The selected storage interval will be set.
A preset time interval or preset distance interval can be
selected as the storage interval.
Storage intervals that can be selected
Time: 3 sec, 5 sec, 10 sec, 30 sec, 1 min, 3 min, 5 min, 10
min, 30 min, and 60 min
Range: 1 nm, 3 nm, 5 nm, and 10 nm
The pull-down menu consists of 2 pages.
To switch between the pages, select Next Page pressing
the numeric key [9], or Previous Page pressing the
numeric key [0].
* Pressing button
41
on the radar display on page 2-7, you can
switch track data storage intervals, and pressing
42
button on the
radar display on page 2-7, you can switch of a memory unit.
Setting the button to OFF cancels the storing of data.

 Loading...