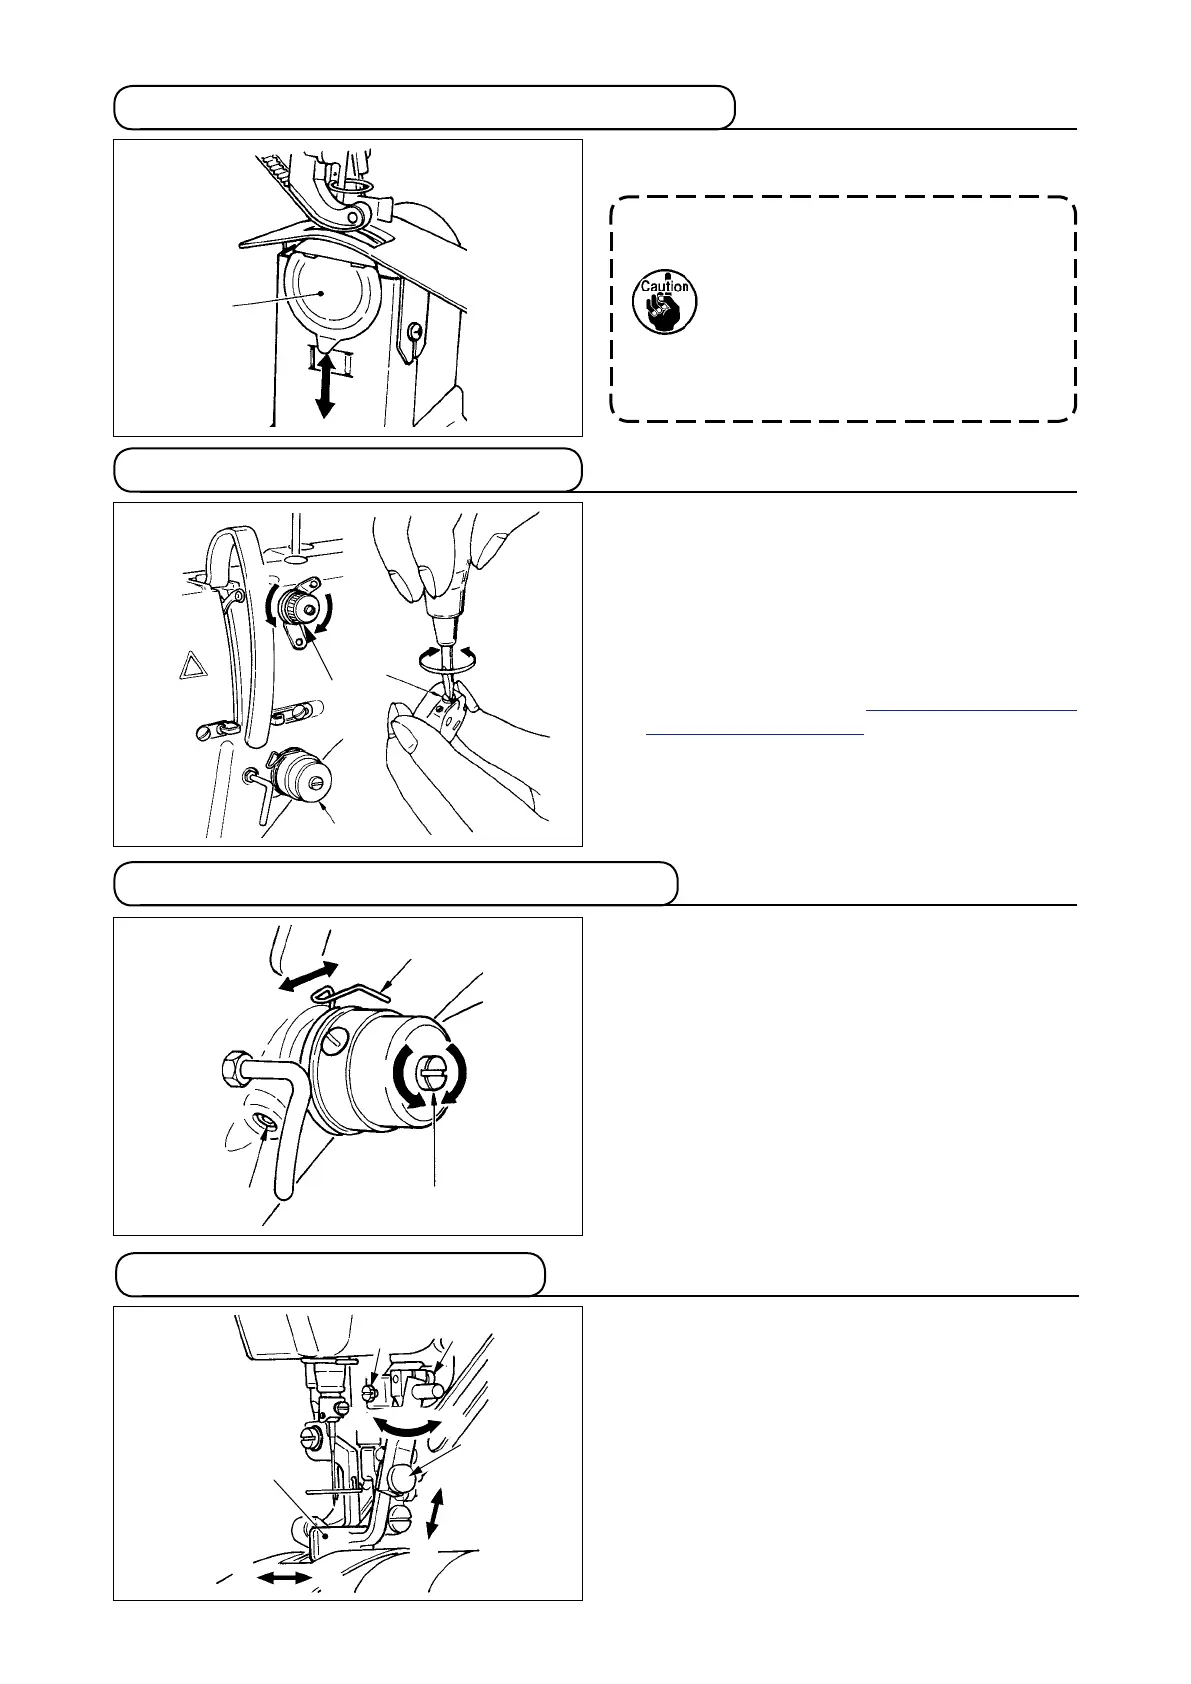
4-5 Attaching and removing the bobbin case
For attaching and removing the bobbin case, slide
cover
1
up or down to perform it.
1. When attaching the bobbin case,
insert it until it will go no further. If
it is insufficient, the bobbin case
may fall off during sewing.
2. Be sure to close the cover when
starting the sewing machine.
There is a danger of rolling cloth
in the bobbin case or the like.
4-6 Adjusting the thread tension
[Adjusting the needle thread tension]
1)
Turn clockwise (direction
A
) thread tension nut No. 1
1
and the length of thread remaining at the needle
tip after thread trimming will be shortened.
2) Turn it counterclockwise (direction
B
) and the
length of thread will be lengthened.
3) Thread tension of thread tension No. 2
2
is set
with the operation panel.
For the details, refer to
"5-6 (3) Changing the
needle thread tension"
.
[Adjusting the bobbin thread tension]
1)
Turn clockwise (direction
C
) thread tension screw
3
and the bobbin thread tension is increased.
2) Turn it counterclockwise (direction
D
) and the
tension is decreased.
4-7 Adjusting the thread take-up spring
1
B
A
3
C
D
1
2
1
2
3
[ Changing the stroke amount of thread take-up spring
1
]
1) Loosen setscrew
2
in the thread tension base.
2) Turn clockwise (direction
A
) the whole thread
tension and the stroke amount is increased.
3) Turn it counterclockwise (direction
B
) and the
stroke amount is decreased.
[ When changing the pressure of thread take-up spring
1
]
1)
Put a thin screwdriver in the slot of thread tension rod
3
and turn it with screw
2
tightened.
2) Turn clockwise (direction
C
) the thread tension
rod and the pressure is increased and turn it
counterclockwise (direction
D
) and the pressure
is decreased.
4-8 Adjusting the stitch guide
1) When setscrew
2
is loosened, ne adjustment
A
-
B
direction of stitch guide
1
position can be
performed. After the adjustment, securely tighten
setscrew
2
.
2) When setscrew
3
is loosened, ne adjustment
A
-
B
and
C
-
D
direction of stitch guide
1
position can be performed. After the adjustment,
securely tighten setscrew
3
.
3) When setscrew
4
is loosened, ne adjustment
E
-
F
direction of stitch guide
1
position can be
performed. After the adjustment, securely tighten
setscrew
4
.
1
2
E
A
B
D
C
F
3
4
A
B
C
D