–
170
–
Feed pitch error will be caused unless the
tension is proper.
(1) Replacing the top feed belt
24-1 Replacing procedure of feed belt
Caution : The standard of the time of replacement is one year although it depends on the frequency of use.Replace the
belt with a new one when it is observed that feed force is excessively deteriorated or the like.
Caution : Perform periodical cleaning approximately once a week since dust is collected inside the top feed cover and
the belt rolls the dust resulting in feed trouble or short life of the belt.
■
Belt tension adjusting procedure
(1) Main feed belt :
Move tension adjustment plate L
!2
to the left or
right to adjust the belt.
• The tension is increased in the right-hand
direction (direction A) and decreased in the left
direction.
(2) Auxiliary feed belt :
Move tension adjustment plate S
!3
to the left or
right to adjust the belt.
• When it is opened on both sides (direction B),
the tension is increased, and when it is closed,
the tension is decreased.
(3) Adjusting the belt tension value :
1) Main feed belt :
The belt has to be bent by 3 mm when it is
pressed with a load of 1.3N (130gf).
2) Auxiliary feed belt :
The belt has to be bent by 3 mm when it is
pressed with a load of 0.4N (40gf).
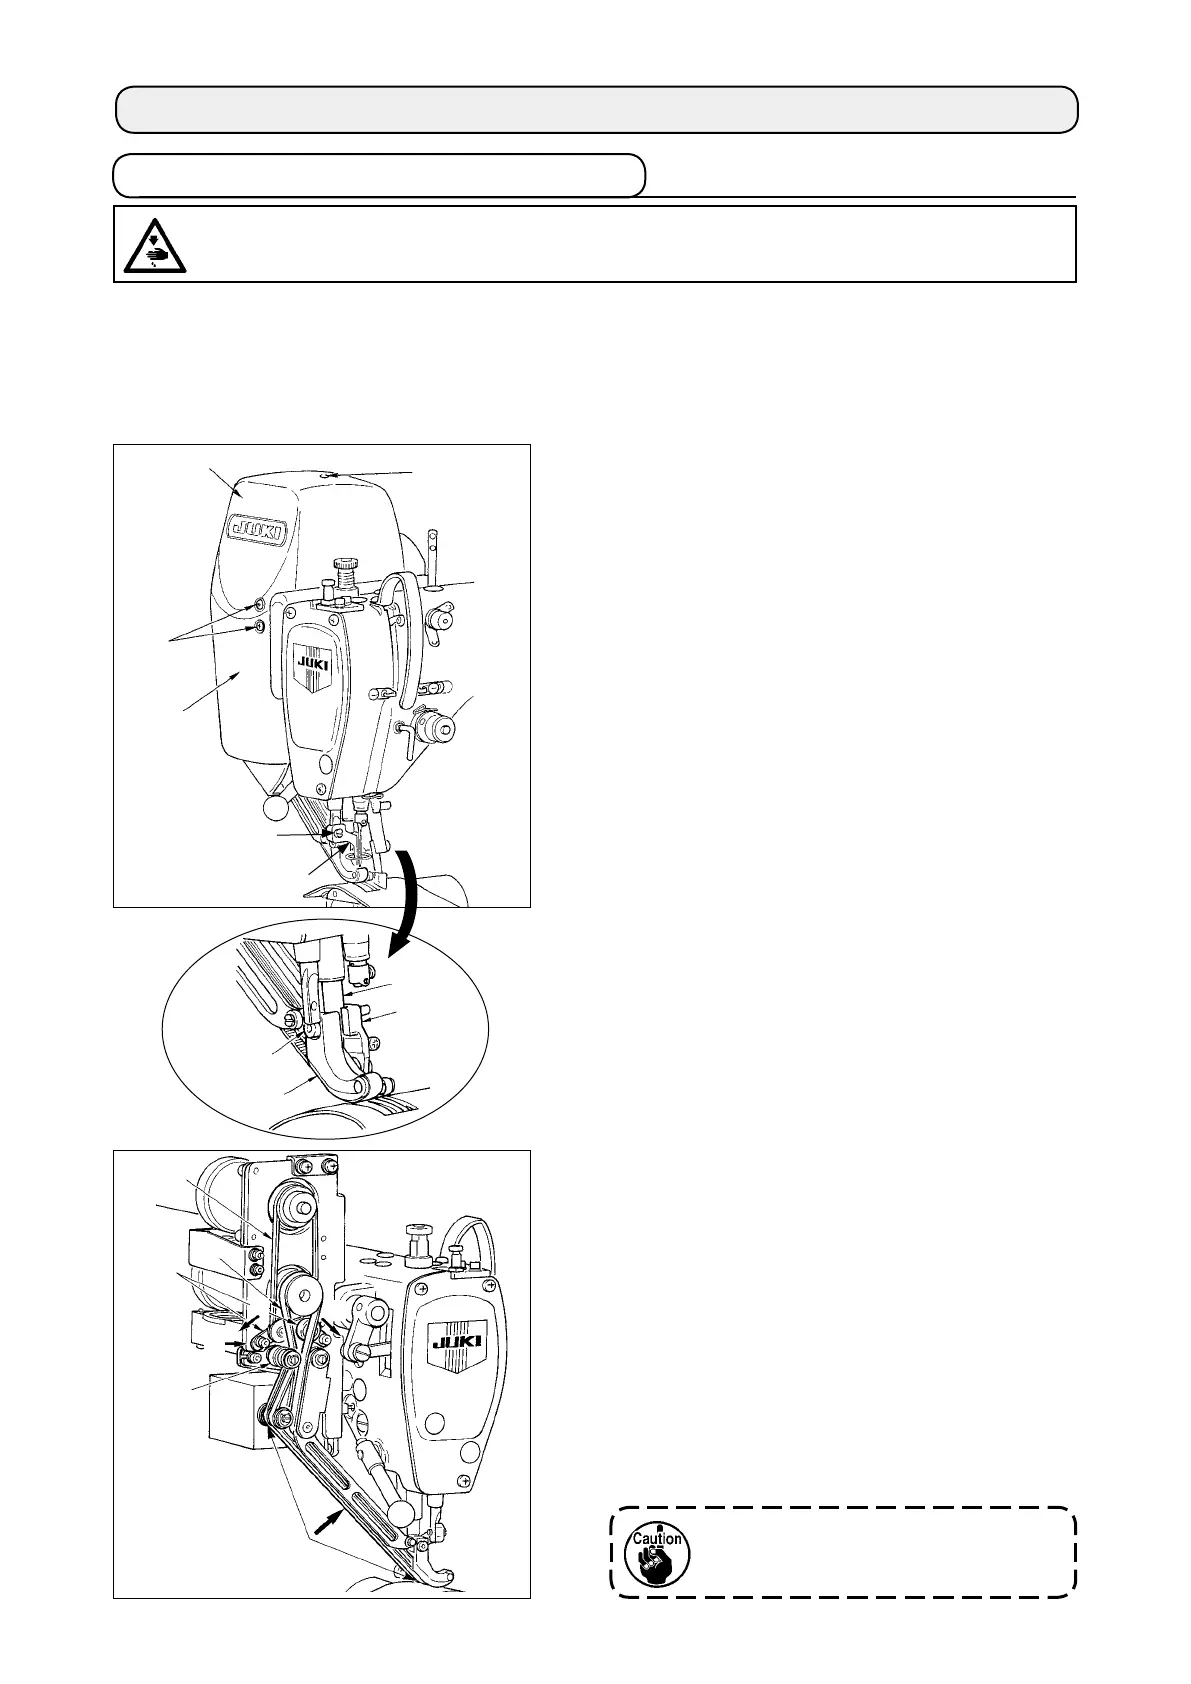
24. MAINTENANCE
1) Remove ten cover setscrews
1
and remove
coverR
2
and cover F
3
.
2) Loosen intermediate presser foot screw
!0
and
remove intermediate presser foot
!1
.
3) Loosen walking foot setscrew
4
and remove
walking foot
5
and auxiliary walking foot
6
.
4) Remove main feed belt
7
and auxiliary feed belt
8
, and replace them with new ones.
5) Put walking foot rod
9
between
5
and
6
, and
x with screw
4
.
6) After adjusting the belt tension, attach cover R
2
and cover F
3
.
WARNING :
Turn OFF the power before starting the work so as to prevent accidents caused by abrupt start of the
sewing machine.
4
5
9
6
1
1
2
Press the center.
8
7
!2
!3
3
A
B
B
!0
!1