–
175
–
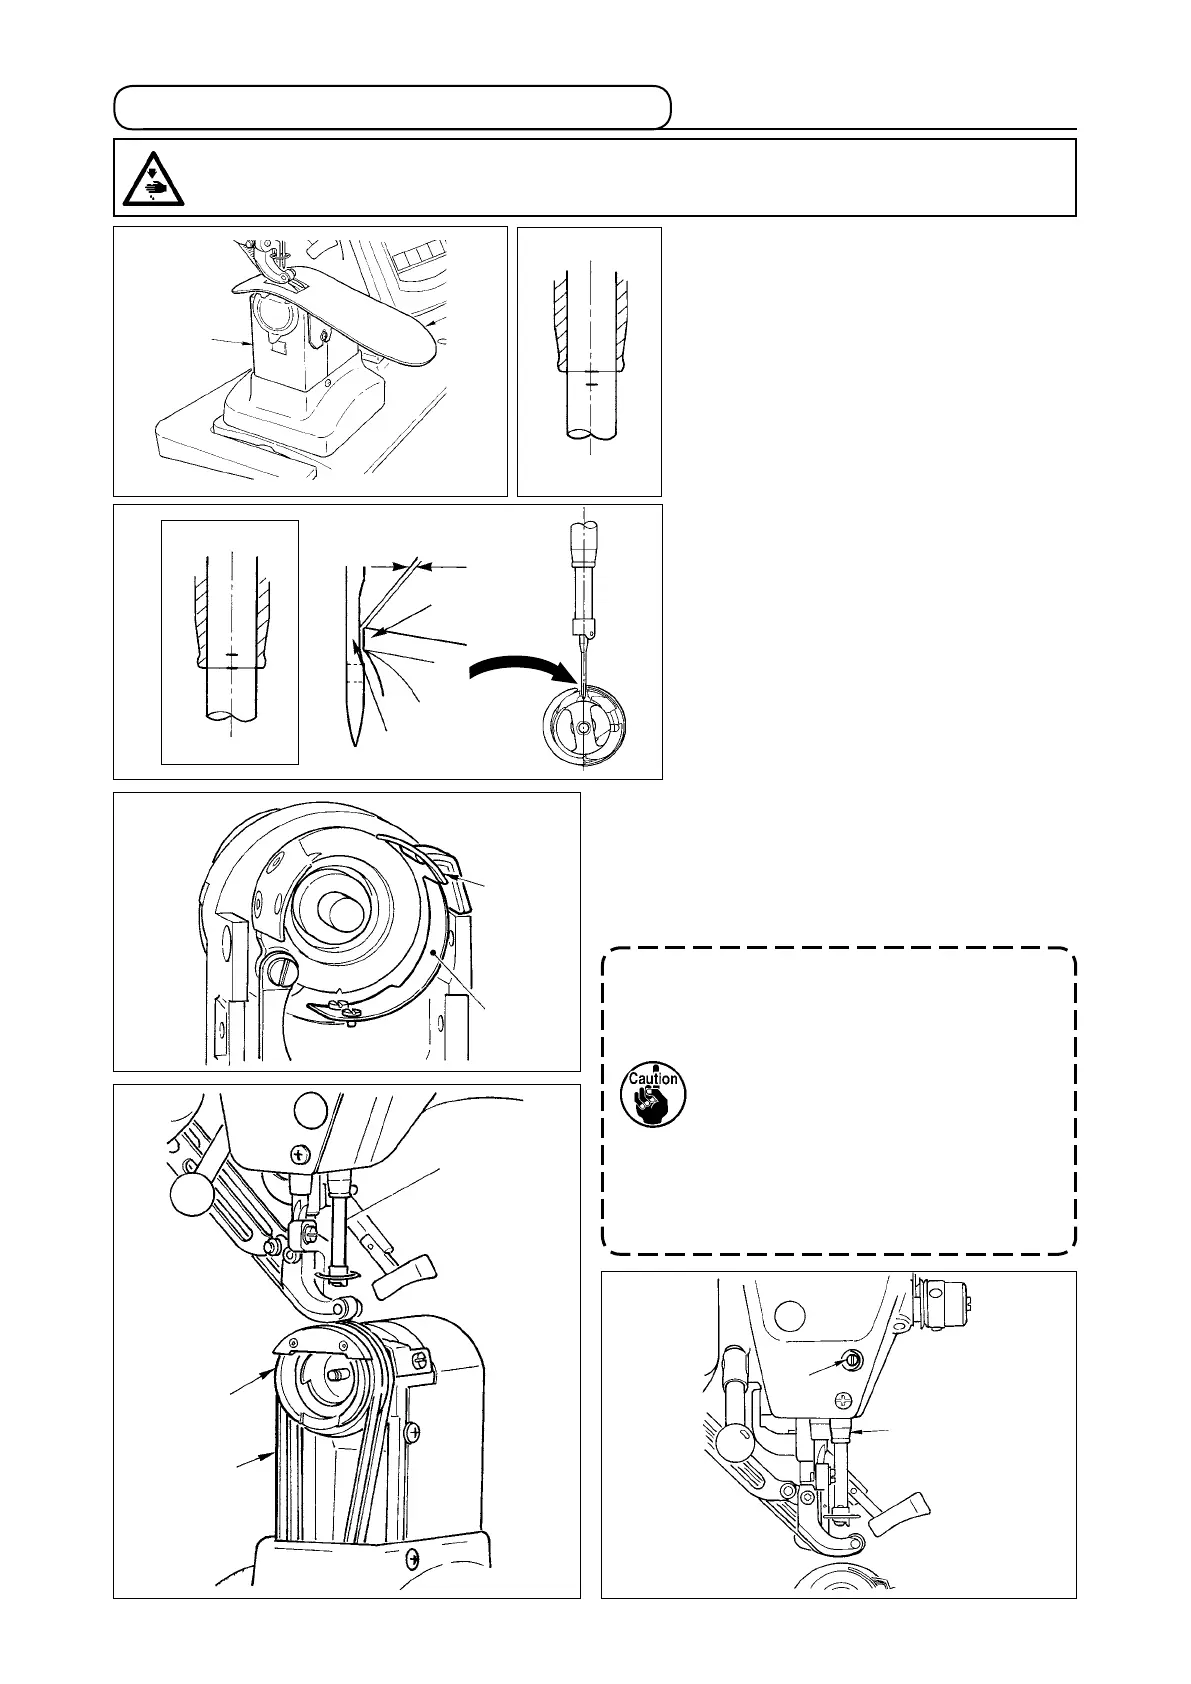
(2) Adjusting the hook
1) Loosen three setscrews in the hook, turn
the handwheel, and adjust needle bar
engraved marker line
B
to bottom end
6
of needle bar bushing.
2) Adjust blade point
7
of hook to the
center of needle
8
so that the clearance
between the blade point and the needle
is 0.04 to 0.1mm (standard).Then tighten
the setscrews in the hook.
3) Put bottom feed belt
9
to hook base
3
, and
assemble it to the hook shaft base.At this time,
adjust the clearance between the bottom surface
of the feed foot (bottom surface of top feed belt)
and the top surface of the bottom feed belt to 0.1
mm at the upper dead point of the needle bar.
1. When the clearance is excessively smaller than
the specified value, the blade point of hook
is damaged, and the clearance is excessively
larger, stitch skipping will be caused.
2. Fit counter knife guard
!0
located inside the
hook base to the inside of counter knife
!1
since lift trouble will be caused.
3. RP hook (dry hook) rolls thread waste or cloth
dust, and there is a possibility of breakdown or
sewing trouble. Periodically perform cleaning
of the hook.
24-4 Adjusting the needle and the hook
1
2
!0
!1
0.04 to 0.1 mm
B
7
8
4
3
9
6
5
(1)
Adjusting the height of needle bar
1) Remove throat plate auxiliary plate
1
and
hook cover asm.
2
.
2) Remove hook base
3
.
3) Bring needle bar
4
to its lower dead point,
and loosen needle bar bracket clamp
screw
5
.
4) Adjust needle bar engraved marker line
A
to bottom end
6
of needle bar lower
bushing, and tighten clamp screw
5
.
WARNING :
Turn OFF the power before starting the work so as to prevent accidents caused by abrupt start of the
sewing machine.
A