Before you replace a fan tray controller:
•
Ensure you understand how to prevent ESD damage. See “Prevention of Electrostatic Discharge Damage”
on page 303.
•
You must have removed the associated fan tray. See “Removing an MX10016 Fan Tray” on page 163.
Ensure that you have the following parts and tools available to install a fan tray controller:
•
Electrostatic discharge (ESD) grounding strap
•
A number 1 Phillips (+) screwdriver to tighten the captive screws.
•
Replacement fan controller
To install a fan tray controller:
1. Remove the replacement fan tray controller from the electrostatic bag.
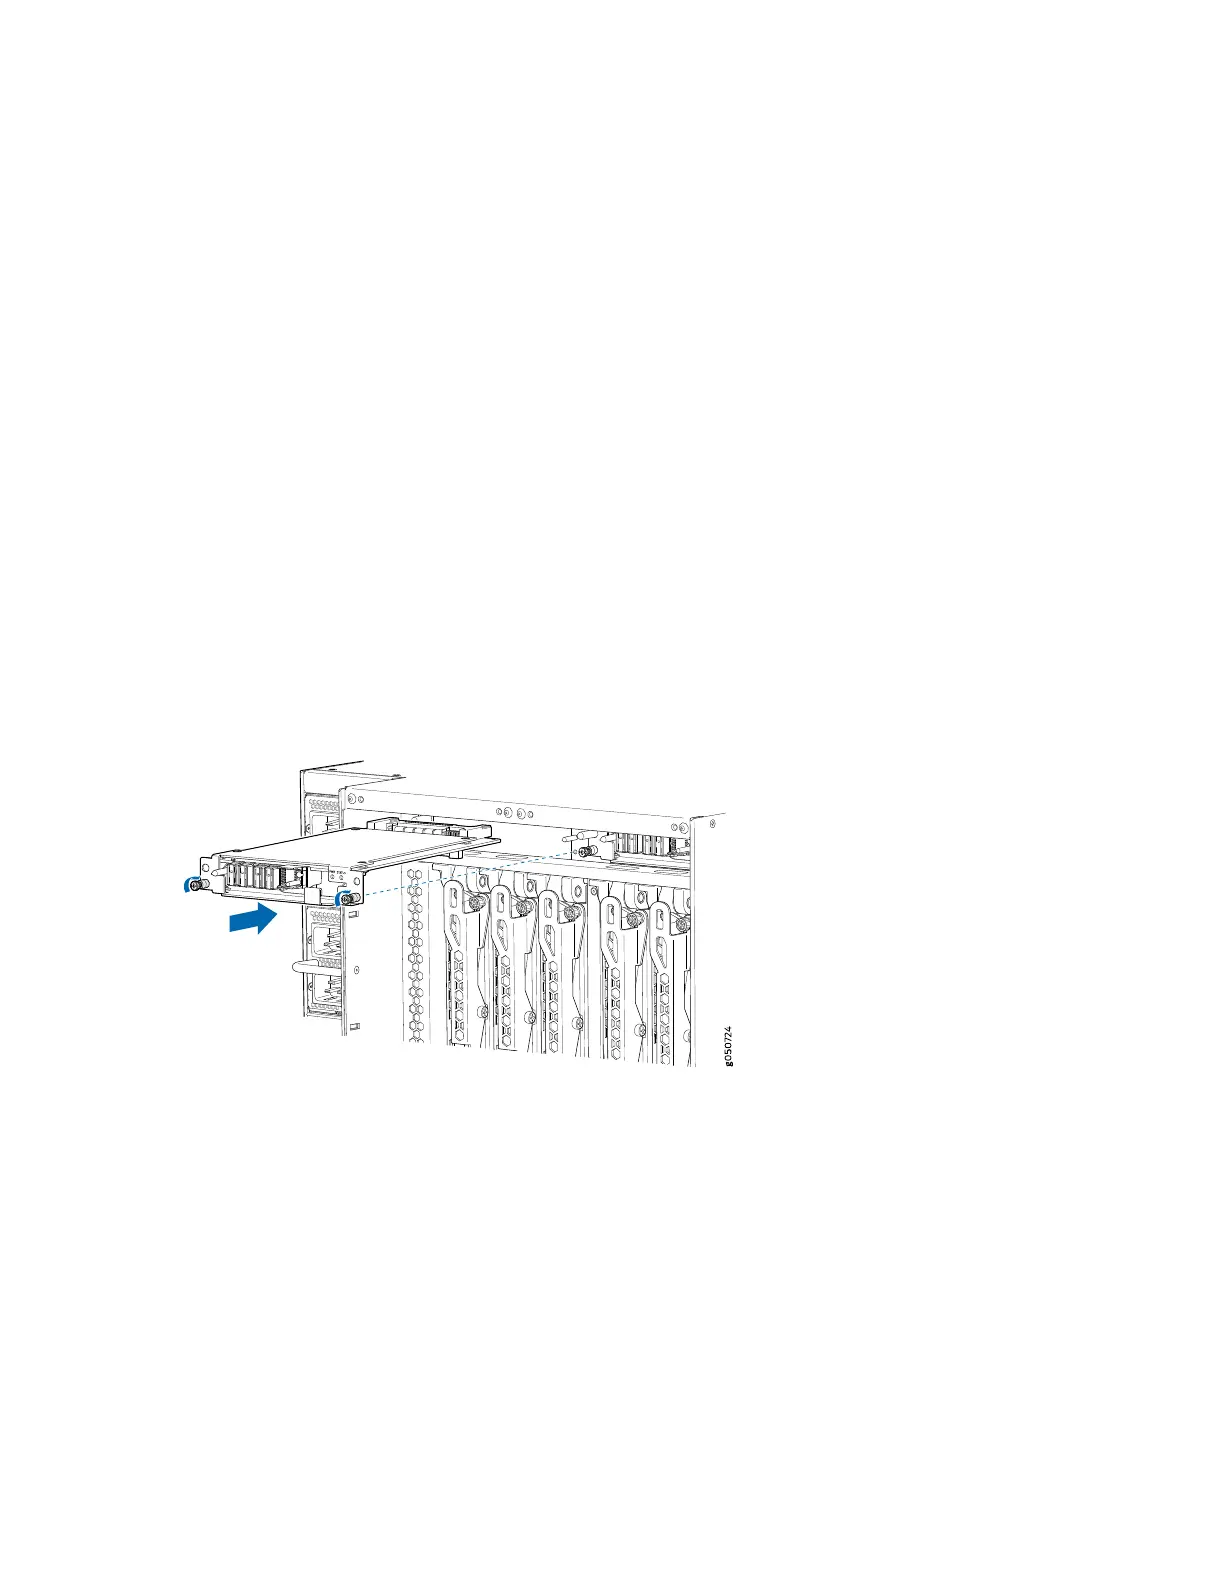
2. Carefully slide the fan tray controller into the fan tray controller slot until it is flush with the mounting
holes (see Figure 70 on page 171).
Figure 70: Replacing an MX10016 Fan Tray Controller
3. Using a Phillips screwdriver, tighten the captive screws for the fan tray controller.
4. Replace the fan tray. See “Installing an MX10016 Fan Tray” on page 166.
171