•
Ensure you understand how to prevent ESD damage (see “Prevention of Electrostatic Discharge Damage”
on page 303).
Ensure that you have the following parts and tools available to remove a DC power supply:
•
Electrostatic discharge (ESD) grounding strap
•
Phillips (+) screwdriver, numbers 1 and 2
•
13/32 in. (10 mm) nut driver or socket wrench
•
Replacement power supply or a cover panel for the power supply slot
CAUTION: Do not leave a power supply slot empty for a long time while the router is
operational. Either replace the power supply promptly or install a cover panel over the
empty slot.
To remove a JNP10K-PWR-DC power supply from an MX10016 router (see Figure 84 on page 190):
1. Attach the electrostatic discharge (ESD) grounding strap to your bare wrist, and connect the strap to
the ESD point on the chassis. There is an ESD point located next to the protective earthing terminal
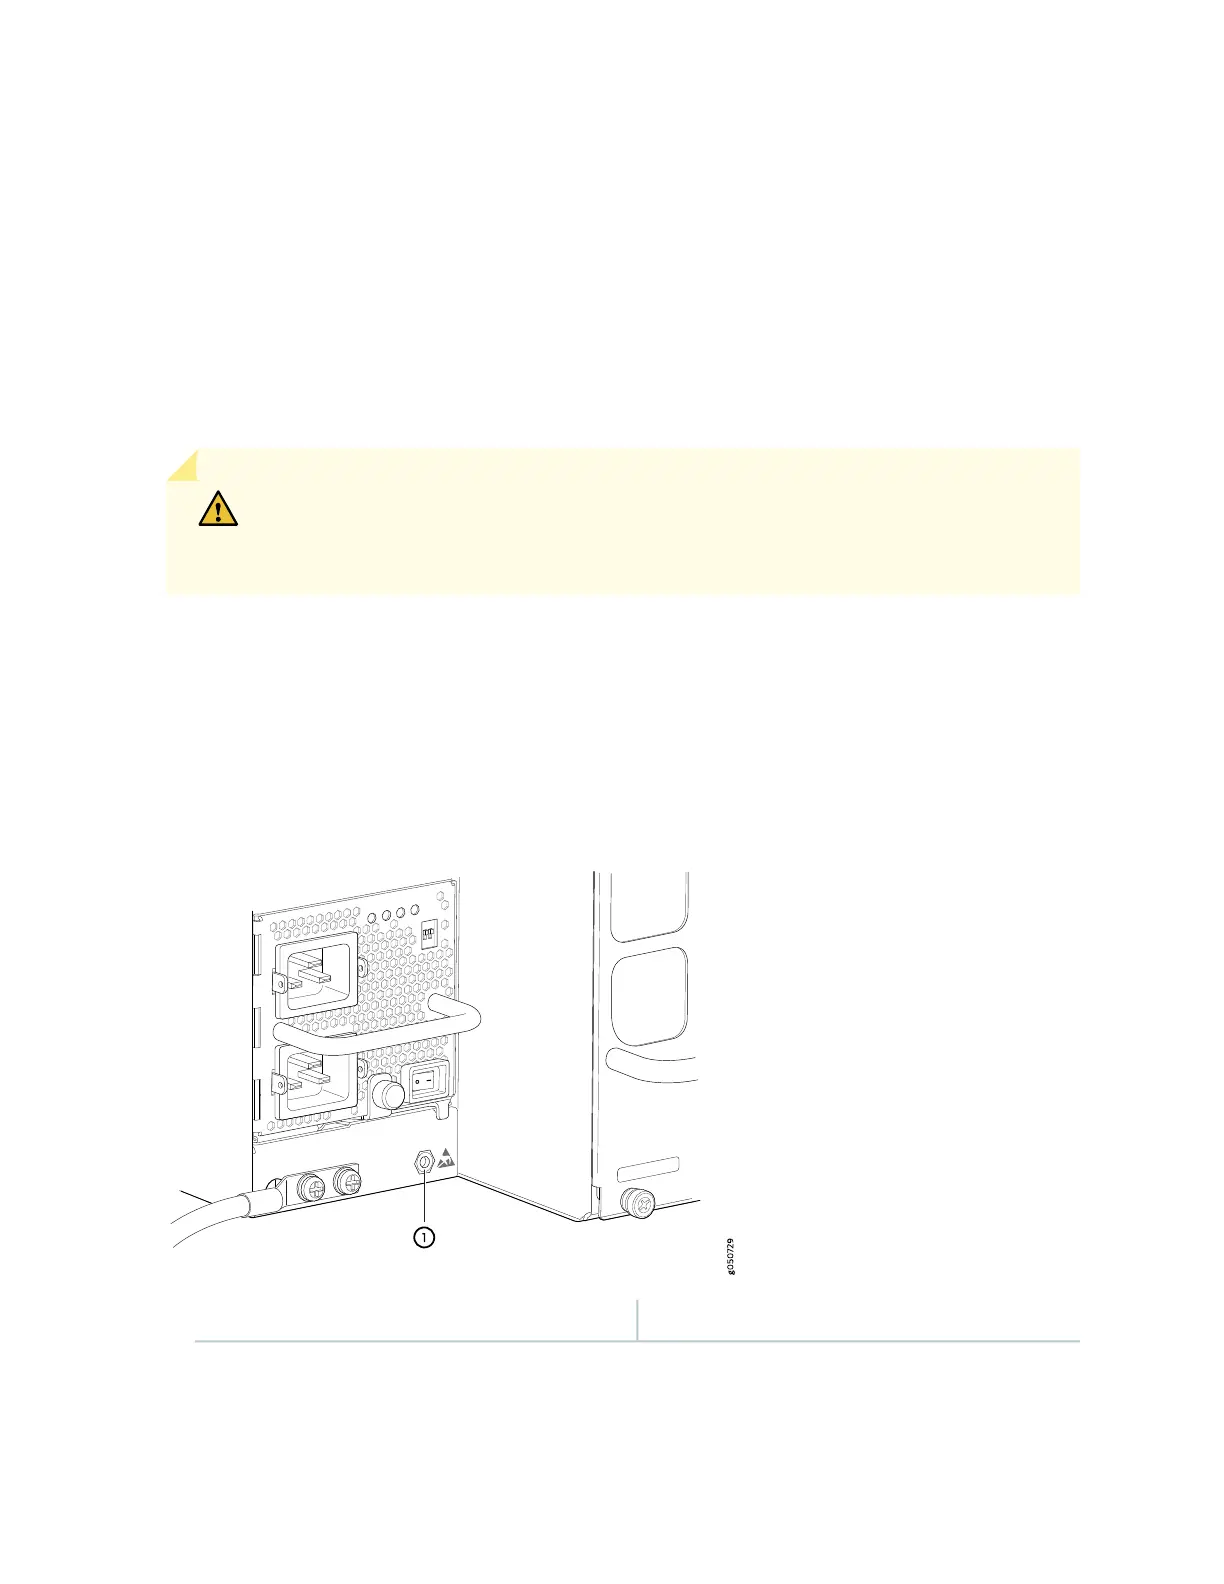
and below PSU 9 on the MX10016 (see Figure 83 on page 188).
Figure 83: ESD Point on the Rear of an MX10016
1—ESD point
2. Ensure that the voltage across the DC power source cable leads is 0 V, and that there is no chance that
the cable leads might become active during the removal process.
188