Getting Started • Tutorial
26
Note: The arrangement can memorize the status of
the control buttons. Therefore when changing the
arrangement, you can also select one of the two fills,
one of the two intros or one of the four variations.
Starting the accompaniment
After selecting an arrangement, you can start the auto-
matic accompaniment.
1 Press RESET/INS to reset the values.
RESET erases the chords that are still in memory.
2 Press START/STOP.
Rhythm play will start. The START/STOP red led
will light up on the first beat, the green led on the
other beats, according to the time signature of the
style.
3 Play a progression of chords.
The keyboard area and the way in which chords are
detected will depend on the type of connection, on
the split point, on the status of the CHORD SCAN-
NING section, and on the “ChordRecog (Chord
recognition mode)” parameter of the Disk/Global
mode (see page 147).
When the i40M is connected with a MIDI key-
board through the special Global channel,
• if the CHORD SCANNING is LOWER, the
chords played with the left hand below the split
point will be detected;
• if the CHORD SCANNING is UPPER or FULL,
the chords played above the split point or with
two hands on the entire keyboard will be
detected.
Note: If the option assigned to the “ChordRecog
(Chord recognition mode)” parameter is “Fingered
1”, you only need to play a note to detect a major
chord.
When the i40M is connected with a MIDI controller
through channels other than Global (for example,
when a MIDI accordion is connected), chords must
come through the Chord 1 and Chord 2 channels
with no extension limits.
The MIDI Setup (see page 136) selected when con-
necting the controller will always create the suit-
able condition to send the chords in the correct way
through the appropriate channels.
Once the chord has been detected, the rhythm will
be joined by the bass and the other accompaniment
tracks that play following the detected chords.
If the MEMORY-CHORD button led is on, the
chords will remain in memory also after releasing
the notes.
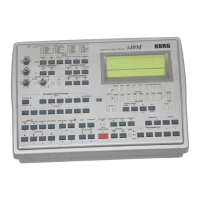
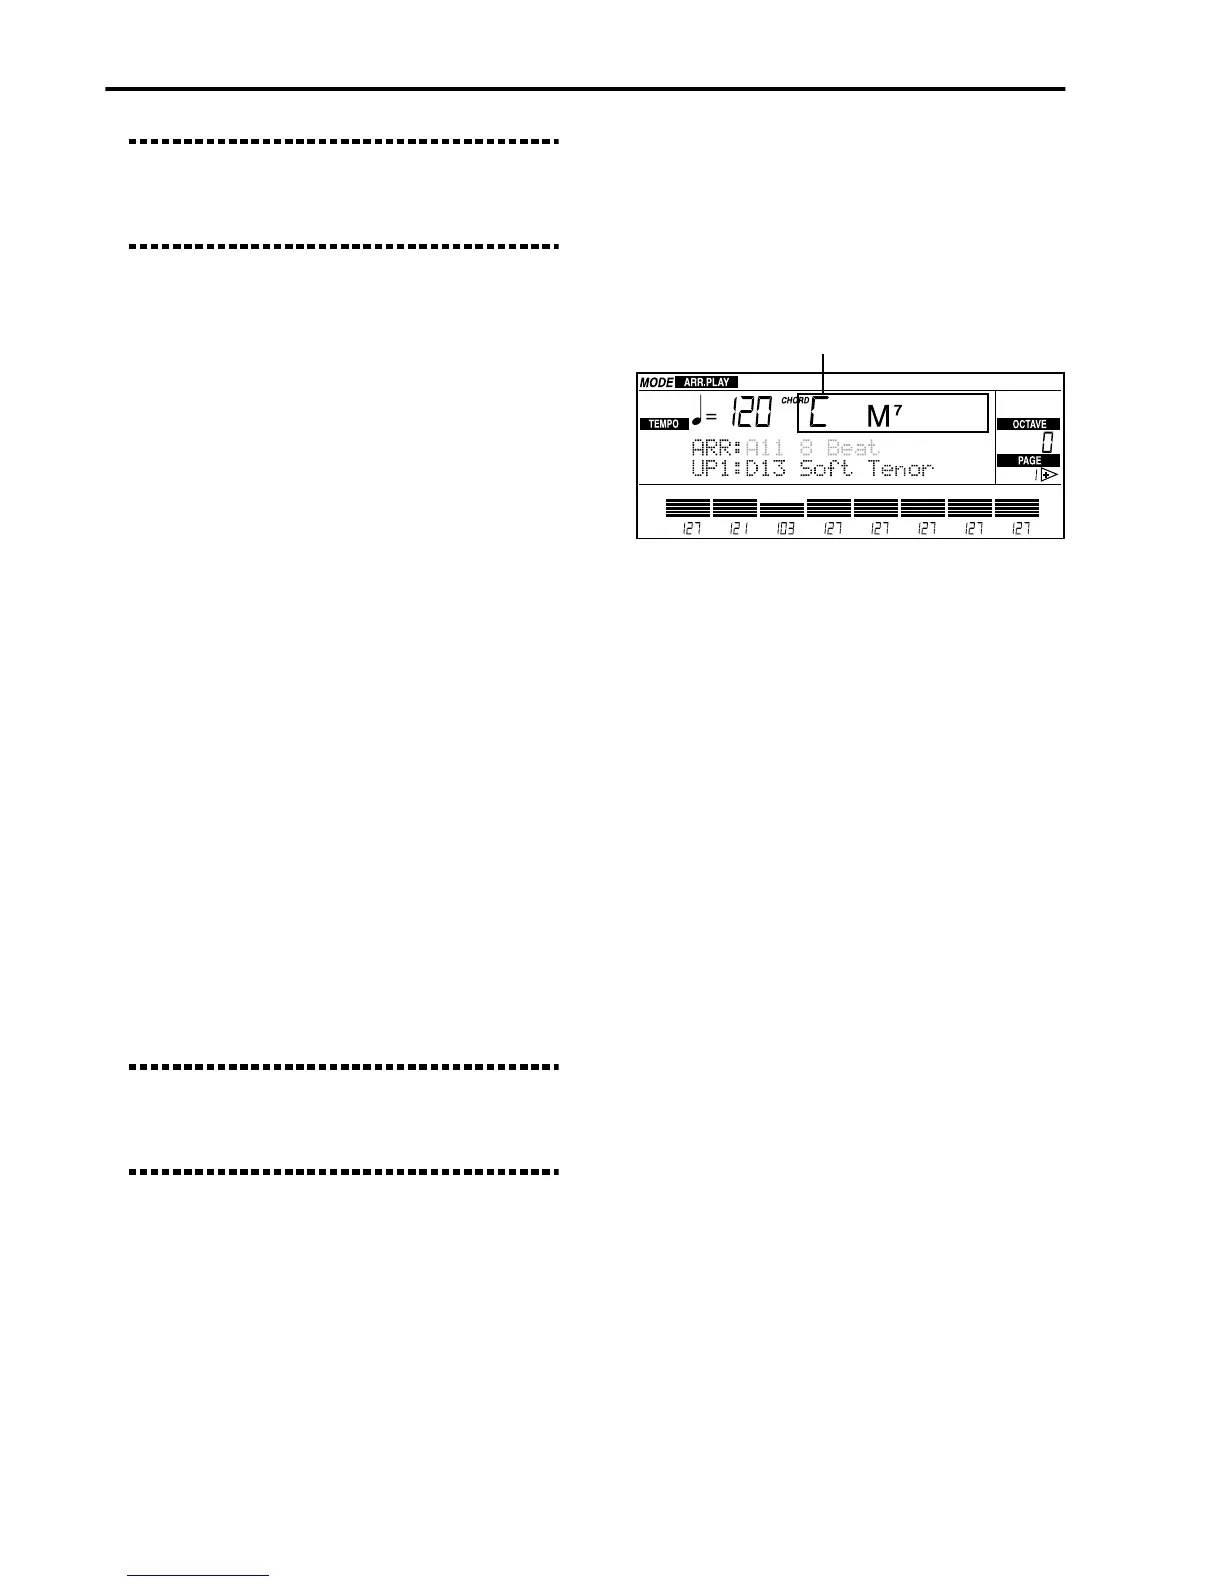
The chord name is shown on the display:
4 Continue playing the chords and play the mel-
ody.
5 Press START/STOP to stop the accompaniment.
Synchro start e stop
You can make the accompaniment start or stop with-
out pressing START/STOP.
1 With the accompaniment stopped, light up the
SYNCHRO-START led.
The Synchro Start makes the accompaniment start
when the notes for the chord recognition chords are
played.
2 Play a chord in the chord recognition area to
start the accompaniment.
3 Light up the SYNCHRO-STOP led.
The Synchro Start makes the accompaniment stop
when the notes for the chord recognition chords are
released.
4 Release the chord recognition notes to stop the
accompaniment.
The accompaniment stops at once.
5 Play a chord again in the chord recognition
area to restart the accompaniment.
6 Turn off the SYNCHRO-STOP led.
If the SYNCHRO-STOP led is off and the MEM-
ORY-CHORD led is on, the accompaniment will
continue playing also when the chord recognition
notes are released.
Recognized chord