Getting Started• Tutorial
35
3 Whilst on Page 2, press REC/WRITE/LYRICS to
enter the recording mode.
4 Select the track you wish to record with the but-
tons of the PROGRAM/VOLUME section. Use the
TRACK SELECT button to switch between the 1-8
and 9-16 tracks.
5 Program the MIDI controller to transmit over the
channel of the track you wish to record.
The tracks need to receive channeled information
and not over the special Global channel. Each track
of the song usually corresponds to a MIDI channel
with the same number as the track. For example,
track 1 usually corresponds to channel 1, track 2 to
channel 2 and son on.
Suggestion: if it is not possible to change the MIDI
channel used by the MIDI controller for transmis-
sion, follow this procedure:
1. Go to “Page 3: Track parameters” in the Song
Edit mode.
2. Modify the “Ch” parameter by assigning the
number of the MIDI channel used by the MIDI
controller for transmission.
3. Go back to the recording page and record the
track.
4. Go to “Page 3: Track parameters” in the Song
Edit mode and assign the original MIDI channel
to the “Ch” parameter.
5. Select a different track and repeat the procedure,
assigning the MIDI channel used by the control-
ler for transmission to the track you wish to
record.
6 Move the cursor to the Recording Mode param-
eter and select the recording mode.
You can select the OVRW option to delete the old
data and record the new data of the track.
Otherwise, in particular to record the drum track
one instrument a time, you can select OVDB, where
you can add new notes to existing notes.
The more complex AUTOP and MANP modes are
described on page 115
7 Move the cursor to the Tempo parameter and
program the metronome tempo.
If you select the AUT option, the tempo is the cur-
rent one indicated by TEMPO/VALUE. If you
select the TEMPO-REC option, the tempo varia-
tions during the recording are recorded.
8 Move the cursor to the Q parameter and select
a quantize value.
The quantize corrects the rhythmical mistakes
made during the recording. The quantize value is
expressed in musical values. Very high values can
deeply change the recording.
9 Move the cursor to the M parameter and acti-
vate or deactivate the metronome.
OFF means that the metronome is deactivated. ON
means that it is active both during the recording
and playback. REC means that it is active only dur-
ing the recording.
0 Press START/STOP to start the recording.
Play freely.
A At the end press START/STOP to stop the record-
ing.
B Repeat the procedure with the other tracks.
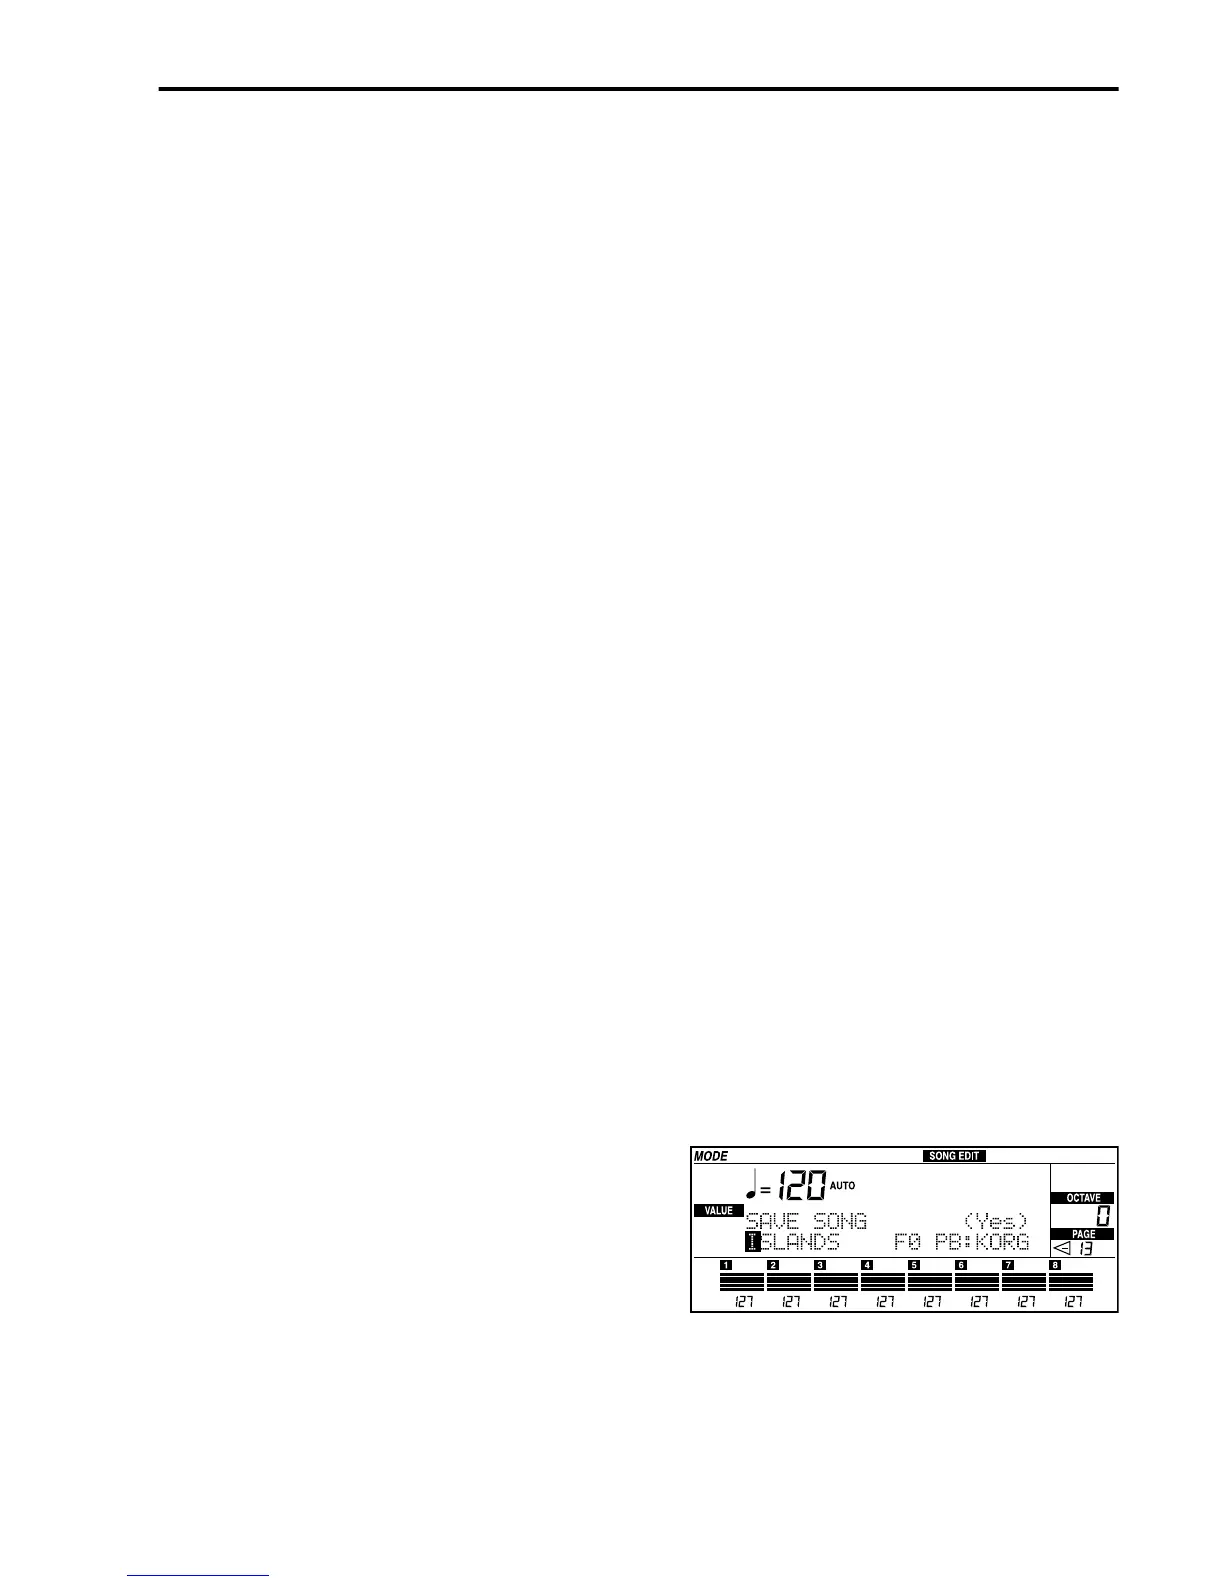
Saving the Song as Standard
MIDI File (SMF)
The songs and backing sequences contained in mem-
ory will be lost when you turn the instrument off,
therefore you need to save them on disk.
1 Insert a new disk into the disk drive.
The disk must be formatted, non copy-protected,
and must have space enough for the song you are
saving. To format the disk see “FORMAT (Format
disk)” on page 133.
2 If you are not already in the Song Edit mode,
press SONG EDIT.
3 Press repeatedly PAGE [+] to get to “Page 13:
Save” in the Song Edit mode.
4 Assign a name to the song.
Move the cursor with the CURSOR buttons and
change the character indicated by the cursor using
the TEMPO/VALUE buttons.