Getting Started • Tutorial
32
The backing sequences
What are the backing
sequences?
The backing sequences are musical pieces created by
playing the real time tracks and the arrangement
accompaniment.
The creation of a new song in the Backing Sequence
mode consists in recording a standard playing with
the arrangements, just like if you were playing nor-
mally in the Arrangement Play mode.
Apart from the tracks available in the Arrangement
Play mode, the Backing Sequence mode contains other
eight tracks (Extra Tracks) where you can record freely.
The backing sequences can be saved on disk as back-
ing sequences or Standard MIDI File (see “Page 18:
SMF converter” on page 105).
Recording the Backing
Sequences
With the i40M you can create new songs exploiting the
wealth of material in the automatic accompaniment.
This type of songs is known as Backing Sequence.
Note: While recording, you cannot select some of the
buttons, e.g. the Keyboard Sets.
1 If the i40M is connected to a MIDI accordion,
switch to the Disk/Global mode and select the
MIDI Setup “Accordion 1”.
See “Connecting the i40M to a MIDI accordion” on
page 49. “Accordion 1” allows you to transmit the
right hand over the special Global channel and the
chords over the Chord 1 and Chord 2 channels.
Note: The backing sequence must receive the real
time tracks over the Global channel and the chords
over the Global and/or the Chord 1 and Chord 2
channels.
2 If the i40M is connected to a keyboard or to
another controller, program it to transmit over
the special Global channel.
Note: The backing sequence must receive the real
time tracks over the Global channel and the chords
over the Global and/or the Chord 1 and Chord 2
channels.
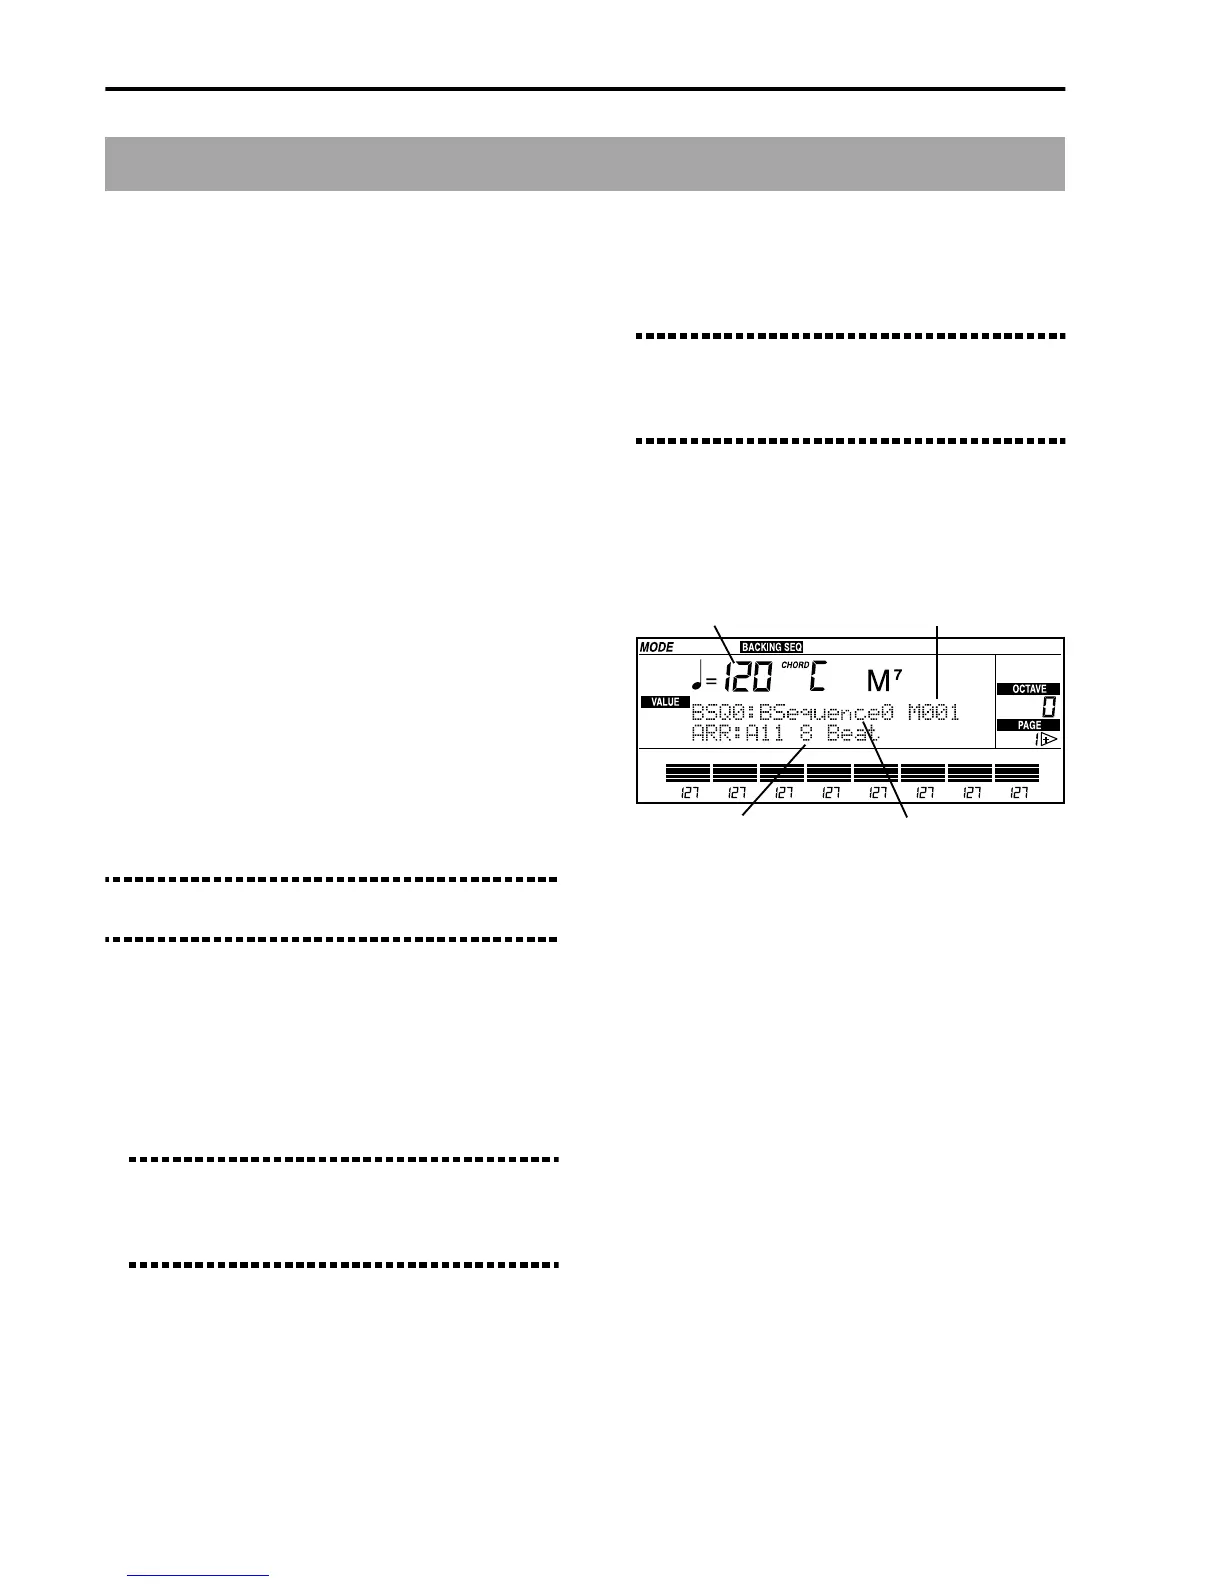
3 Press B.SEQ to enter the Backing Sequence
mode.
The B.SEQ led will light up. The following display
will appear.
4 Select the backing sequence you wish to record
with the TEMPO/VALUE buttons.
For this example, let’s select BSQ3. (If BSQ3 is
recorded, select another backing sequence).
5 Select an arrangement with the buttons of the
PROGRAM/ARRANG section.
Press the PROGRAM/ARRANG button to light up
the ARRANG led, then one of the BANK [A], [B] or
[USER] buttons to select the bank. Finally, press
two NUMBER button in sequence to choose a two-
digit number between 11 and 88.
6 If necessary, change the split point, the Key-
board Mode, the Keyboard Assign and the
Chord Scanning.
Split point: hold down SPLIT POINT and play the
note that you wish to be the new split point. Key-
board Mode: use the buttons in the KEYBOARD
MODE section. Keyboard Assign: use the buttons
of the KEYBOARD ASSIGN section. Chord Scan-
ning: use the buttons of the CHORD SCANNING
section.
Backing Sequence name
Measure number
Tempo
Arrangement