Lifting Arms 411
Typically, the push-off screws appear to be completely tight after just one pass of tightening
without any noticeable separation of clamp collars. Although it seems that the screws cannot be
tightened further, several more rounds of torqueing in a cross sequence will increase the push-off
force in the system and ultimately release the front collar.
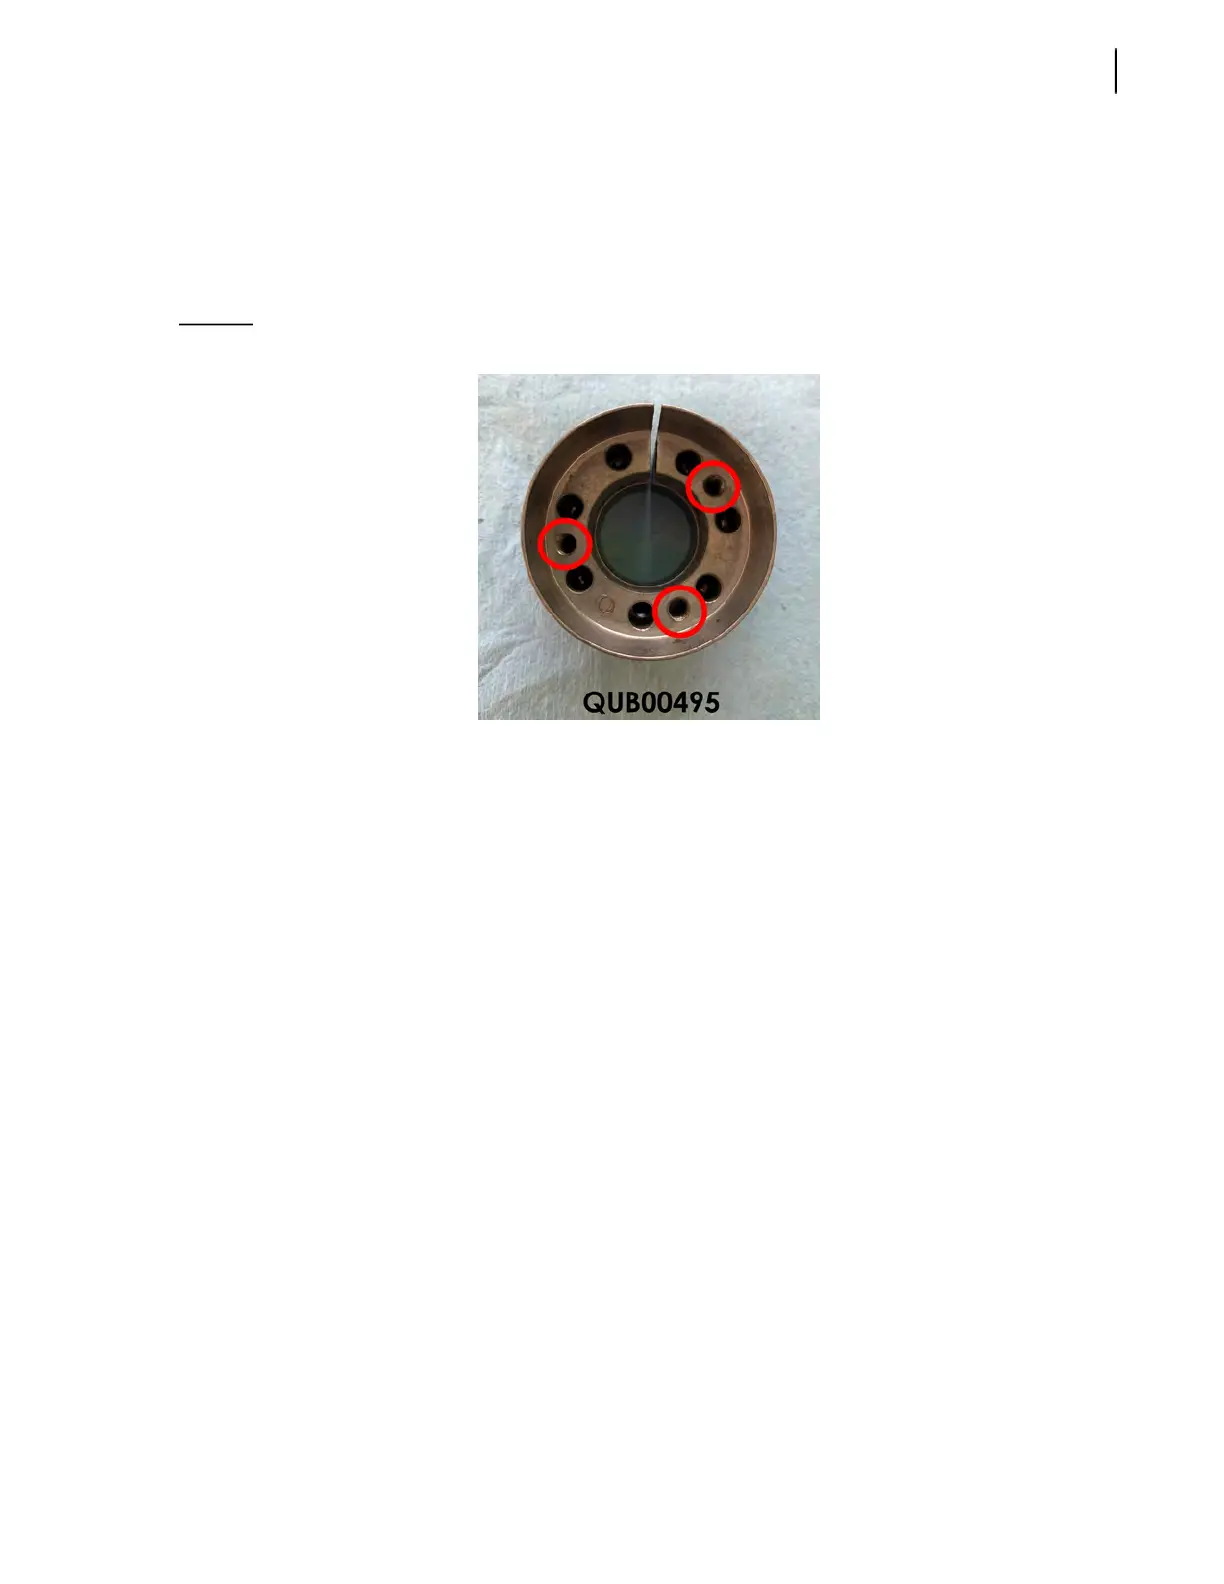
5. Remove the front collar and transfer screws into all push-off threads in center collar (see Figure
10-49).
Figure 10-49
Transferring screws into push-off threads (2)
6. Release rear collar by repeating step 4.
Procedure for Inspection
1. Inspect pin and bore surfaces for damage or galling.
2. Measure outside diameter of pin and inside diameter of bore and compare measurements to the
table on page 409. Replace any worn or damaged parts.
3. If keyless locking device is to be re-used, thoroughly clean all the surfaces and lubricate both
screws and treads with a thin film of light-weight oil.
Procedure for Assembly
1. Carefully clean the bore and shaft contact surfaces and apply a thin film of light-weight oil.
2. Ensure that all slits are aligned and that the front and rear collars are disengaged from the center
collar before inserting into the bore and onto the shaft.
3. Verify the shaft is centered equally between both keyless locking devices.
4. Tighten all locking screws gradually in a cross pattern (see Figure 10-47).
5. During the first round of tightening all locking screws, apply up to 50% of the tightening torque
listed in the table above.
6. Repeat steps 4 and 5; however, this time apply 100% of the tightening torque listed in the table
on page 409.
7. Apply 100% of the tightening torque in a continuous sequence (see Figure 10-50).
Perform this step twice.