136 General Maintenance
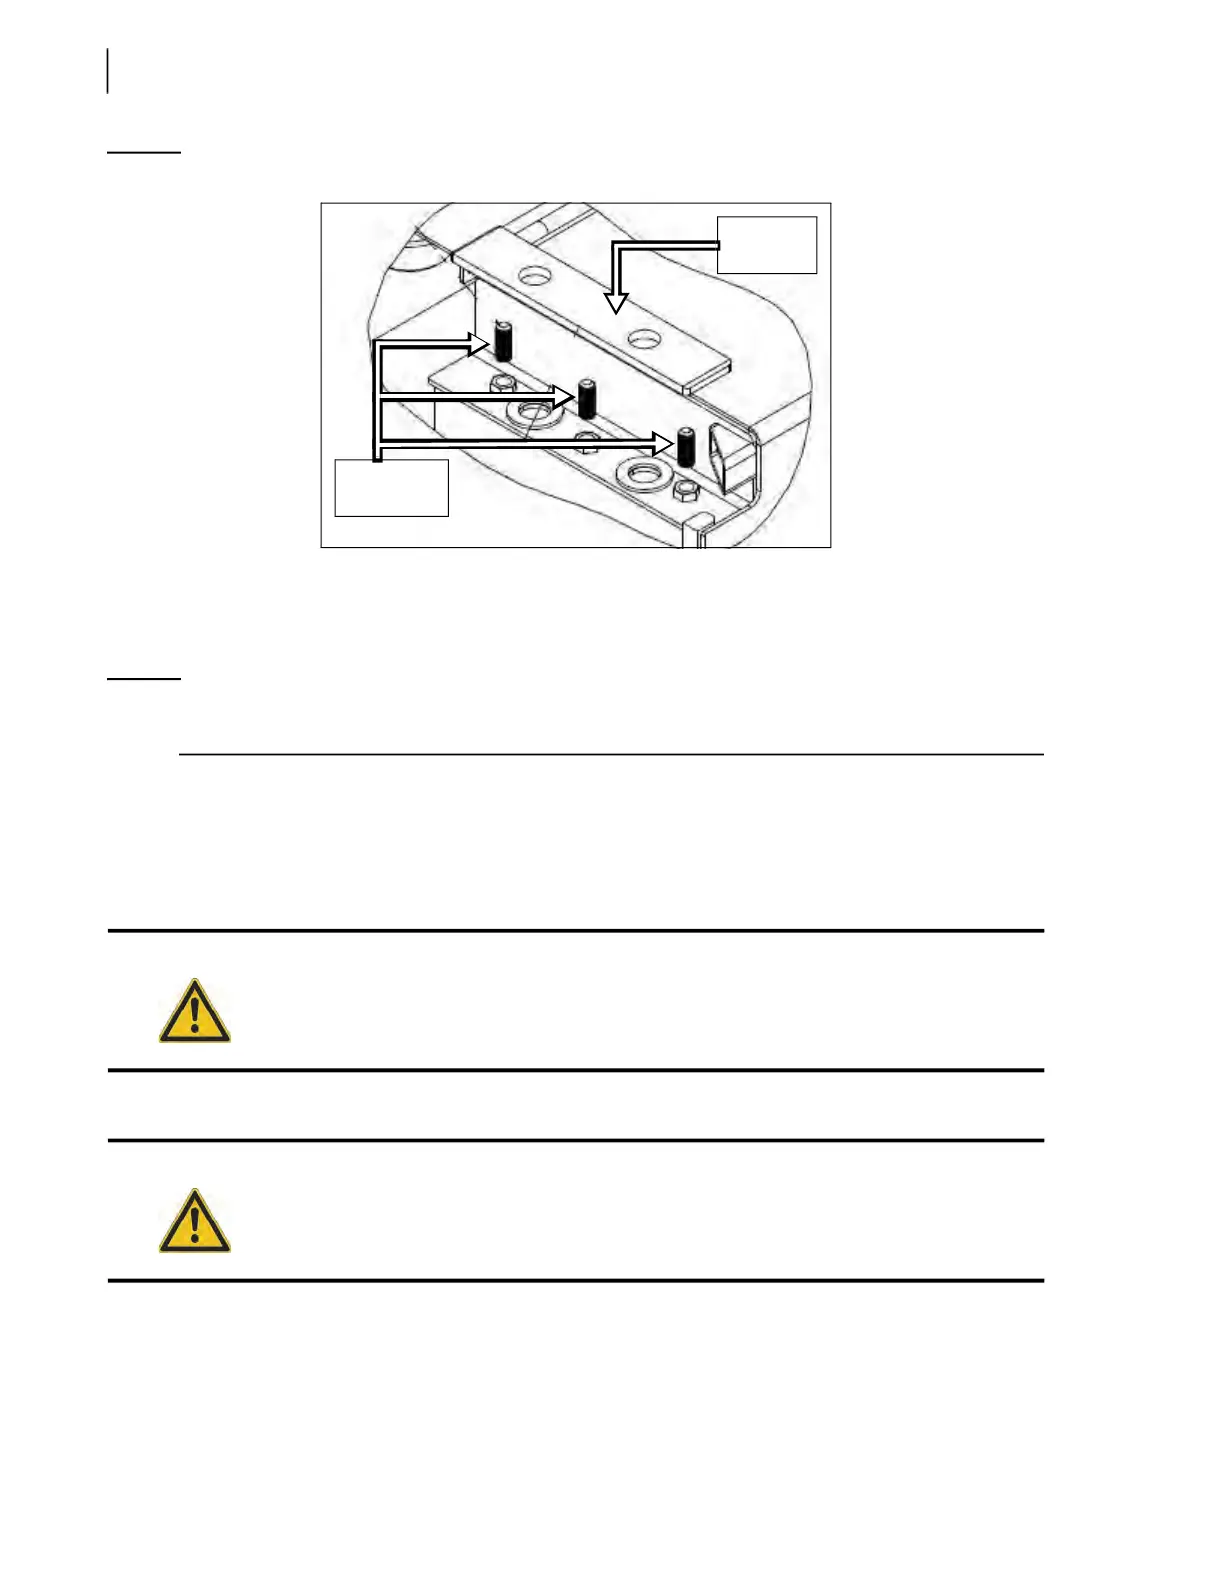
Figure 3-179
Adjustment screws and upper wear pad
Preparing for Upper Wear Pad Replacement
A. Standard Units W/ Loading Arm and Dual HELPING-HAND™ Units
NOTE: For standard units with no loading arm, go to page 140; for co-mingle units with loading arm,
go to page 144; for co-mingle units with no loading arm, go to page 154.
Make sure you go through the following steps:
1. Start the engine and engage the hydraulic pump.
2. Using the joystick, extend the automated arm to get better access to the hopper area.
In dual H
ELPING-HAND™ units, extend both arms.
3. Fully retract the packer.
4. Turn OFF the hydraulic pump and the engine.
5. Lock out and tag out the vehicle (see Locking Out and Tagging Out the Vehicle on page 14).
6. Open the left/right hand side hopper door.
7. Remove the anti-spill guards located on each side of the hopper.
Danger!
Secure the area around the path of the automated arm when performing maintenance
or repair.
Danger!
Do not enter the hopper while the packer is moving.
Wear pad
Adjustment
screws