Lifting Arms 401
If, during the adjustment of the gripper adjustment rod, the mechanic notices that there is some up-
and-down play at the opposite end of that part (the one that is attached to the two-finger section of
the gripper [see Figure 10-26]), it may be necessary to replace the bushing/spacer system (see Figure
10-29) that is found inside the circular end of the adjustment rod.
To replace the bushing/spacer system of the gripper adjustment rod, proceed as follows:
1. Apply all safety measures to ensure safety around the vehicle at all times.
2. If it is not already done, uninstall the adjustment rod end connected to the one-finger section of
the gripper (refer to steps 2-11 of the previous procedure).
3. Locate the other adjustment rod end where the bushing/spacer system is mounted (see Figure
10-28).
4. Remove the pin that holds the adjustment rod to the gripper base.
The pin is held in place by a bolt.
If the gripper is still closed, you will need to manually push the two-finger section of the gripper
since the other end of the adjustment rod is loose. Push the gripper fingers far enough back so
that you can lift the pin.
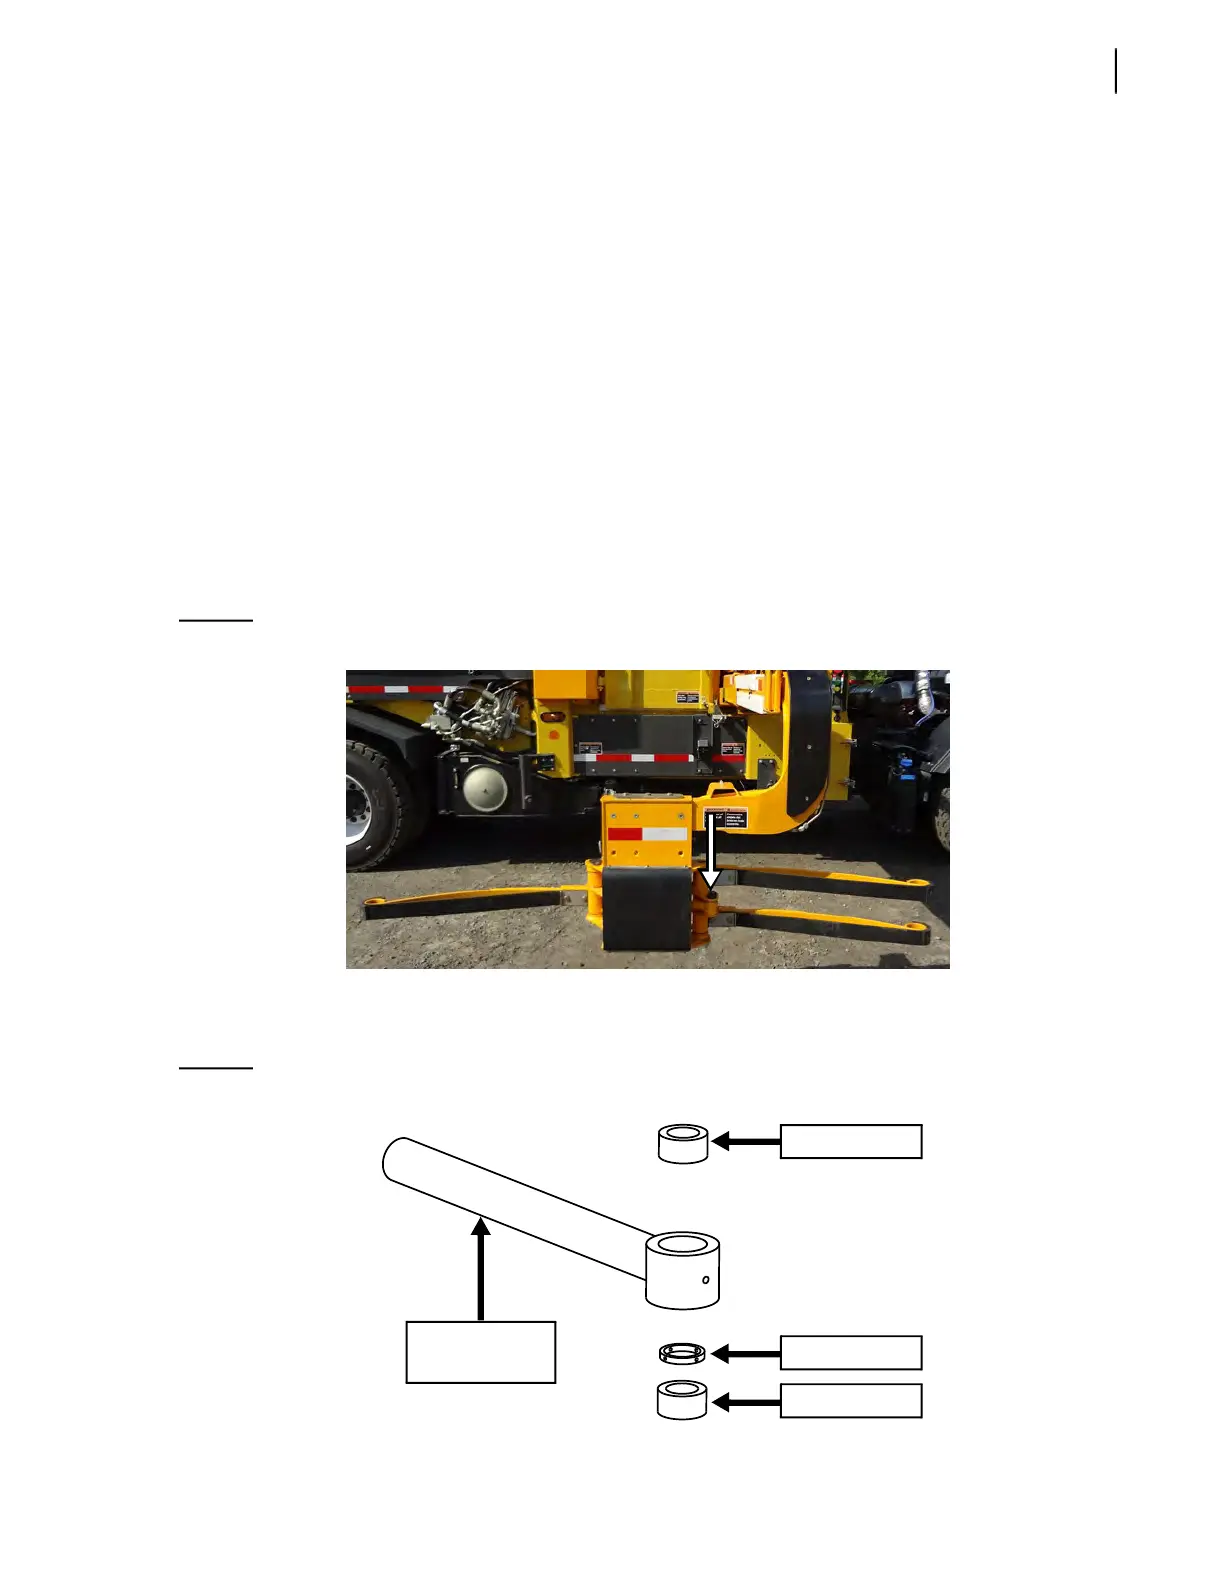
Figure 10-28
Pin securing right end of gripper adjustment rod
5. Remove the adjustment rod completely.
6. Remove both bushings and the spacer, and replace them.
Figure 10-29
Bushing/spacer system
Bushing
Bushing
Spacer
Adjustment
rod