Moldboard Blade
The frequency for replacing the moldboard blade
depends upon the material you’re working with and
operator’s skill in maneuvering the blade.
For safety, wear a hard hat, gloves and
safety glasses when replacing grader attachments.
To replace or change the blade:
1. Block the front and rear wheels to prevent
movement of the machine.
2. Start the grader with the park brake engaged, then
lower the moldboard so it just touches the ground
without any down pressure.
3. Turn off the ignition, ensuring the park brake is still
engaged, and dismount the grader.
4. Working on one section at a time, stand so the blade
is turned away from you, and begin with a bolt on
either end of the blade.
5. Remove the nut and washer, then the bolt. (Figure
5-39)
6. Work from one end to the other until all have been
removed to CAREFULLY dislodge the blade from
the moldboard.
7. Move used blade safely out of the way and align new
blade.
8. Working from one end to the other, install bolts,
washers and nuts, then torque. (See Torque
Tables, Section 2)
9. Discard any worn bolts and replace with the same
size. (See Section 7, Illustrated Parts List)
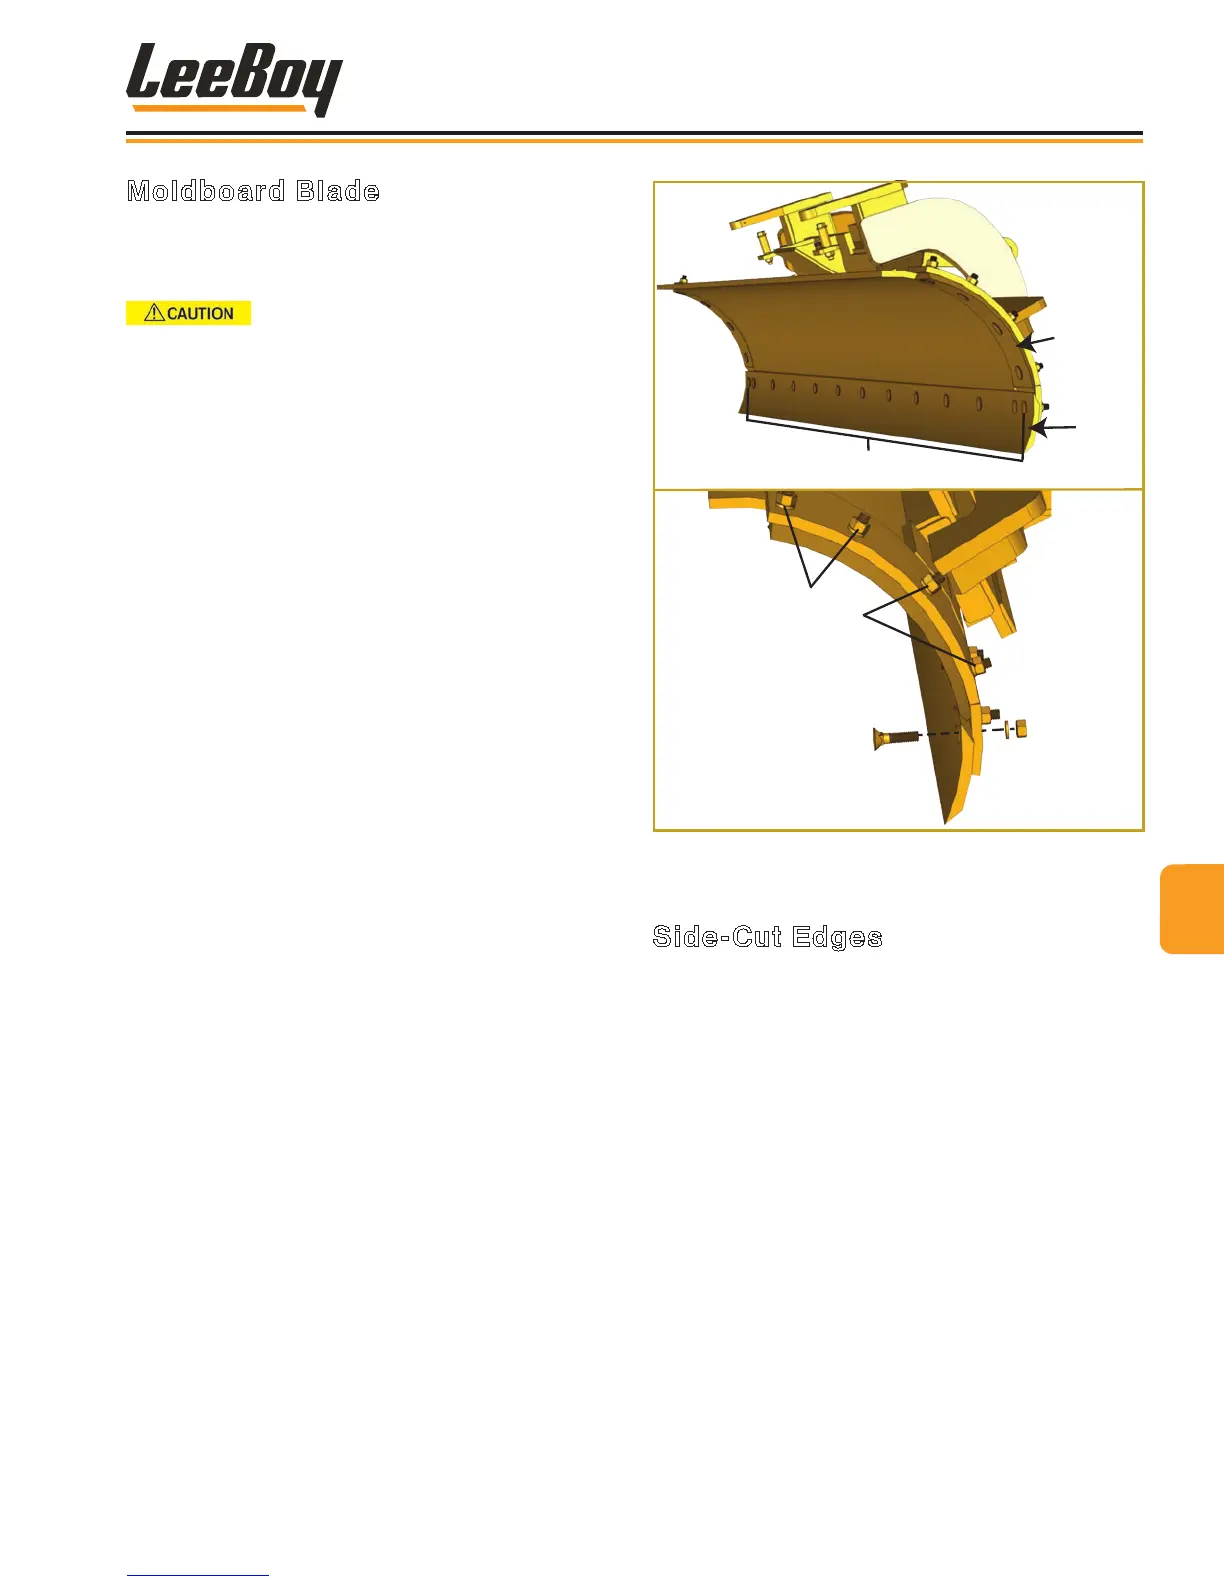
Blade
Bolts
Remove
nut and
washer
rst.
Side-Cut
Edge
Side-Cut
Edge Bolts
Figure 5-39. Replacing Moldboard Blade
Side-Cut Edges
The moldboard side-cut edges can become damaged
or worn over time, requiring replacement.
Follow the same procedure previously outlined for
removing the bolts to replace the side-cut edges.
(Figure 5-39) There are four bolts on each side-cut
edge.
5
Maintenance
LeeBoy 685D Motor Grader 5-33