Moldboard Lift Cylinders
1. Park the grader on a level surface in a designated
area where oil does not touch or run off onto the
ground.
2. Lower the moldboard to the ground.
3. Engage the park brake, shut down the engine and
place wheel chocks on wheels for safety.
4. Use a sling or other means of supporting the
moldboard lift cylinders.
5. Disconnect, plug and tag the hydraulic hoses
connected to bottom of one cylinder, being very
careful to prevent any contamination when plugging
the hydraulic hose ttings.
NOTE: Inspect the hydraulic ttings. Replace any
damaged or worn ttings.
6. Use ats on cylinder rod to unthread cylinder rod
from ball joint. If the ball joint needs to be replaced,
separate tapered ball joint stud from turntable and
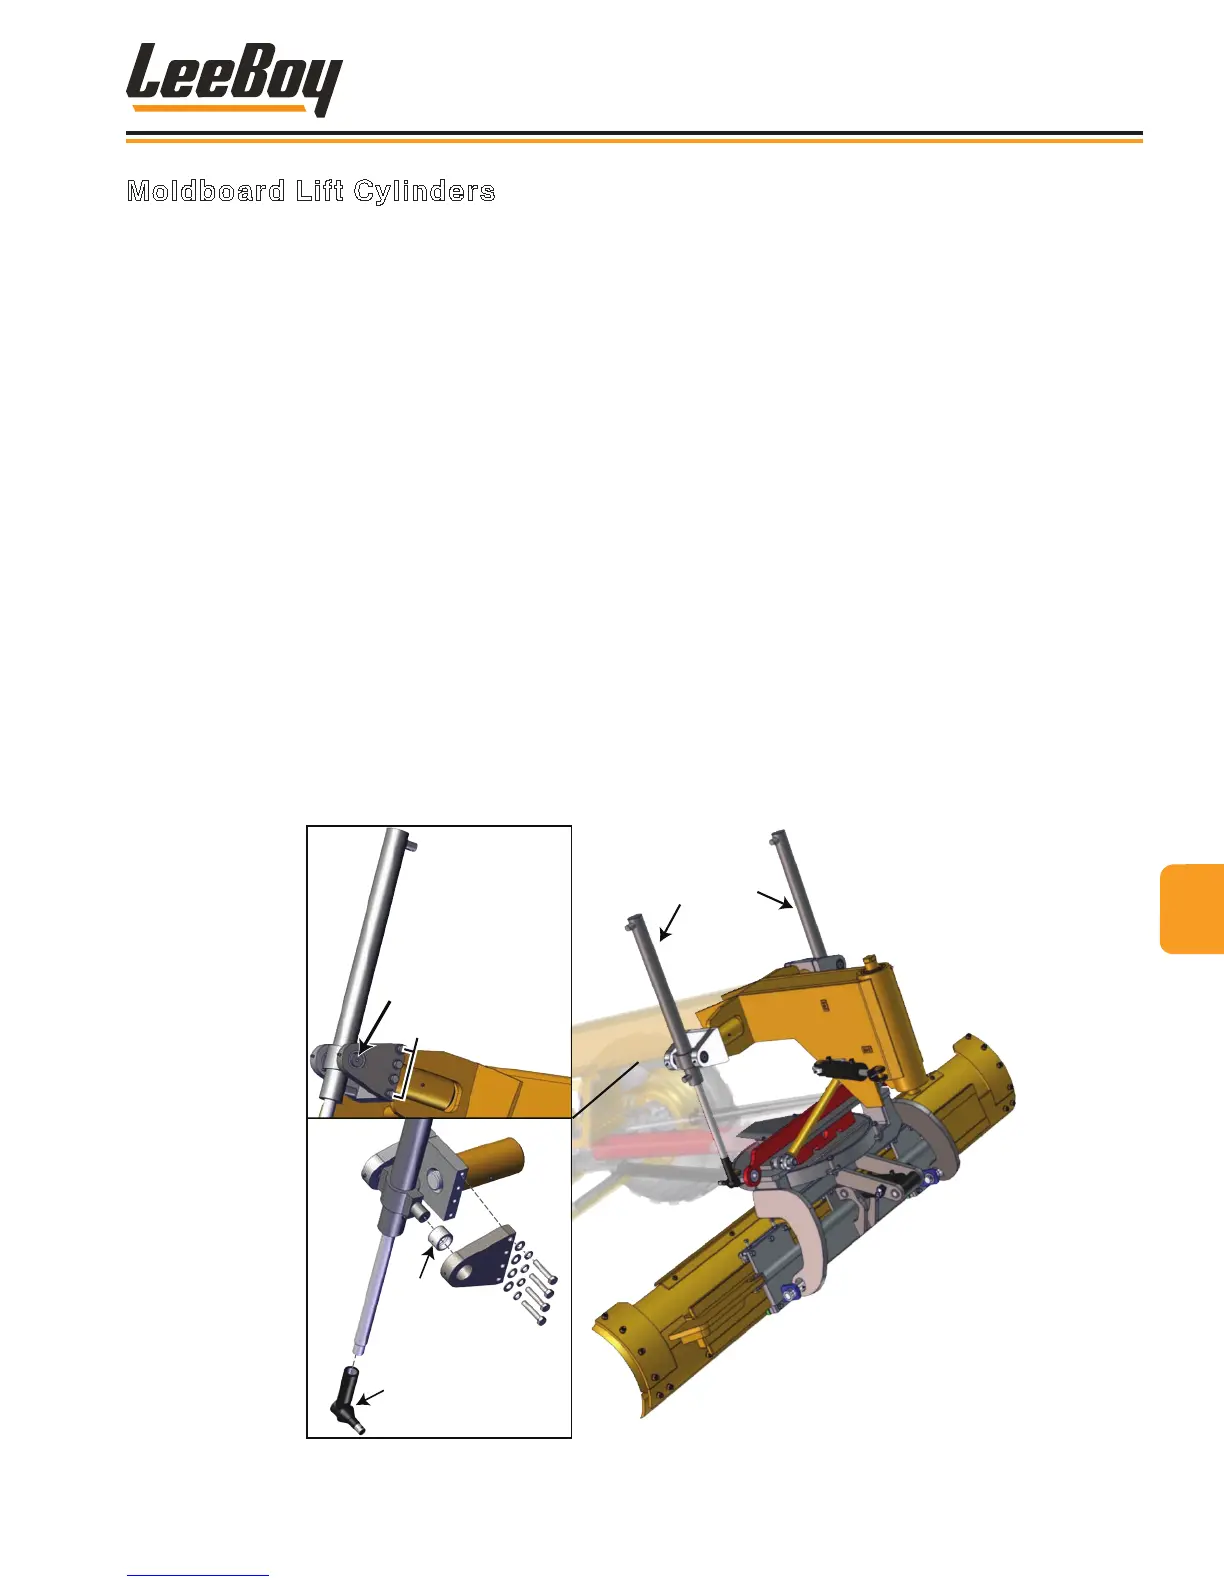
remove. (Figure 5-41)
7. Remove the four (4) bolts and washers on the front
side of the lift cylinder, then the lift cylinder mount
slide plate as shown in Figure 5-41.
8. Remove the bushing inside from the cylinder pin.
9. Remove the bushing inside from the cylinder pin.
Carefully remove the lift cylinder from the frame
to remove it. Clean the area thoroughly before
installing new cylinder.
10. Position the new moldboard lift cylinder into place.
11. Insert bushing (ensuring the grease tting is in
place), then position the side plate and secure with
washers and bolts. Torque bolts. (See Torque
Tables, Section 2)
12. Repeat Steps 4 - 11 on the other lift cylinder if
needed.
13. Reconnect the hydraulic hoses according to the
tags for correct reconnection.
14. Using a grease gun, lubricate the rods on each
cylinder.
15. Start the engine and idle for a few minutes to ensure
the hydraulic oil has warmed in the system.
16. Raise and lower the moldboard several times to
ensure proper operation and check for leaks.
Lift
Cylinders
Bolts
Cylinder Pin
(Front Side
of Cylinders)
Bushing
Ball Joint
Figure 5-41. Moldboard Lift Cylinders
5
Maintenance
LeeBoy 685D Motor Grader 5-35