Operating a Scarifier
Use the following procedure for scarifying roads or
other areas using the optional rear scarier:
1. Raise the moldboard at least one foot (.304 m) off
the ground to allow unrestricted movement. Rotate
the moldboard so that it is perpendicular with the
frame and pitch the blade forward halfway.
2. Position the grader ahead of the working area and
ensure the front wheels are vertical.
3. Slowly move the grader forward.
If the rear wheels lose traction, raise
the scarier until the wheels regain traction.
4. At the starting point for the job and while still moving,
lower the scarier.
• If equipped with a rear scarier, use the rear
scarier lever shown in Figure 4-46.
Rear Attachment Lever
Figure 4-46. Rear Attachment Control Lever
5. When nished with the rst pass, raise the scarier
by pulling rearward on the scarier lever.
6. If more passes are needed, repeat the procedure.
DO NOT remove more than ve teeth
as the force against the remaining teeth could shear
them off.
Replacing Scarifier Teeth
The scarier tooth supports are adjustable and secured
with pin locks.
Always support the scarier and other
attachments using a block or sling before servicing.
1. Raise the scarier. Support the scarier on
blocks or use a sling for support.
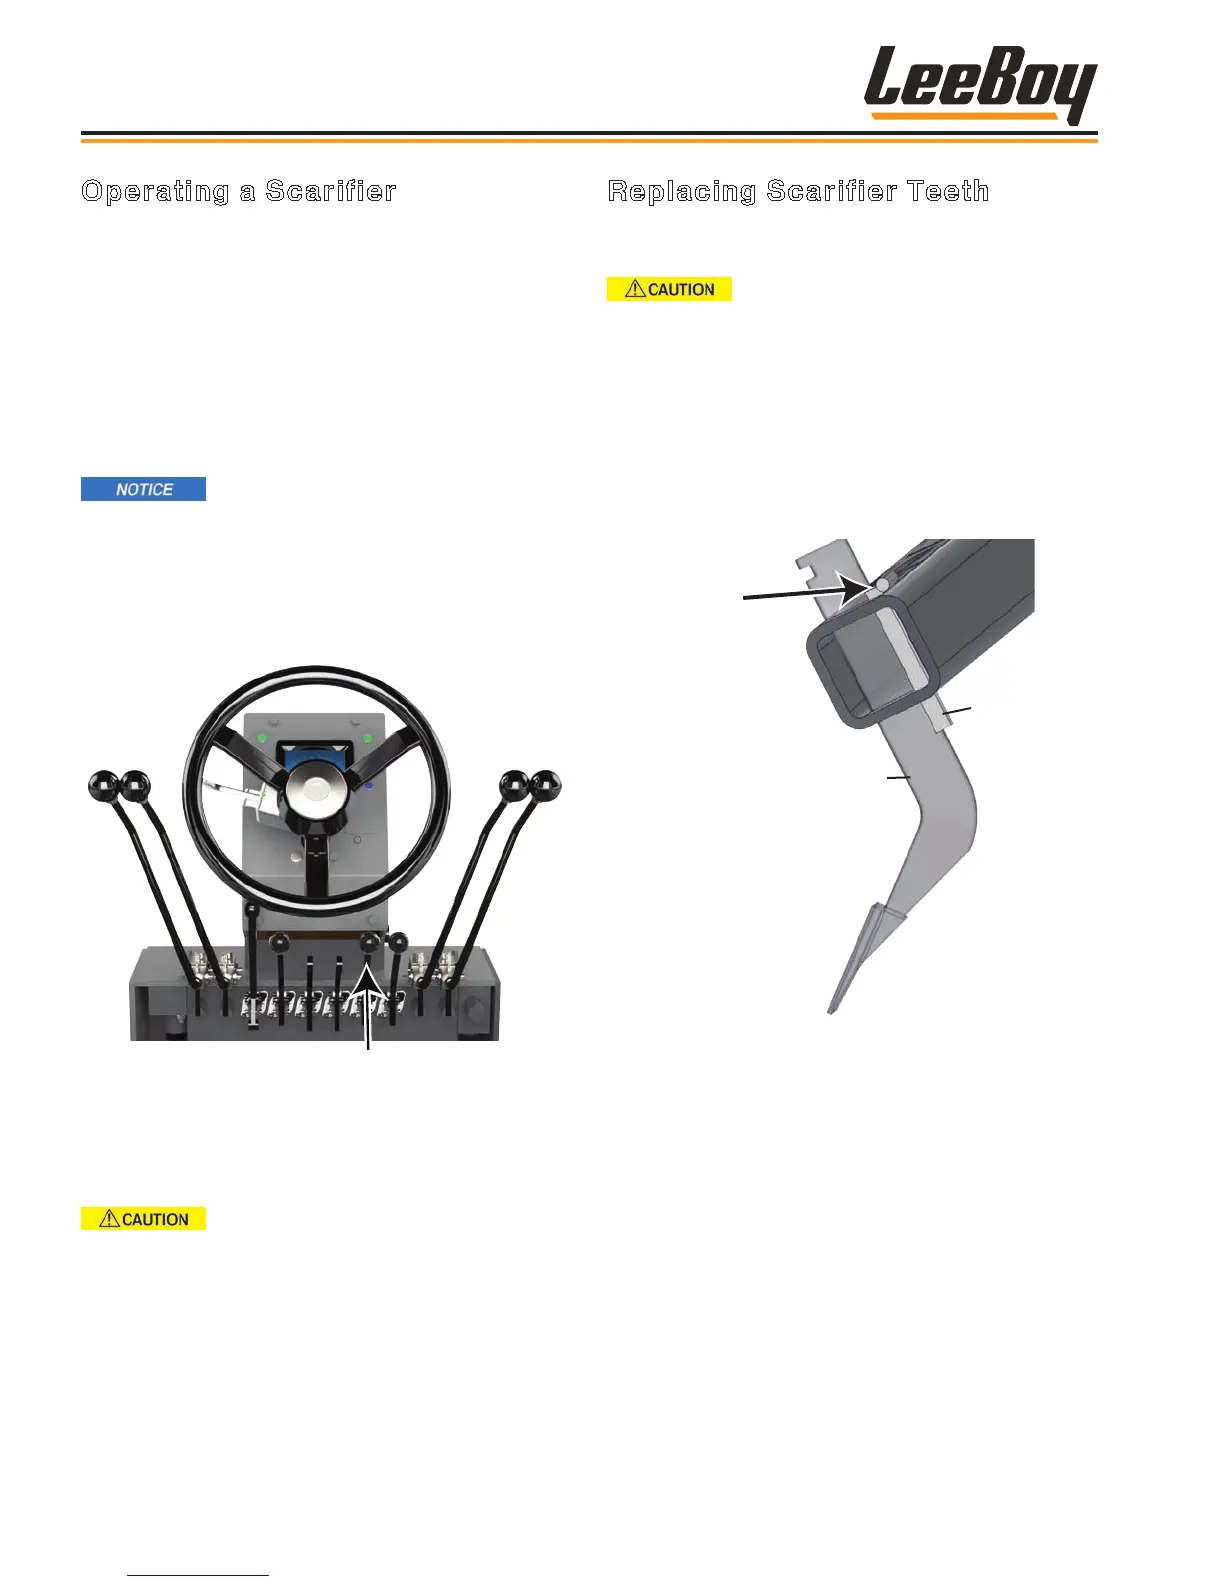
2. Using a pry bar or lock pin tool, remove the shank
lock pin and tooth from the scarier frame. (Figure
4-47)
• If only removing tooth, be sure to store tooth
shank and locking pin together for later use.
Pin
Lock
Tooth
Shank
(Pin
Lock)
Figure 4-47. Scarier Shank Lock Pin and Tooth
3. Position new tooth shank into the desired slot on the
scarier frame.
4. Insert lock pin. It is recommended using a rubber
hammer if you wish to hammer the lock pin back into
place to prevent damage.
Operation
LeeBoy 685D Motor Grader4-28