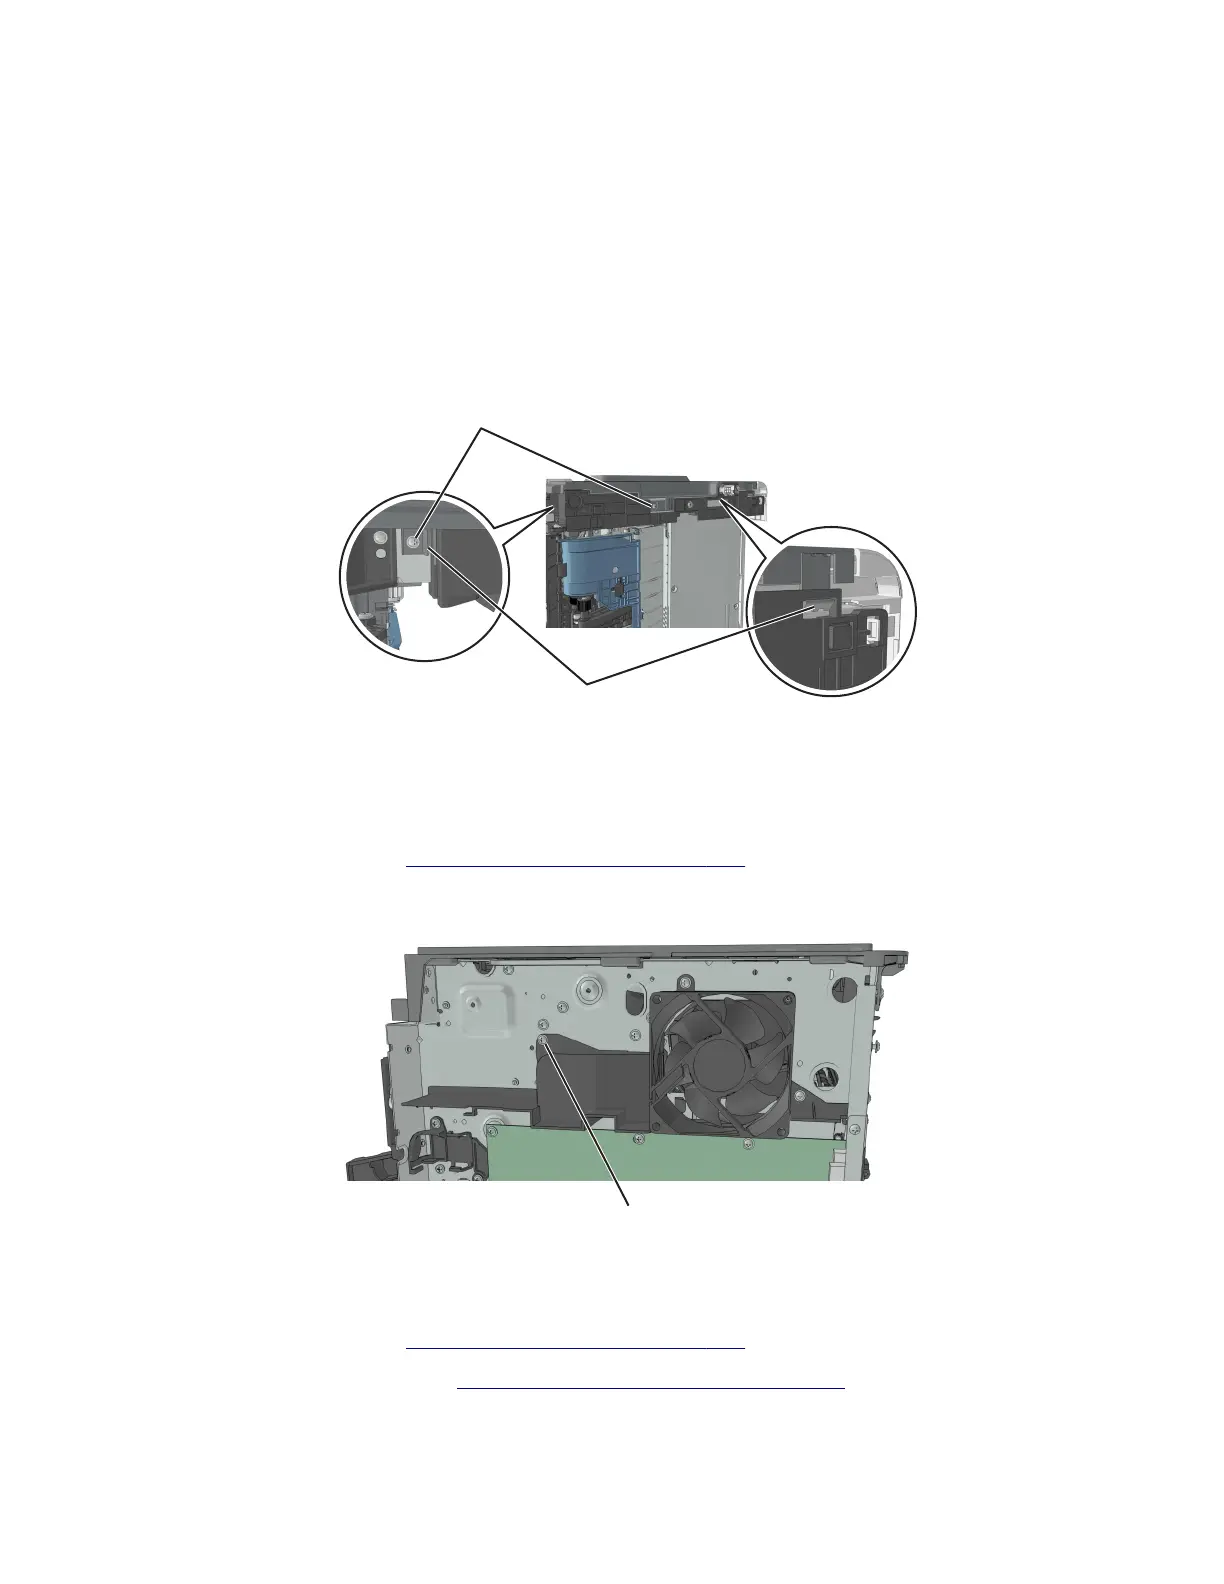
Right side removals
Right cover removal
1 Open the front door.
2 Position the printer so that it sits on its left side.
3 Remove the two screws (A) securing the right cover.
4 Release the latches (B) to remove the right cover.
B
A
Cooling fan duct removal
Note: This is not a FRU.
1 Remove the right cover. See “Right cover removal” on page 209.
2 Remove the screw (A), and then remove the cooling fan duct.
A
Cooling fan removal
1 Remove the right cover. See “Right cover removal” on page 209.
2 Remove the cooling fan duct. See “Cooling fan duct removal” on page 209.
3 Disconnect the cable JFAN1 or JFAN2 from the controller board.
4514-2xx
Parts removal
209