2. Installation UMX-TPS-TX100 series – User's Manual 21
Connecting Steps
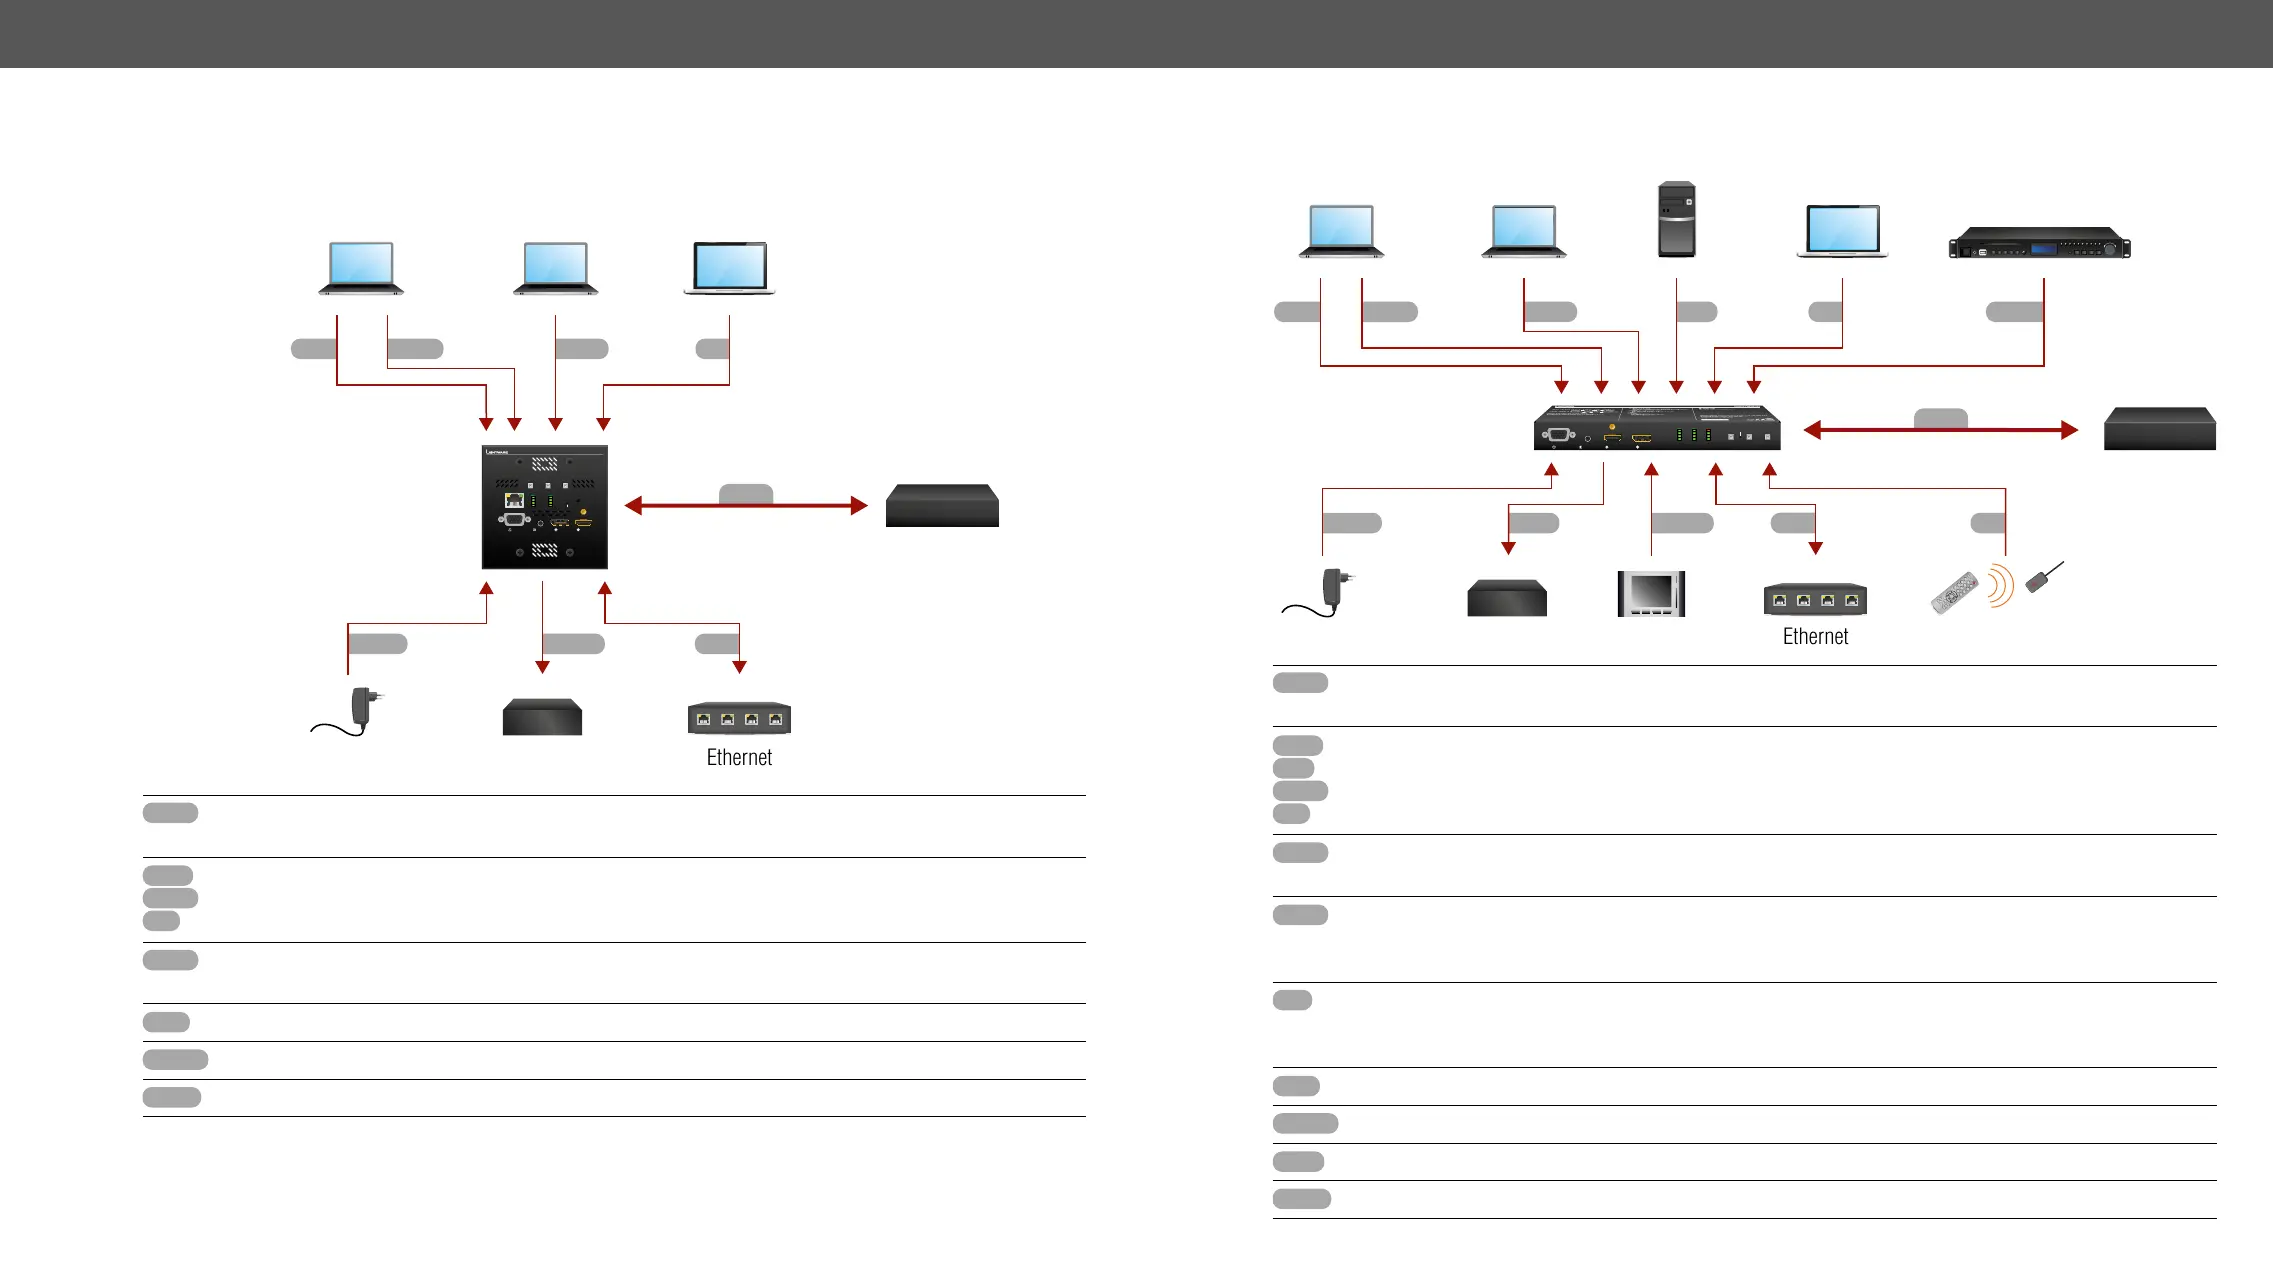
FP/WP-UMX-TPS-TX100 series
Power
EthernetPower adaptor
FP/WP-UMX-TPS-TX100 series
transmitter
HDMIVGA DPAudio
LAN
RS-232
CATx
Compatible
receiver or
input board
WWPP--UUMMXX--TTPPSS--TTXX113300--UUSS
VIDEO
Autoselect
HDMI
INPUT STATUS
SHOW
ME
DP
VGA
AUDIO
TPS LINK
HDMI
DP
AUDIO
AUDIO
SELECT
IR
VIDEO
SELECT
RESET
Ethernet
AUDIO IN
HDMI IN
VGA IN
DP IN
Connect the transmitter and a compatible receiver or the matrix input board by a CATx cable via the
TPS connectors.
HDMI
cables.
Optionally connect an asymmetric audio device with unbalanced audio signal (e.g. a VGA laptop)
to the 2.5" TRS (jack) audio input port.
Optionally connect the transmitter to a LAN network in order to control the device.
See powering options in the next section.
UMX-TPS-TX100 series
Power
GPIO
IR
EthernetPower adaptor Infrared
UMX-TPS-TX100 series
transmitter
HDMI DVI
VGA
DP
Audio
Audio
LAN
RS-232
VIDEO AUDIO
DVI-A Video
Autoselect
HDCP
Audio2
DVI-D
DP
DVI-D
DP
SHOW
ME
AUDIO
SELECTINPUT STATUS
VIDEO
SELECT
HDMI HDMI
VGA
Audio1
RESET
AUDIO1 IN HDMI IN DP IN VGA IN
CATx
Compatible
receiver or
input board
Touch panel
Connect the the transmitter and a compatible receiver or the matrix input board by a CATx cable via
the TPS connectors.
HDMI
DVI
cables.
Optionally connect an asymmetric audio device with unbalanced audio signal (e.g. a VGA laptop)
to the 2.5" TRS (jack) audio input port.
Optionally connect a symmetric audio device with balanced audio signal (e.g. a media player) to
the 5-pole Phoenix audio input port. See the wiring guide for the connector in the Audio Cable
section.
Optionally for Infrared control:
- Connect the IR emitter to the IR OUT port of the device.
- Connect the IR detector to the IR IN port of the device.
Optionally connect the transmitter to a LAN network in order to control the device.
See powering options in the next section.
 Loading...