214713 184 Revision A
1010974
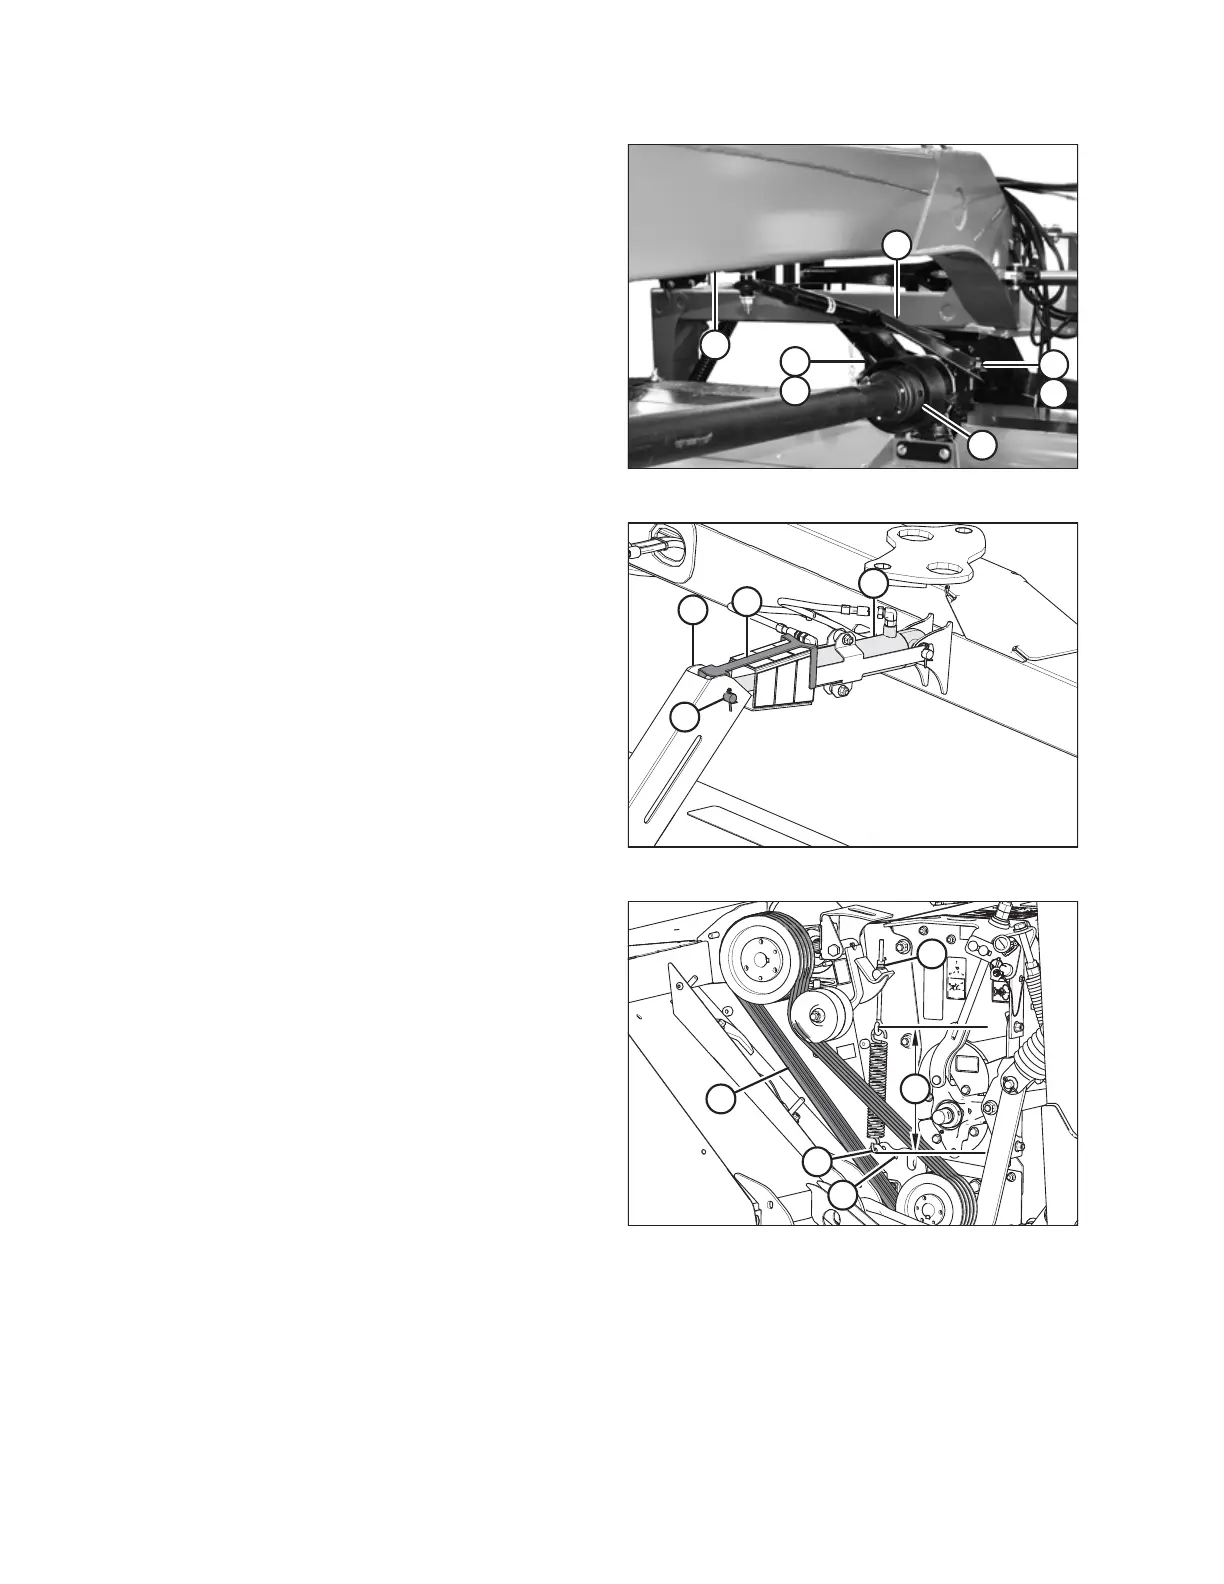
A
B
C
A
B
D
E
Figure 9.30: Aft Driveline and Steering Arm
11. Undo strapping or wire supporting driveline to hitch (D),
and connect driveline (E) to header swivel gearbox.
Refer to 3.5 Attaching Clutch Driveline, page 26.
12. Remove hex head bolts (A) and spacers (B) from
gearbox.
13. Undo strapping or wire supporting steering arm to hitch,
and position steering arm weldment (C) on gearbox.
14. Secure steering arm to gearbox with spacers (B) and
hex head bolts (A). Apply high-strength threadlocker
(Loctite
®
262 or equivalent) to front holes and torque
bolts to 203 Nm (150 lbf∙ft).
1018206
A
B
C
D
Figure 9.31: Center-Link and Indicator Links
15. Undo strapping or wire securing center-link (B) and
indicator (D) to carrier frame.
16. Remove pins and hardware from anchor (C).
17. Attach center-link (B) and indicator (D) to anchor (C)
with clevis pin (A) and secure with cotter pin.
1022673
A
B
C
D
E
Figure 9.32: Conditioner Drive
NOTE:
Ensure proper pulley configuration installation—large
pulley installed onto gearbox for both roll and
finger conditioners.
18. Install conditioner drive belts (A) onto pulleys.
19. Check that tensioner spring is installed at
correct location:
• Hole (D) for roll conditioner
• Hole (E) for finger conditioner
20. Tighten idler tensioner nut (C) until spring length (B)
measures 366 mm (14-3/8 in.).
21. Tighten jam nut.
22. Replace the driveshields. Refer to 6.3 Closing
Driveshields, page 126.
CHANGING THE CONDITIONER