214713 50 Revision A
Installing Electrical Components
Installing Light Assemblies
1015032
A
Figure 3.99: Transport Lighting
1. Disconnect the wiring harnesses at the left light
assembly; there are two connectors per assembly.
2. Remove the left light assembly (A).
NOTE:
Right side was removed earlier.
1015039
A
C
B
Figure 3.100: Left Side of Carrier
3. Remove red lamp (C) from the right light assembly
(removed in an earlier procedure). Align red lamp (C)
with the predrilled holes, in the left lamp bracket, next to
amber lamp. Secure the red lamp with
existing hardware, as shown.
4. Install right light assembly (A) on the left float spring
mount using bolts (B) removed in Step 2, page 50. Red
lamp (C) should be towards rear of machine when in
transport mode.
1011253
A
B
C
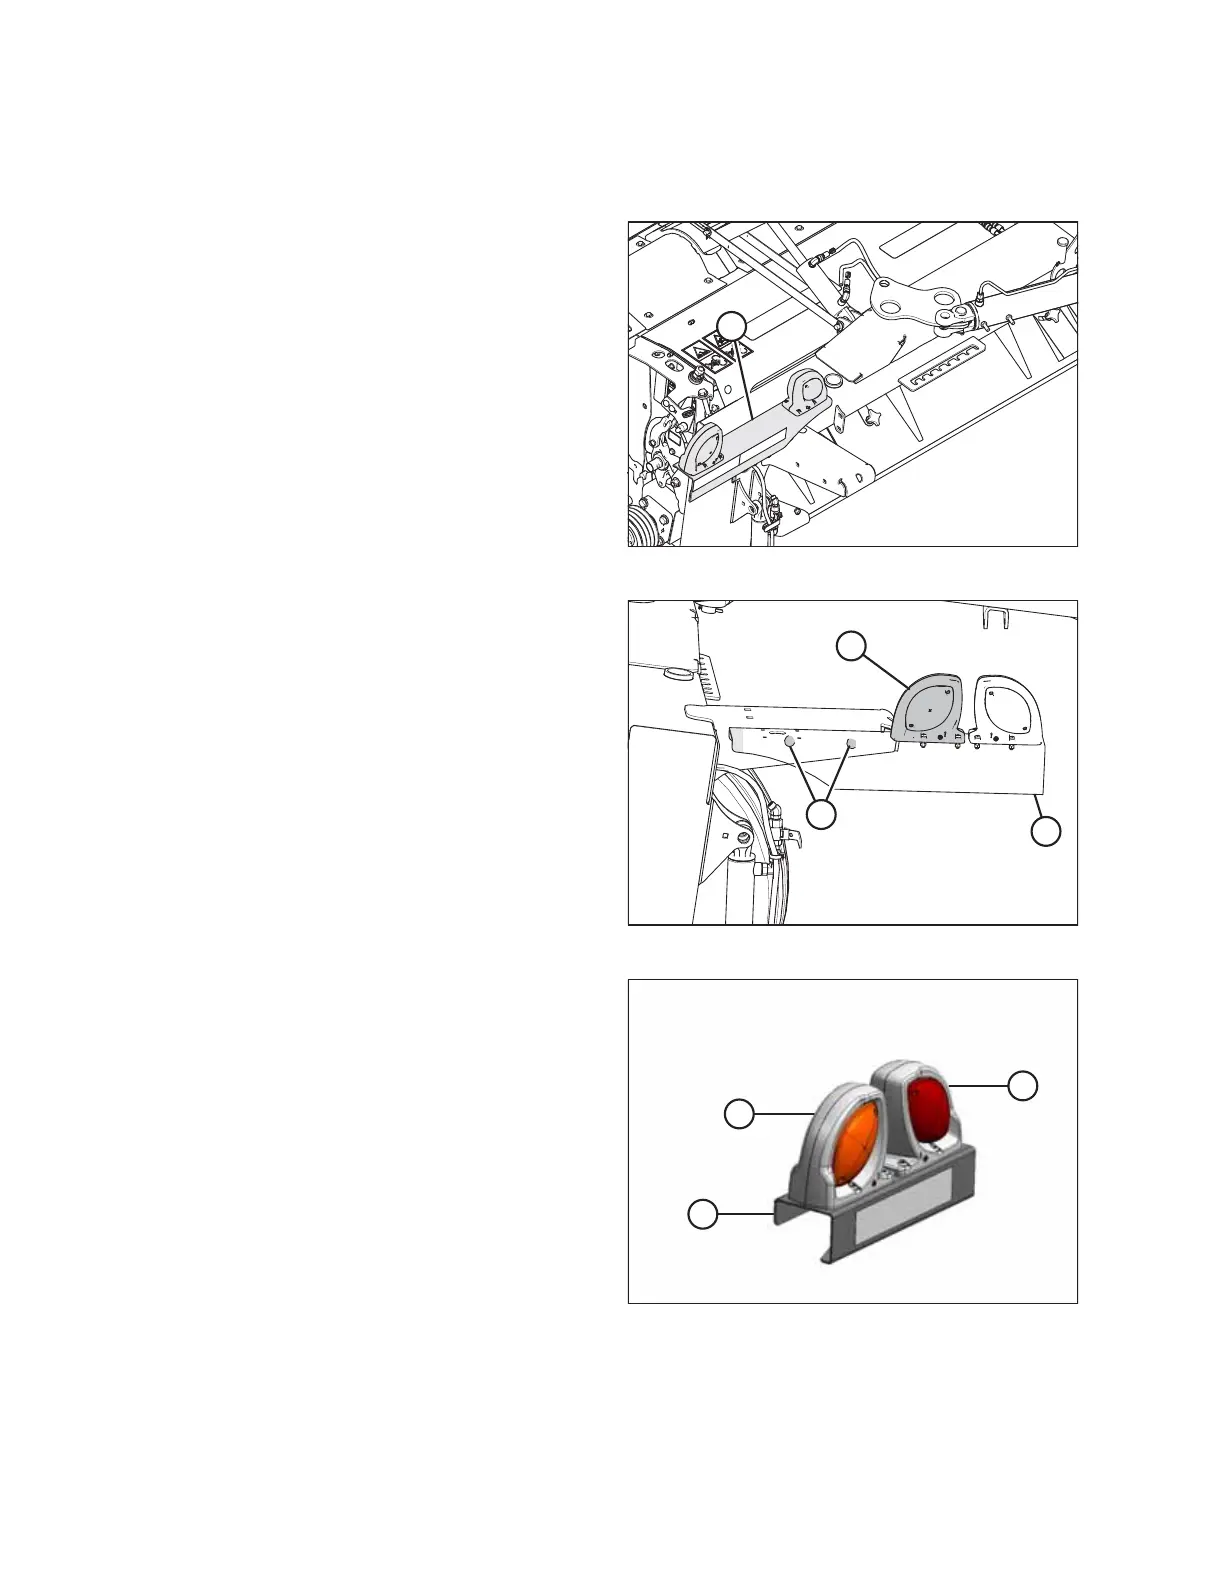
Figure 3.101: Light Assembly
5. Retrieve new light bracket (C) from shipment.
6. Install amber lamp (A) and red lamp (B) onto new
bracket (C), previously removed from the right lamp
bracket, with hardware provided.
ASSEMBLING THE DISC MOWER (WITH OR WITHOUT THE DEALER-INSTALLED TRANSPORT)