Manitowoc Published 05-09-17, Control # 014-28 2-11
16000 SERVICE/MAINTENANCE MANUAL HYDRAULIC SYSTEM
SAE Straight Thread Connection
This type of connection leaks most often because the jam
nut and washer are not backed up before assembly.
When the jam nut and washer are not backed up, there is not
enough room for the O-ring when the squeeze takes place
and the washer cannot seat properly as shown in
Figure 2-11
, View A. The compressed rubber between the
washer and the spot face will cold flow out of compression,
causing the fitting to loosen and leak as shown in
Figure 2-11
, View B.
Tighten SAE straight thread connections, as follows:
1. Back up jam nut and washer to end of smooth portion on
fitting as shown in Figure 2-12
, View A.
2. Lubricate O-ring with clean oil; this is very important.
3. Thread fitting into port until washer bottoms against spot
face as shown in Figure 2-12
, View B.
NOTE: If an elbow is being used, back it out as necessary
to align it with hose.
4. Tighten jam nut. When fitting is properly installed, O-ring
will completely fill seal cavity and washer will be tight
against spot face as shown in Figure 2-12
, View B.
Table 2-3 Straight Thread Leakage
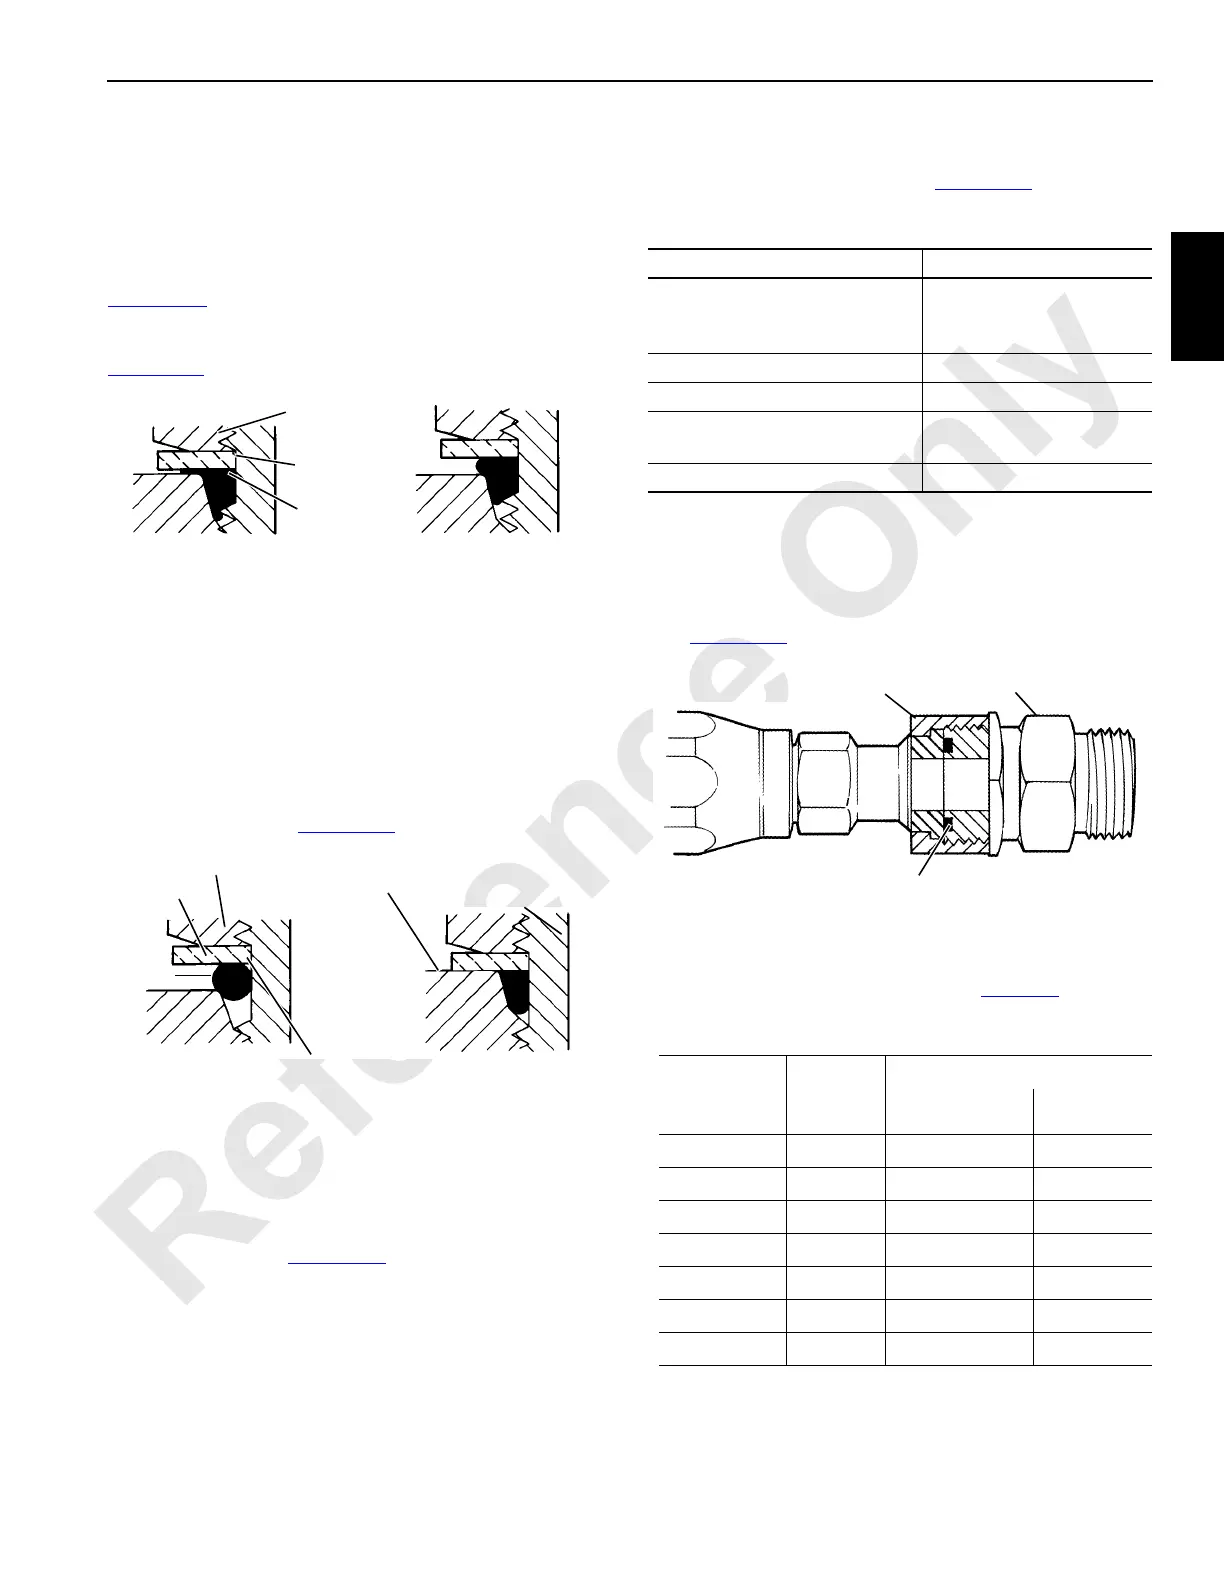
ORS Connection
NOTE: ORS is the registered trade mark for a face-type
seal manufactured by Aeroquip Corporation.
1. Lubricate and install O-ring in adapter groove
(Figure 2-13
).
2. Lubricate threads.
3. Tighten nut to torque value given in Table 2-4
.
Table 2-4 ORS Assembly Torque
View A
O-Ring
Washer
Jam Nu
t
FIGURE 2-11
Washer cannot seat properly on
spot face. Compressed rubber
between washer and spot face
will cold flow out of compression,
causing fitting to loosen and leak.
When jam nut and washer
are not backed up, there is
not enough room for O-ring
when squeeze takes place.
S107
View BView A
View A
View B
Washer
Jam Nu
t
FIGURE 2-12
Nut and washer backed
up to end of smooth
portion on fitting.
S106
Spot Face
O-Ring
Causes Cures
Jam nut and washer not backed
up at assembly, causing O-ring
to be pinched.
Replace O-ring and
tighten fitting properly.
O-ring cut. Replace.
O-ring wrong size. Replace with proper size.
Sealing surfaces gouged or
scratched.
Repair if possible or
replace damaged parts.
Sealing surfaces dirty. Clean and lubricate.
Nut Size
in (mm)
across flats
Fitting
Size
Torque
In-Lb Nm
5/8 (15,9) -04 120 – 145 14 – 16
13/16 (20,6) -06 203 – 245 23 – 28
15/16 (23,8) -08 380 – 470 43 – 53
1-1/8 (28,6) -10 550 – 680 62 – 77
1-3/8 (34,9) -12 763 – 945 86 – 107
1-5/8 (41,3) -16 1110 – 1260 125 – 142
1-7/8 (47,6) -20 1500 – 1680 170 – 190
Nut
Adapter
O-Ring
FIGURE 2-13
S105
 Loading...


