System Self-Test Preoperative Tests
4 - 6 046-003777-00 A5/A3™ Operating Instructions
The following step is recommended when replacing an O
2
sensor:
• Complete the 21% and 100% O
2
Calibration (see “O
2
Sensor Calibration” on page7-6).
The following step is recommended to be performed weekly, whenever a new vaporizer is
installed or when CO
2
absorbent is replaced:
• Perform a vaporizer leak test (see “Vaporizer Leak Test” on page4-22).
4.4 System Self-Test
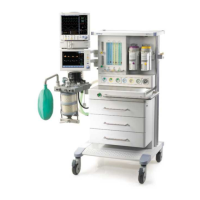
When the A5/A3 is powered on, it performs a self-test to ensure its alarm system (alarm LED, speaker,
and buzzer) and hardware (flowmeter board, ventilator board, assistant ventilator board, power
board, and CPU board) are properly functioning.
Perform a System Self-test:
1. Turn the system switch on the front panel to the ON position. The A5/A3 powers up and
begins its system self-test. See TABLE4-1 for the system self-test sequence.
After the system self-test is completed, the test results are displayed on the screen. Startup
alarm messages also may be displayed.
See TABLE4-2 for a list of possible test result conditions.
See “Startup Alarm Messages” on page6-18 for a list of Startup Alarm Messages.
2. Proceed to operate or troubleshoot the A5/A3 based on the self-test results.
SYSTEM SELF-TEST SEQUENCE COMMENTS
1. A high-pitched beep is sounded. Alarm self-test
2. The A5/A3 startup screen is displayed.
3. The LED above the touchscreen illuminates in sequence:
red, yellow, and blue.
Alarm self-test
4. A test low priority alarm is sounded. Alarm self-test
5. The System Self-Test progress bar is displayed.
6. The System Self-Test is automatically started. Hardware self-test
7. The results of the System Self-Test are displayed.
TABLE 4-1 A5/A3 System Self-Test Sequence
 Loading...
