36
Operation of the Monitor Wall
Displaying a Source in Full Screen Mode
Loading a Layout by Using the RCP-200
To load a layout on the monitor wall, by using the RCP-200
1 Touch LAYOUT SELECT on the RCP-200’s right-hand screen.
The layout chooser view appears.
2 Rotate the TAKE knob to locate the layout you wish to load, scrolling the list as needed.
3 Once you have selected the layout you wish to load, press TAKE.
After a moment, the new layout appears on the monitor wall, and the RCP-200’s right-
hand screen returns to the ASSIGN CHANNEL panel.
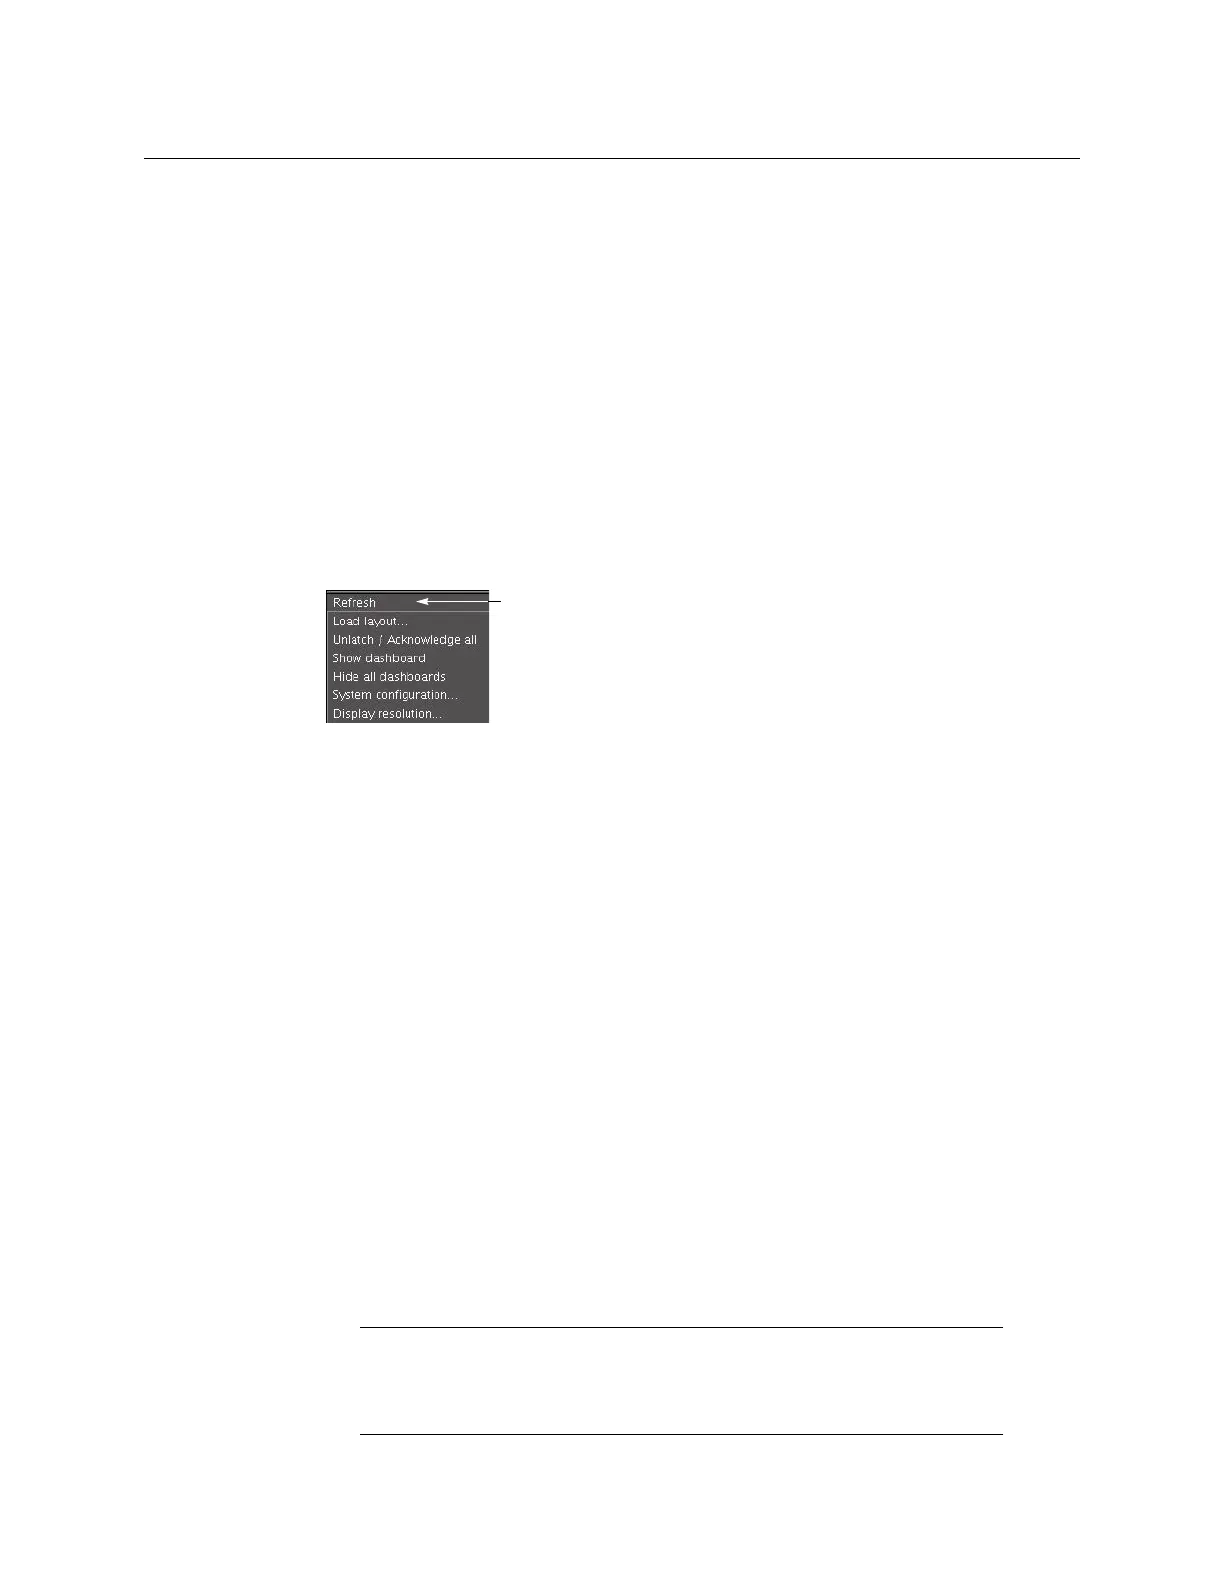
Refreshing a Layout
To refresh a layout
• Right-click anywhere on the monitor wall, point to Monitor wall (if you clicked a layout
element), and then click Refresh on the shortcut menu.
Displaying a Source in Full Screen Mode
To display a source in full screen mode from the Kaleido-RCP2
1 Move the pointer over the video source you wish to display in full screen mode.
2 Press FULL SCREEN on the Kaleido-RCP2.
The full screen layout assigned to the current user is loaded into the full screen zone.
To display a source in full screen mode from the RCP-200
1 Touch the WALL MOUSE category if it is not already selected, and then move the
pointer over the video source you wish to display in full screen mode on the monitor
wall.
2 If you have yet to assign the FULL SCREEN wall function to one of the programmable
knobs, rotate the knob you wish to program until FULL SCREEN is selected, and then
press the knob.
FULL SCREEN appears above the programmed knob.
3 Press the FULL SCREEN knob.
The full screen layout assigned to the current user is loaded into the full screen zone.
To close the full screen view
• Move the pointer over the full screen zone, and then press FULL SCREEN again, on the
Kaleido-RCP2 or RCP-200.
Note: A full screen layout can also be loaded by configuring actions in
XEdit.
See Managing Layouts on page 200, for information on creating a full
screen layout, and refer to Creating Actions, on page 267, for detailed
instructions.