EasyManuals Logo

Mitsubishi FX3U Series User Manual

Mitsubishi FX3U Series
476 pages
To Next Page IconTo Next Page
To Previous Page IconTo Previous Page
Page #140 background imageLoading...
Page #140 background image
FX3U Series Programmable Controllers
User’s Manual - Hardware Edition
134
8 Installation In Enclosure
8.5 Procedures for Installing on and Detaching from DIN Rail
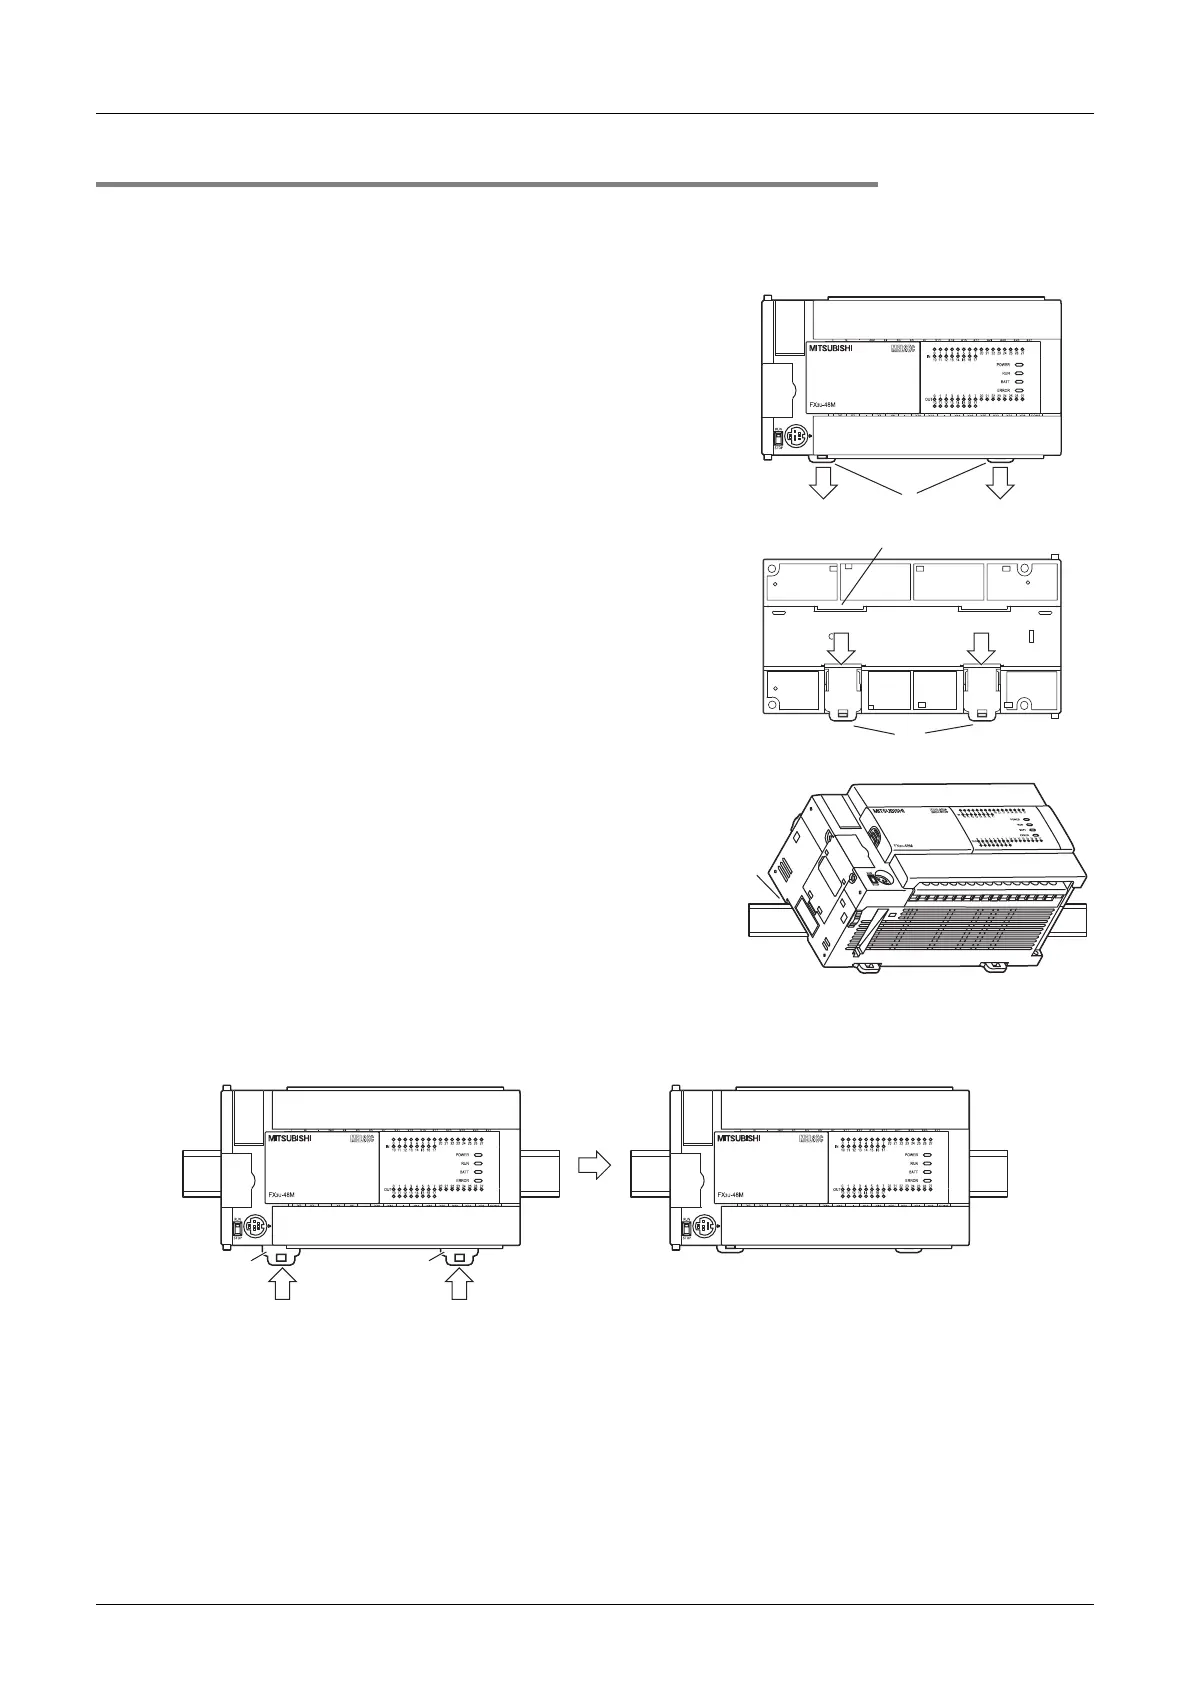
8.5.2 Installation of main unit
The main unit must be installed before installing a expansion board or special adapter on the enclosure.
For the connection procedure, refer to Subsection 8.7.2, 8.7.3, and 9.5.2.
1 Push out all DIN rail mounting hooks (A in
the right figure).
2 Fit the upper edge of the DIN rail mounting
groove (C in the right figure) onto the DIN
rail.
3 Lock the DIN rail mounting hooks (D in the
following figure) while pressing the PLC against the DIN rail.
11
A
C
1
A
1
C
33
DD

Table of Contents

Other manuals for Mitsubishi FX3U Series

Questions and Answers:

Question and Answer IconNeed help?

Do you have a question about the Mitsubishi FX3U Series and is the answer not in the manual?

Mitsubishi FX3U Series Specifications

General IconGeneral
ModelFX3U Series
Program Memory64k steps
Execution Speed0.065 μs/basic instruction
TypePLC (Programmable Logic Controller)
Power Supply100-240V AC
I/O PointsUp to 384
CommunicationUSB
ExpansionSupported via expansion modules
High-Speed CountersUp to 6 channels
Analog Input/OutputAvailable via expansion modules
Temperature Range0 to 55°C
Programming LanguageLadder Logic, Structured Text
Built-in FunctionsPID control
Humidity5 to 95% (non-condensing)

Related product manuals