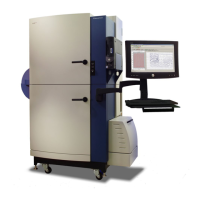
FLIPR
®
Tetra High Throughput Cellular Screening System User Guide
0112-0109 H 159
Preparing Cells for Suspension Assays
Location of Cells in the Plate
Suspension cells can be used for luminescence experiments. In this
case, cells are kept in uniform suspension by the Cell Suspension
option, which consists of a cell suspension module and reservoir
system. Suspended cells are first pumped to the reservoir and then
delivered to the read plate by the FLIPR
®
Tetra System pipettor head.
These assay methods are also described in the literature, for example,
in Boie et al., Eur. J. Pharmacol., 340(2-3):227-241 (1997), and in
United States Patent 6,872,536 and European Patent 1,145,002. Users
interested in the patented methods may wish to consult legal counsel in
evaluating these patents.
Cell Densities
Cell densities in luminescence suspension assays vary. Depending on
the bioluminescence signal from the cells, the density can be adjusted
to reach appropriate signal window. Bright cells can be diluted, while
dim cells might require a higher concentration. The suggested cell
densities are 1,000–5,000 cells per well for 1536-well plates,
2,500–10,000 cells per well for 384-well plates, and 5,000–40,000 cells
per well for 96-well plates.
Cell Seeding
The size of the experiment will dictate the number of cells required. A
typical CHO-based 100-plate suspension cell assay requires
approximately 250–300 × 10
6
cells in the suspension cell flask. This
can be accomplished by culturing cells in multiple layer flasks. Cells
should be split 2–3 days prior to the assay and not be more than
80–90% confluent prior to antibiotic removal. All flasks should be
incubated at 37 °C and 5% CO
2
. One day prior to testing, spent media
from each flask should be replaced with growth media that does not
contain selection antibiotics.
Powering-Up the System
To ensure proper system function, power the instrument well before
you begin an experiment. The camera requires about five minutes to
reach its operating temperature, and if you are heating the plate stage
(Instrument > Manual Operation > Temperature Control), allow
15 minutes for complete temperature equilibration (check the
Instrument Status window for stage temperature).
Follow the start-up procedure in Startup and Shutdown on page 41.
Make sure the appropriate pipettor head, wash reservoir, LED banks
and filters are in place prior to starting the instrument. If incorrect

 Loading...