Chapter 4 - Terminals and Optional Equipment
Chapter 4 4 - 47
4.15.3.1 Installing the ADA Adapter:
1. Set the dip switch for recording: Position 1 and 6 ON, all others OFF.
2. Unplug the keyset completely: line cord, LAN cable, and any power adapter which may be
connected to the keyset.
3. Lower the legs of the keyset if they are raised.
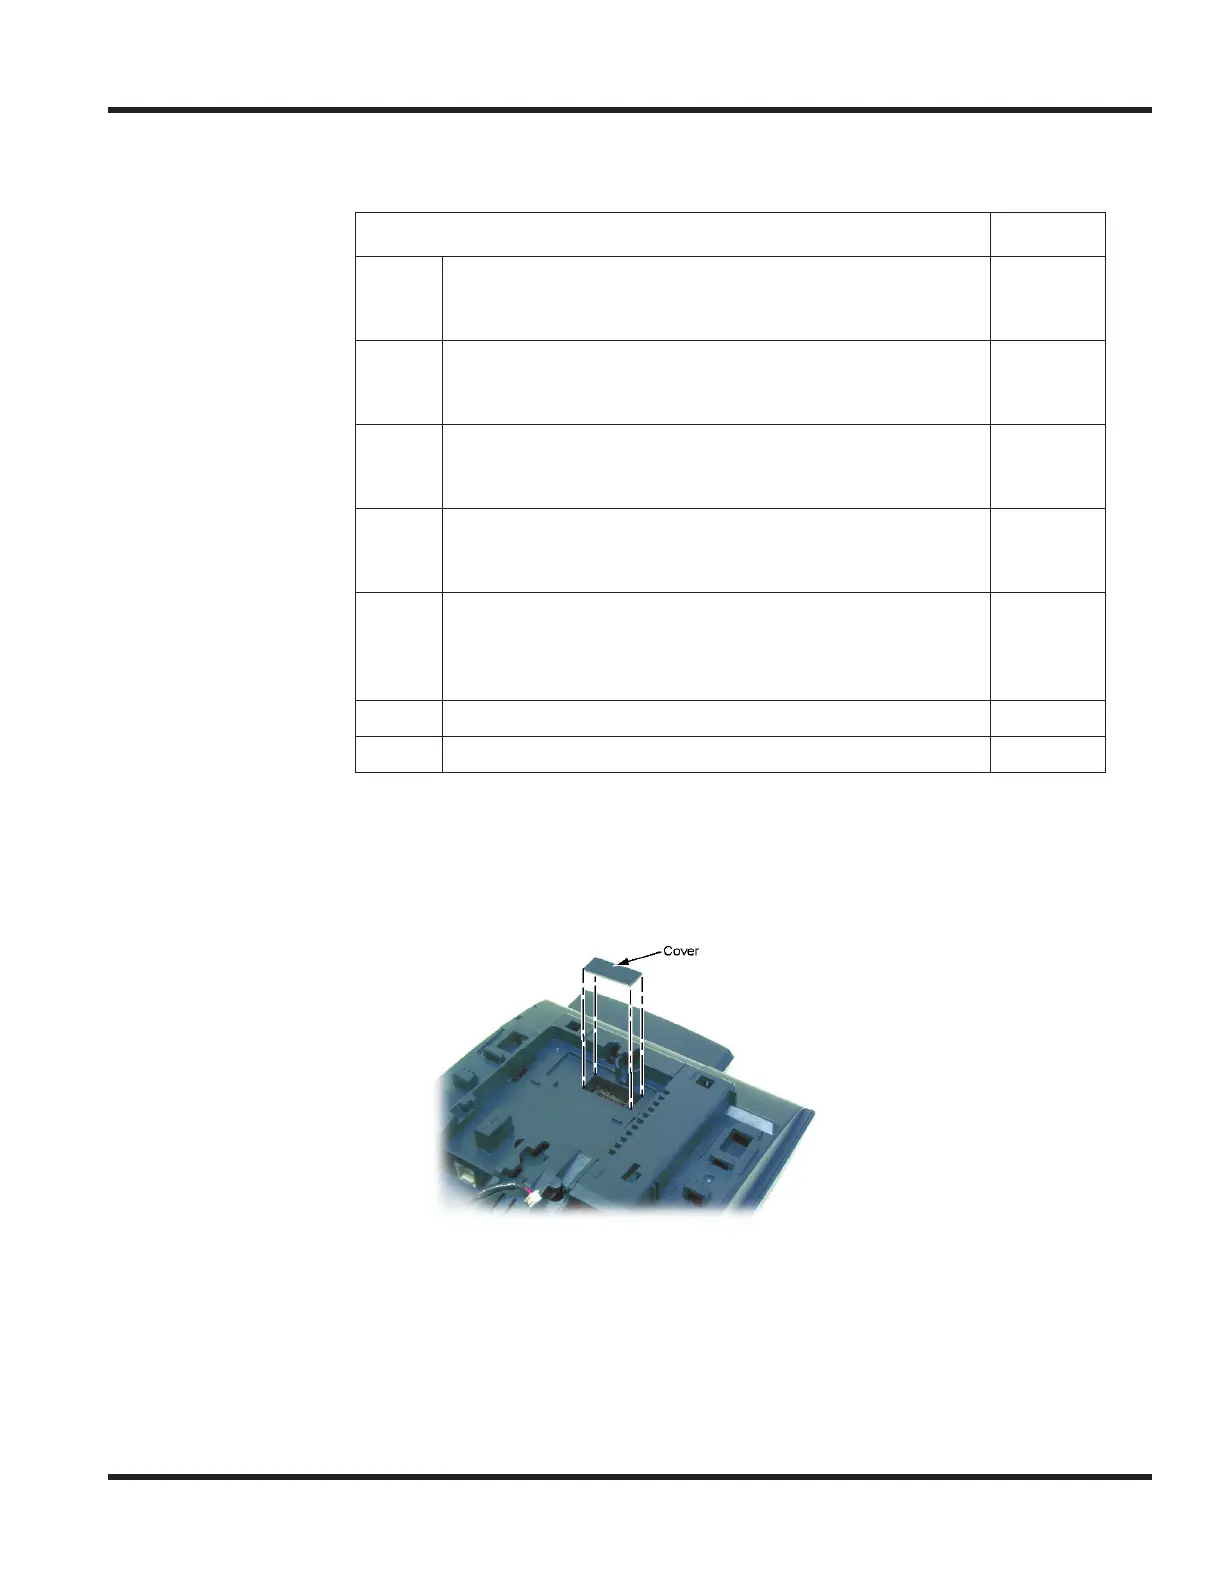
4. Remove the connector cover on the bottom of the keyset.
Figure 4-24: REMOVE THE CONNECTOR COVER
ADA Dip Switches Default
Bit 1
Confirmation tone when recording starts.
On: Enable Tone
Off: Disable Tone
ON
Bit 2,
Bit 3
Output audio on “OUT” port.
Both On: Output
Both OFF: No Output
Both OFF
Bit 4
Sending start signal of recording equipment.
On: Send Signal
Off: No Signal
ON
Bit 5
Termination Impedance for OUT Jack
On: 30 Ohm (recording level lower)
Off: 600 Ohm (recording level higher)
OFF
Bit 6
Reset when recording finished (for loading ADA adapter
firmware only).
ON: Normal Use (mandatory)
OFF: Loading Firmware
ON
Bit 7
Unused OFF
Bit 8
Unused OFF

 Loading...


