ACCESS GATEWAY
System Administration 213
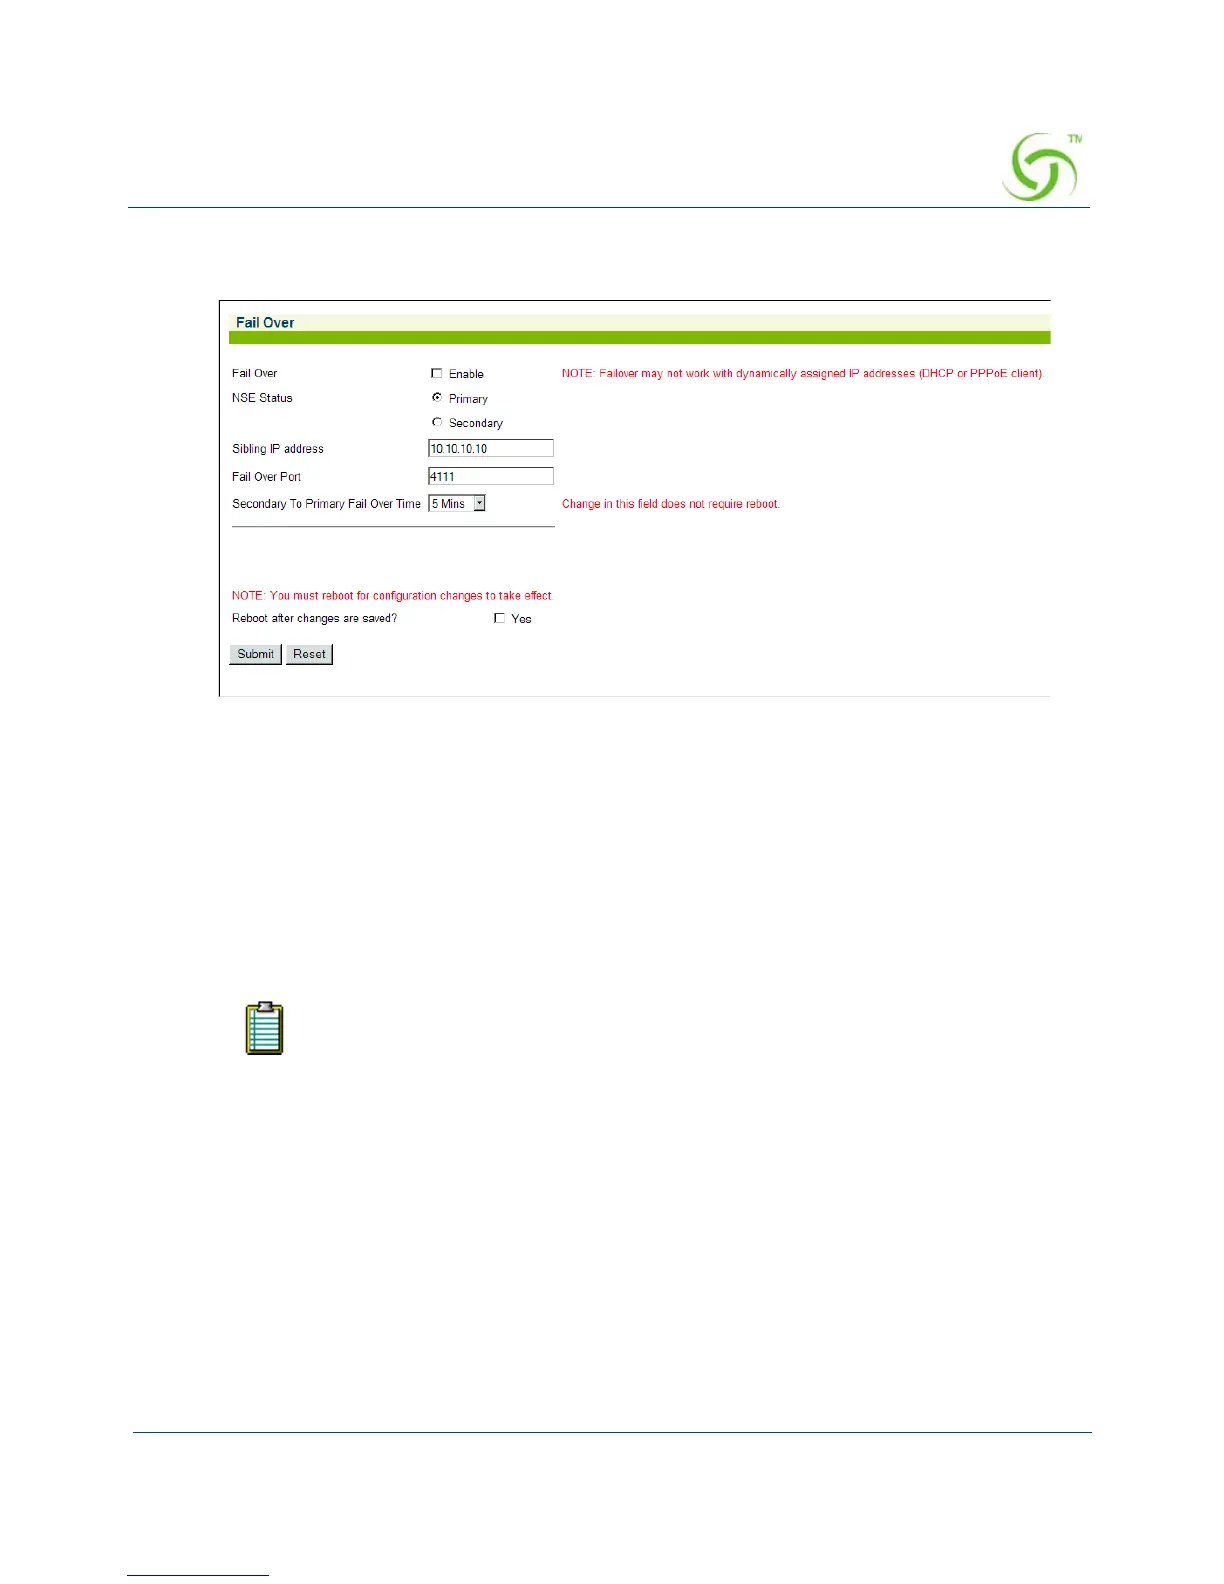
1. From the Web Management Interface, click on System, then Fail Over. The Fail Over
screen appears:
2. Enable or disable the Fail Over feature, as required.
3. If you enabled Fail Over, define the Sibling Status (Primary or Secondary).
4. Enter an IP address in the Sibling IP Address field.
5. Define the port in the Fail Over Port field.
6. Select the Secondary To Primary Fail Over Time. The time set here is how long the
Secondary will wait while not receiving messages from the Primary before it takes over.
7. Click on the check box for Reboot after changes are saved?
8. Click on the Submit button to save your changes, or click on the Reset button to reset all
values to their previous state.
Viewing the History Log {History}
You can view a history log of the system’s Access, Reboot, and Uptime activities. The history
log contains up to 500 entries. Over 500 entries and each new log item removes the oldest
entry in the list. The latest entry is always at the top of the list.
If you are using RADIUS, it is recommended to add both Nomadix gateways to the
RADIUS server.