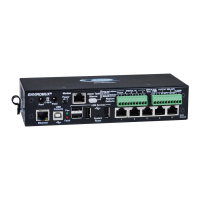
NTI ENTERPRISE ENVIRONMENT MONITORING SYSTEM
26
Data and Event Logging
The ENVIROMUX can log sensor readings, sensor alerts, alert handling, sensor connections/removals, and user
logins/logouts. The logs can be viewed at any time through the web interface (page 113). Additionally, as entries are generated,
they can be emailed or sent as SNMP traps. Entries can be deleted from the logs via the web interface. The maximum size of
each log is 1000 entries, listed in chronological order. Each log’s behavior upon reaching this maximum size can be configured,
allowing the log to either wrap (overwrite oldest entries), stop logging, or clear and start over. The entire log can be downloaded
as a plain text file from the web interface at any time. Log entries can be removed individually, in groups, or all at once.
Email
The ENVIROMUX can access an outgoing SMTP server (authenticated or non-authenticated, with or without SSL
encryption) to send email. Outgoing mail may contain pre-formatted alert notifications or data log messages (samples on page
113). The user can configure what conditions cause emails to be sent. The ENVIROMUX’s email address can be configured
through the web interface on the Enterprise Setup page (page 71), and SMTP server information can be configured on the
Network Setup page (page 74). Up to 17 outgoing email addresses (112 characters max. including commas) may be configured
(corresponding to the 16 user and 1 root email addresses). An example of email configuration can be found in "How to Setup
Email".
Syslog
The ENVIROMUX can send alerts as SYSLOG messages when a sensor enters/leaves alert mode, and for all log
events. The destination for SYSLOG can be configured in each user profile (page 84). For detailed instructions on setting up
Syslog, see "How to setup Syslog
".
SNMP
The ENVIROMUX can send alerts as SNMP traps when a sensor enters/leaves alert mode, and for all log events. Using
an SNMP MIB browser, a user can monitor all sensor statuses and system IP settings, as well as configure sensor thresholds,
sensor names, and the system name. Click on the checkbox for SNMP under contacts (page 84) for each user that should
receive SNMP messages. The SNMP agent supports SNMP v1, v2c and v3.
Note: The SNMP MIB file (sems-16-v1.xx.mib), for use with an SNMP MIB browser, can be found at
http://www.networktechinc.com/download/d-environment-monitor-16.html.
Several SNMP related supplemental instructions can be found in "How to setup SNMP
".
SNMP Sensors
The ENVIROMUX can now (firmware version 2.61 and later) poll up to 32 third-party SNMP devices (i.e. a UPS or
Rebooter) and be setup to send alert messages for configured events based on the information received. Using smart alert
events a user can be made aware when network connected devices perform outside of desired parameters.
Modbus TCP/IP Support
The ENVIROMUX is equipped with Modbus TCP/IP support to enable PLC controls to read the value/state of some of the sensors
and read and command the state of relays. Specific instruction on this topic can be found here
.
External Modem
An external modem (GSM) can be connected to allow the system to send alert notifications via SMS messages. When a
sensor crosses a threshold, an alert notification can be formatted to SMS message (see page 84) and the modem could transmit
the message to pre-specified cellular numbers (up to 17- one for each user). The external modem can be supplied from an
external power supply or from the USB port.
Power-on/Reset Operation
On power-up, after going through its boot sequence, the ENVIROMUX will launch the monitoring application, load any
stored configuration values, and immediately identify and begin taking readings from any connected sensors. Alerts will be
reported using the configured alert methods, and data will be logged using the stored preferences. A user can log in at any time
after the system has launched the monitoring application (approximately 60 seconds after power is applied) to view and configure
properties of the system and its sensors.
FYI: The boot sequence can also be initiated manually using the System Reset button. See page 119 for details.
 Loading...