45762101TH Rev.1
4-28
①
①
Hook
FFC cable
Holder-Head
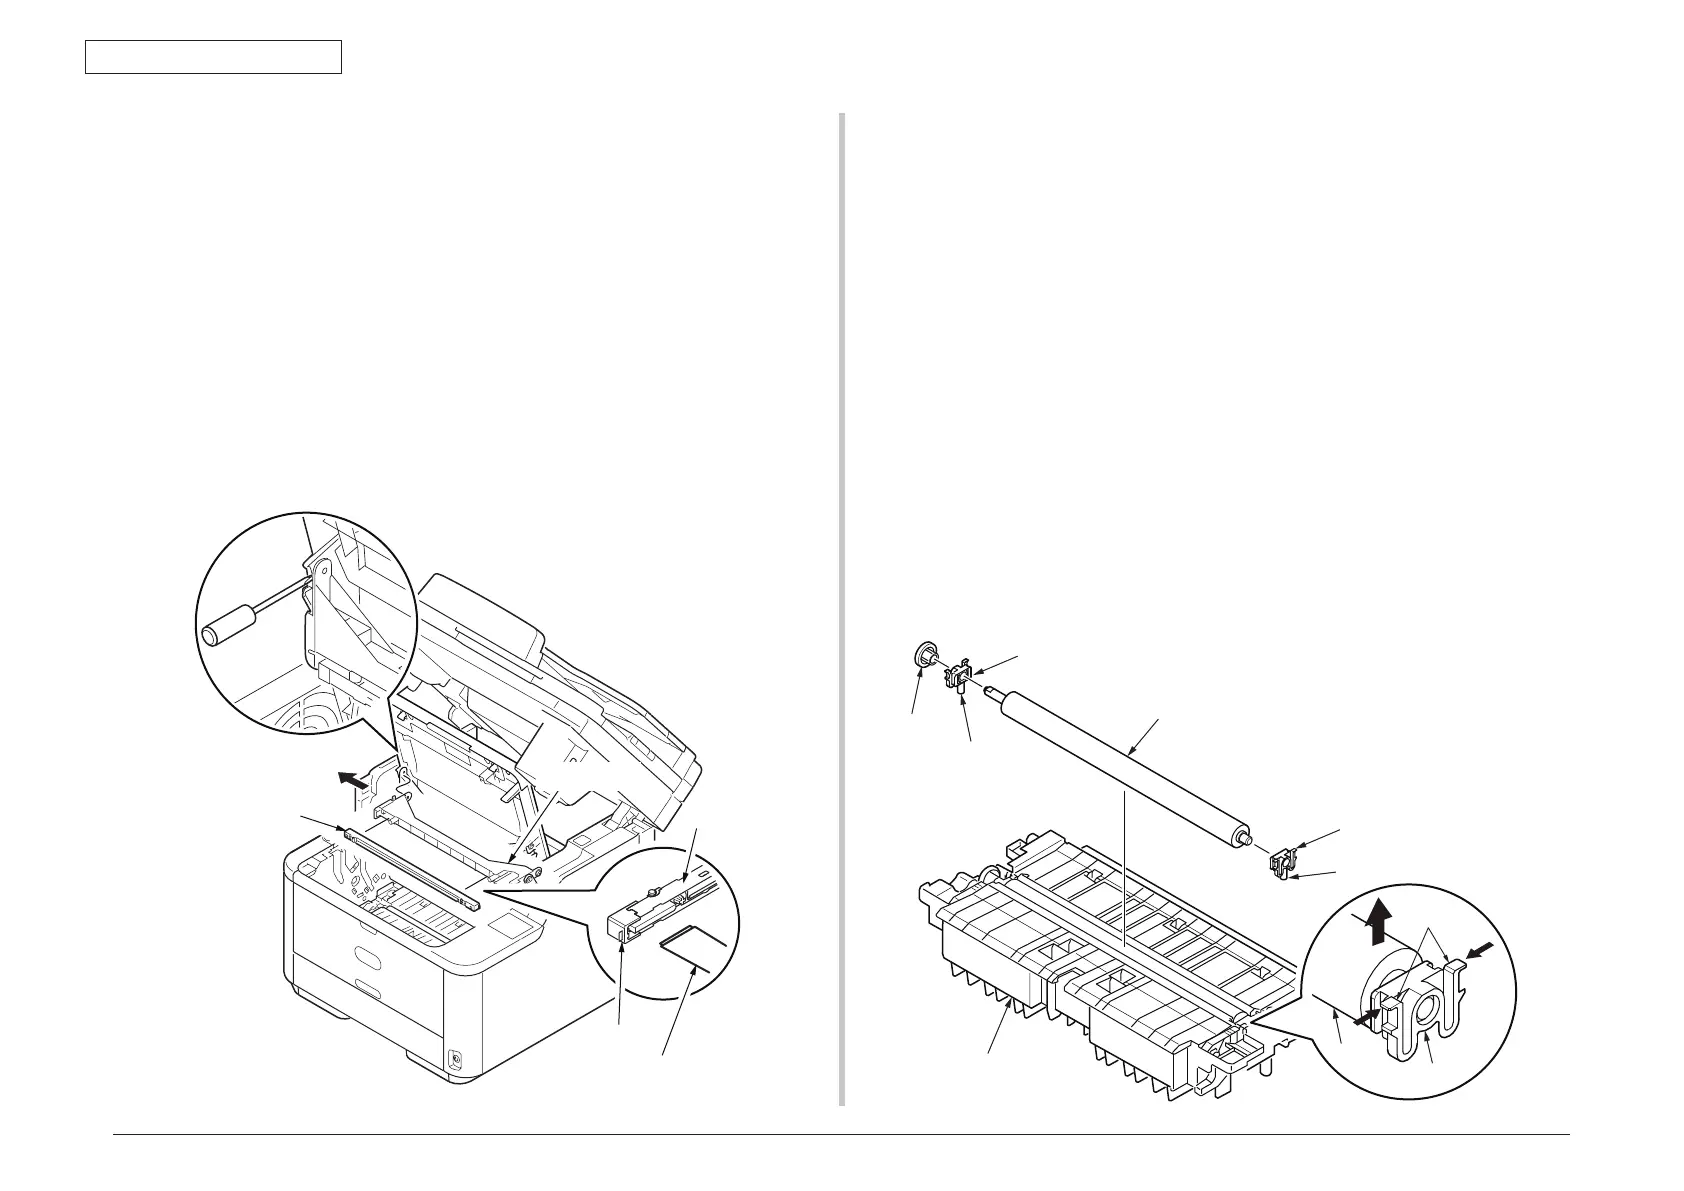
4.2.10 LED Head
(1) Open the Stacker Cover.
(2) Remove the ID UNIT.
(3) Disengage the tab of the Holder-Head from the stacker cover by using a
flat-head screwdriver or something.
(4) Pull the Holder-Head toward you as illustrated below.
(5) Open the Holder-Head by arrow direction and then remove the hook.
remove the LED Head
①
.
(6) Remove the FFC cable from the connector of LED Head
①
.
(7) Installing is performed by the reverse procedure with removing.
Note! Beware of not to touch or press the Lends of LED Head directly.
4.2.11 Frame-Assy-TR
(1) Open the Stacker Cover.
(2) Remove the ID UNIT.
(3) Take the Frame-Assy-TR out of the printer.
(4) Disengage the latches of Bearing-TR
①
on both ends.
(5) Hold the Bearing-TR
①
on the both side, and then lift up the Roller-Transfer
②
.
(At this moment, Gear-TR
③
is also removed.)
(6) Installing is performed by the inverse procedure with removing.
Note! (to assemble)
1. While installing, pay attention to the up-and-down direction of Bearing-TR
①
.
2. Operating carefully, not to touch Roller-Transfer
②
surface.
3. Be careful not to fit each Bearing-TR
①
to the Frame-Assy-TR with their
springs inclined.
4. The each Bearing-TR and Spring are common. After assembled, strong
the gear side pressure.
Frame-Assy-TR
②
②
①
①
Spring
Latch
Spring