4-64 Service Manual
e. Continue entering and pausing.
5. After the 32nd number is entered and becomes solid, the number is automatically entered.
• If the number is incorrect, Checksum does not match appears, and the original screen appears to
re-enter the value.
• If the number is correct, Saving changes to NVRAM appears.
Tray present sensor removal
1. Remove the media tray.
2. Remove the imaging unit. See “Imaging unit (IU) removal” on page 4-40.
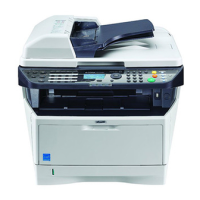
3. Remove the rear screw (A) in the waste toner bottle sensor contact to allow access to the cable cover.
Note: The waste toner bottle sensor contact does not need to be unplugged or removed.
4. Remove the four screws (B) from the cable cover, and remove the cable cover.
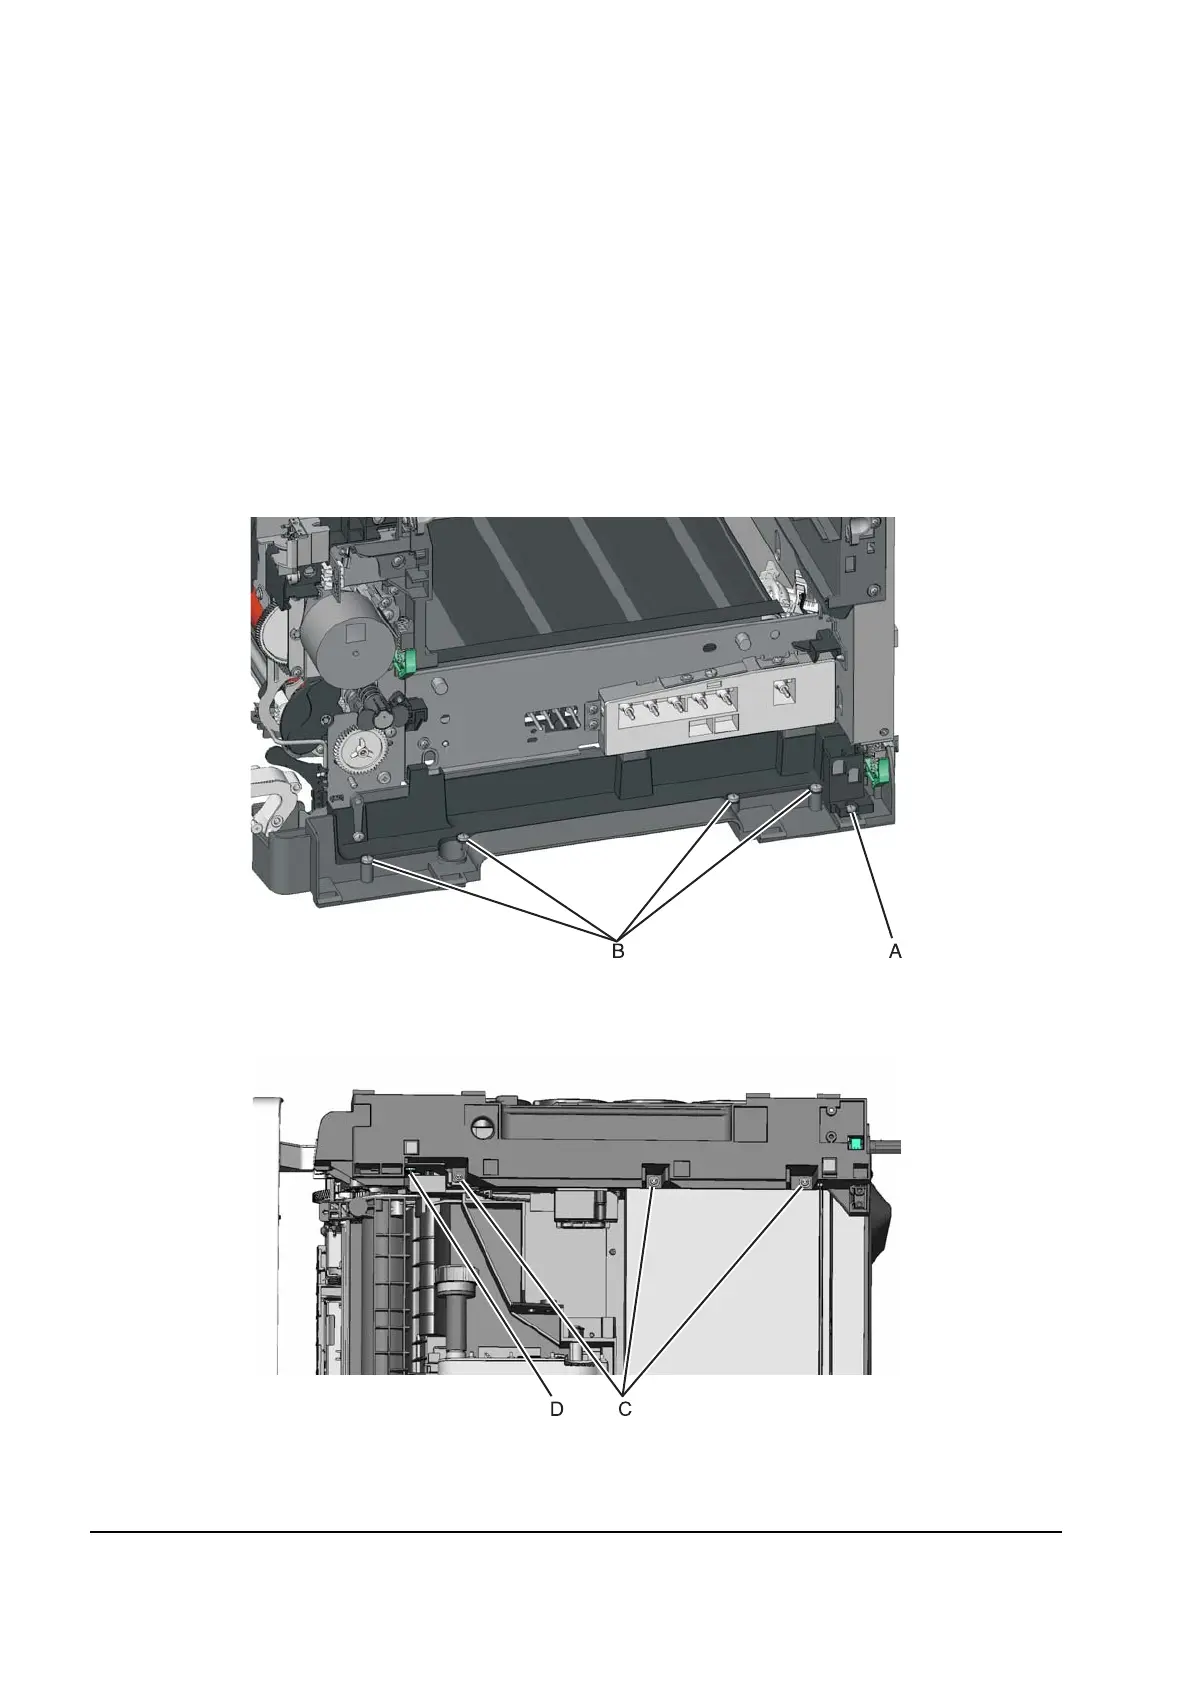
5. Turn the printer on the back.
6. Remove the three screws (C) securing the lower right frame to the printer.
7. Remove the screw (D) closer to the front of the printer.
Y112730-2

 Loading...