Temperature and Humidity Limits 2-1
Airborne Contaminants Limits 2-2
Positive Pressurization and Ventilation - Hot Aisle Containment System (HACS) 2-3
Electrostatic Discharge 2-3
Prepare the Rack 2-4
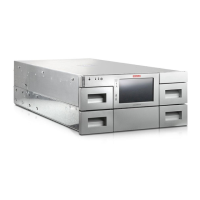
Unpack and Acclimate the Library 2-5
Install the Base Module 2-5
Unpack the Base Module Accessory Kit 2-6
Install the Base Module Back Rails 2-7
Install the Base Module Front Rails 2-8
Connect the Base Module Front Rail to the Back Rail 2-9
Secure the Base Module Front Rail 2-9
Verify the Installation of the Base Module Front Rail 2-10
Install the Clip Nuts (square hole racks only) 2-11
Mount the Base Module 2-12
Engage the Base Module with the Rail 2-12
Remove the Cartridge Magazine with the Hex Key 2-13
Remove the Cable Clip in the Base Module 2-14
Secure the Base Module to the Rack 2-14
Install the Expansion Module 2-15
Unpack the Expansion Module Accessory Kit 2-16
Remove the Library Floor 2-17
Install Clip Nuts for the Expansion Module (for square hole racks only) 2-18
Prepare the Expansion Module by Removing the Cartridge Magazines 2-19
Install the Floor in the Bottom Expansion Module 2-19
Mount the Expansion Module 2-21
Install the Rear Rails for the Expansion Module 2-22
Secure the Expansion Module to the Rack Front 2-23
Replace the Cartridge Magazines 2-23
Label the Modules 2-23
Install the Hook and Loop Strap 2-24
Install Power Supplies and Tape Drives 2-25
Remove the Power Supply Slot Cover 2-27
Insert a Power Supply into the Slot 2-27
Remove the Drive Slot Cover 2-28
Insert a Tape Drive Tray into the Slot 2-28
Cable the Library 2-29
Cable the Expansion Modules 2-29
Connect Cables to the Drives and Power Supplies 2-31
Connect the Network Port 2-32
Align and Dress the Cables and Cords 2-32
iv