To reassign the MIDI channel for this coupler, hold
SET and press a key on the Great
Manual (in this
case,
Low
"C").
For
further
information,
see
"Reassigning 'Send" Channel" in your organ's
MIDI Phase II User's Guide.
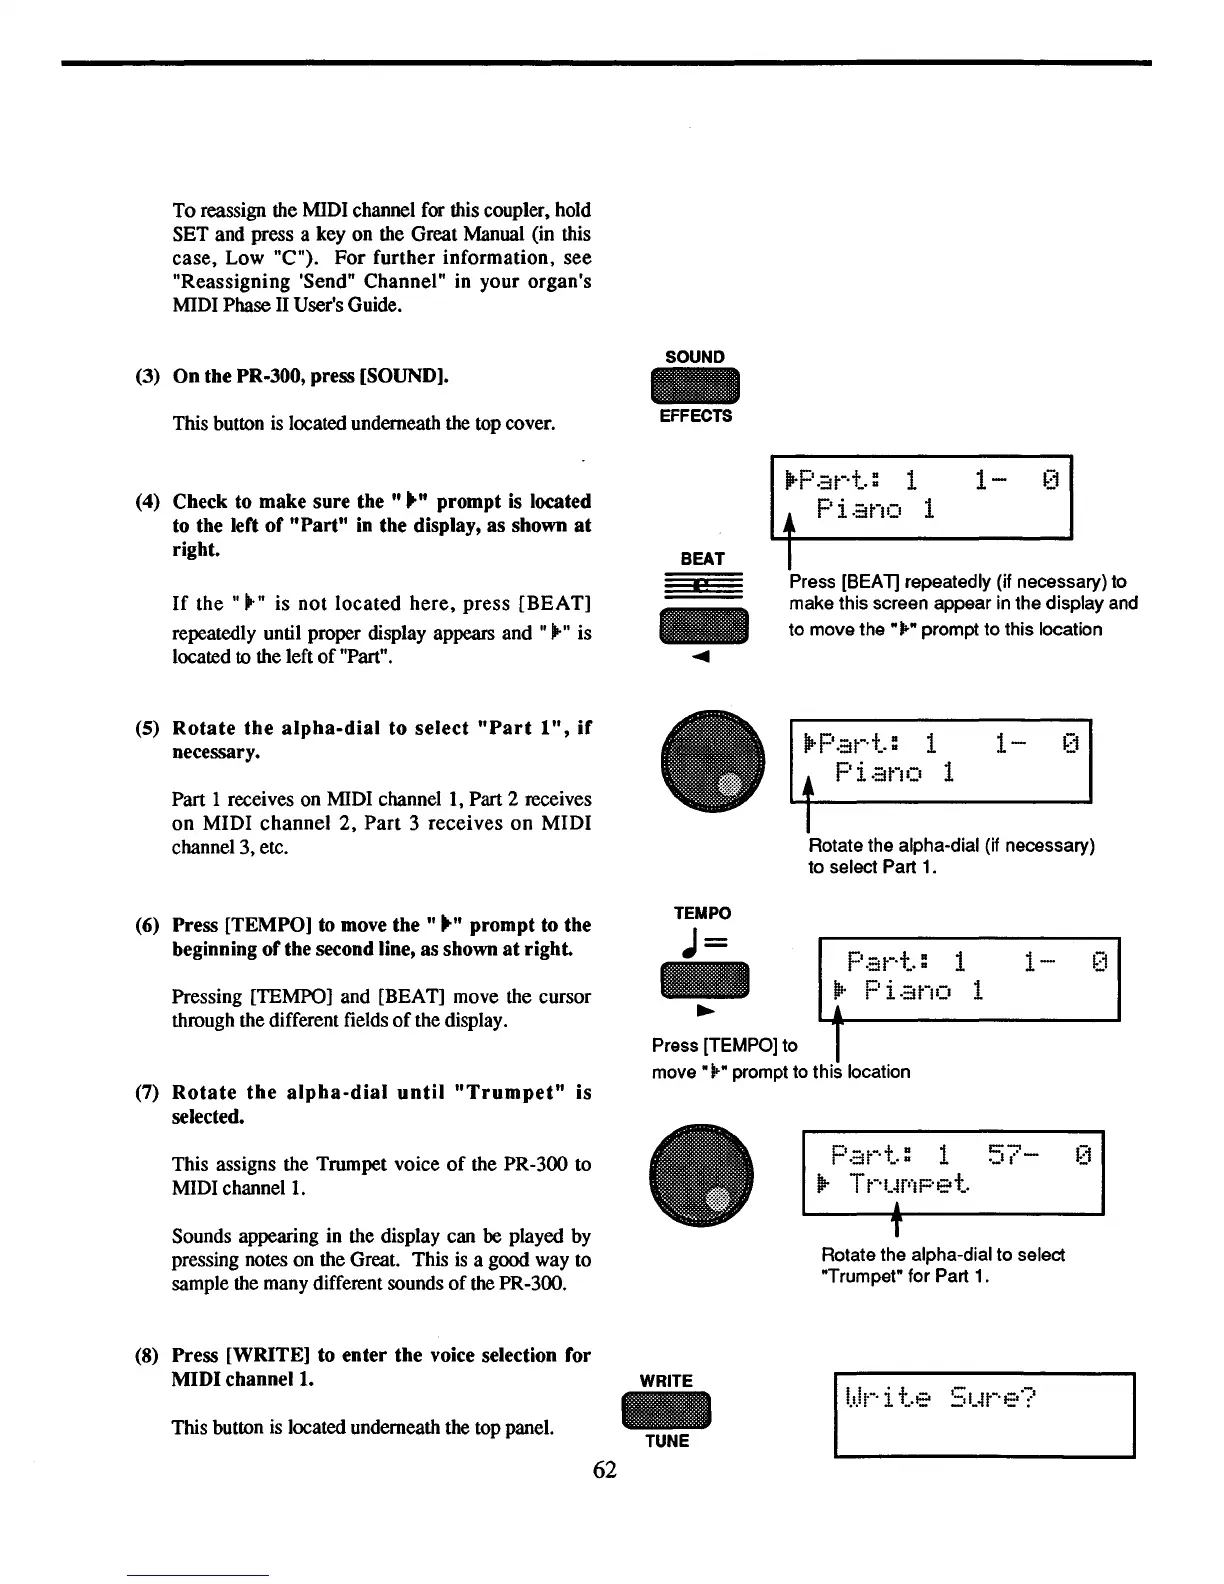
(3) On the PR-300, press [SOUND].
This button is located underneath the top cover.
SOUND
-
EFFECTS
(4) Check to make sure
the"""
prompt
is
located
to the left of
"Part"
in
the display, as shown
at
right.
If
the
....... is
not
located
here,
press
[BEAT]
repeatedly until proper display appears and
.......
is
located
to
the left
of
"Part".
BEAT
-
....
!lrP
at-·t.: 1
1-
~~1
•
Piano
1
T
Press [BEAT] repeatedly (if necessary) to
make this screen appear in the display and
to move
the"
...
" prompt to this location
(5)
Rotate
the
alpha-dial
to select
"Part
1",
if
necessary.
Part 1 receives on MIDI
channell,
Part 2 receives
on
MIDI
channel
2,
Part
3
receives
on
MIDI
channel 3, etc.
!lrPat-·t.: 1
1-
0
•
Piano
1
I
Rotate the alpha-dial (if necessary)
to select Part 1.
1-
TEMPO
J=
Pat-·t.: 1
!lr
Piano
1
~
L.
......
.....I
Press [TEMPO] to 1
move"
1>"
prompt to this location
Pressing [TEMPO] and [BEAT] move the cursor
through the different fields
of
the display.
(6)
Press [TEMPO] to move
the"""
prompt to the
beginning of the second line, as shown
at
right.
(7)
Rotate
the
alpha-dial
until
"Trumpet"
is
selected.
This assigns the Trumpet voice
of
the PR-300 to
MIDI channel
1.
Sounds appearing in the display can
be
played by
pressing notes on the Great. This
is
a good way to
sample the many different sounds
of
the PR-300.
p.:;jt-·t.:
1
57-
~]
II'-
Tt-·l.wIPet.
&
i
Rotate the alpha-dial to select
"Trumpet" for Part 1.
(8)
Press [WRITE] to enter the voice selection for
MIDI
channell.
This button is located underneath the top panel.
WRITE
-
TUNE
62
 Loading...