5
Part of
Practice
Fully Utilizing Cutting Function
136
Accurately Adjusting the Cutting-in Amount
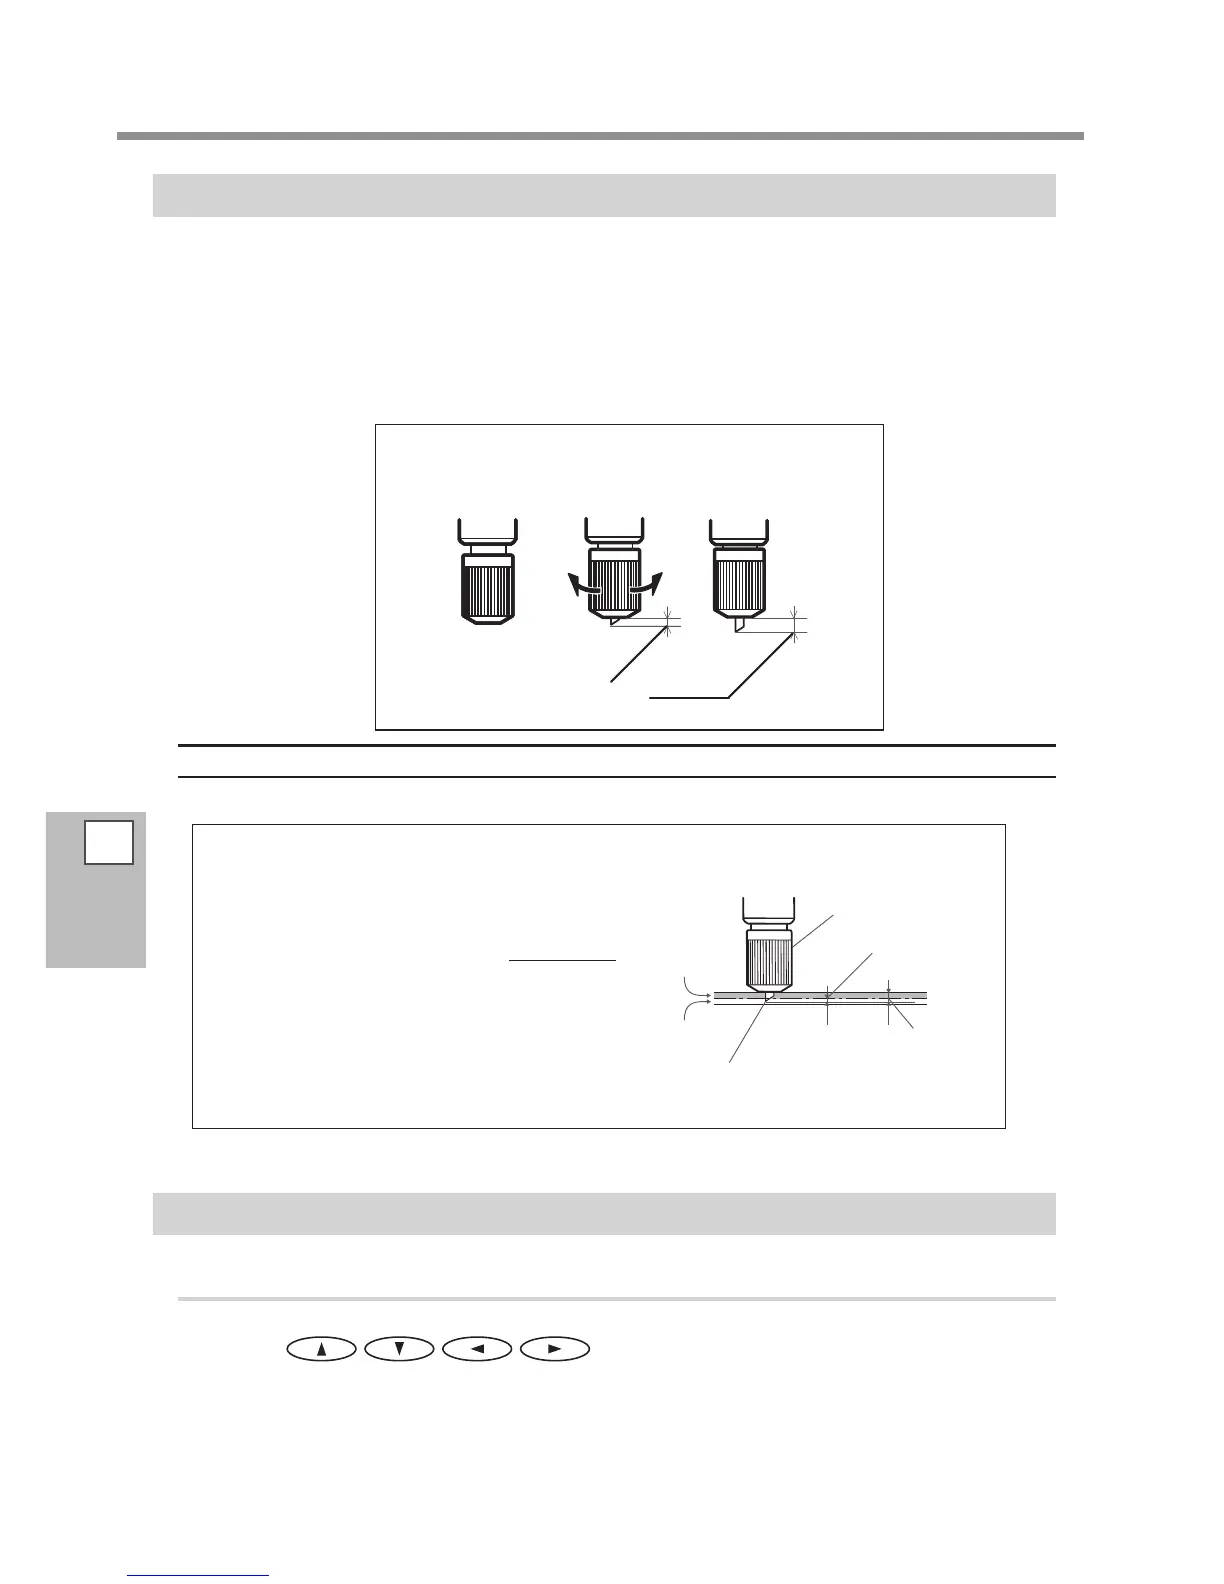
When you want to perform accurate and ne adjustment of the cutting-in amount, such as when cutting media
with thin backing paper, you can obtain good results by adjusting the tip of the blade.Turn the cap portion of
the blade holder to adjust the amount of blade extension. Each indicator tick corresponds to 0.1 millimeters,
and adjustment for 0.5 millimeters can be made by rotating the cap one full turn.
Note that making the amount of blade extension too small may cause the tip of the blade holder cap to touch,
and may soil and damage the printed surface. It's important to be especially careful about this when you're
using media that has poor ink adhesion properties.
Rough Estimate for the Amount of Blade Extension
Use the following dimension as a rough estimate for setting the amount of blade extension.
Adjusting the Conditions for Cutting the Printed Surface/Cutting-in Amount
1.
Performing the cut test print
Press to move the cutting carriage to the position where
the cut test print should be performed.
The position to perform the cut test print can be selected and set freely.
Blade holder
Material
portion
Backing paper portion
Blade
Half of the
backing paper
Amount of blade
extension is approxi-
mately equal to the
cutting-in amount.
Amount of
blade =
extension
Thickness of
the backing
paper
2
Thickness of
the material +
portion
Min. 0 mm
Amount of blade extension
Max. 2.5 mm
 Loading...