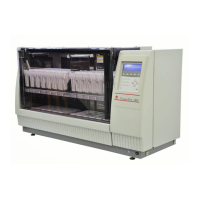
[1] Solution Configuration Selection
Touch this icon to switch the solution configuration used for staining. Select a desired solution
configuration from the stored configurations and apply it to the instrument.
[2] Staining Mode Selection
Touch this icon to set the following items regarding the starting of stain process. Once set, the staining
mode (continuous/batch) cannot be changed during stain process. Other settings can be changed
during stain process.
• Staining mode selection
Set whether to perform stain process in the batch mode or continuous mode.
• Initialization of Start Staining Screen
Set when to show the start staining screen. Select Opening the door or Touching START button.
• Initialization of Staining Process Start
Set when to start staining. Select Closing the door, Touching START button or Touching START
button after closing the door.
When the Closing the door is selected, be careful not to let stain process start inadvertently.
• Start Confirmation
Set whether or not to show a confirmation message at the start of staining.
• Process Start Notice
Set whether or not to notify the start of stain process by showing the start screen once staining
process has started.
• Heating Station Always Heated
When heating stations are used, set whether or not to always heat the heating stations.
• Solution Name Display
Set whether or not to display the applicable solution name (abbreviation) on each station in the
monitor screen showing a solution configuration.
• Link with Coverslipper
Set whet her to connect or disconnect the communication link with the connected coverslipper when
the link is set in the System Setup screen (P. 1-36). Even if the instrument is linked to a coverslipper,
slides are not transferred to the coverslipper if "Not in Use" is shown here. This item is displayed only
when the instrument is linked to an automated coverslipper.
[3] Reset Solution Usage Information
Touch this icon to reset the usage limit in runs/days/slides for each solution station whose usage
information is managed.
[4] Error Log
Touch this icon to check the error history and error descriptions or clear errors.
[5] Read Barcode (Optional)
Use this setting to read the 2D bar codes on Sakura staining solutions* and enter their expirations in
the instrument based on the 2D bar code information.
* Check the local Sakura Finetek website for availability of the Sakura staining solutions and staining
kits.