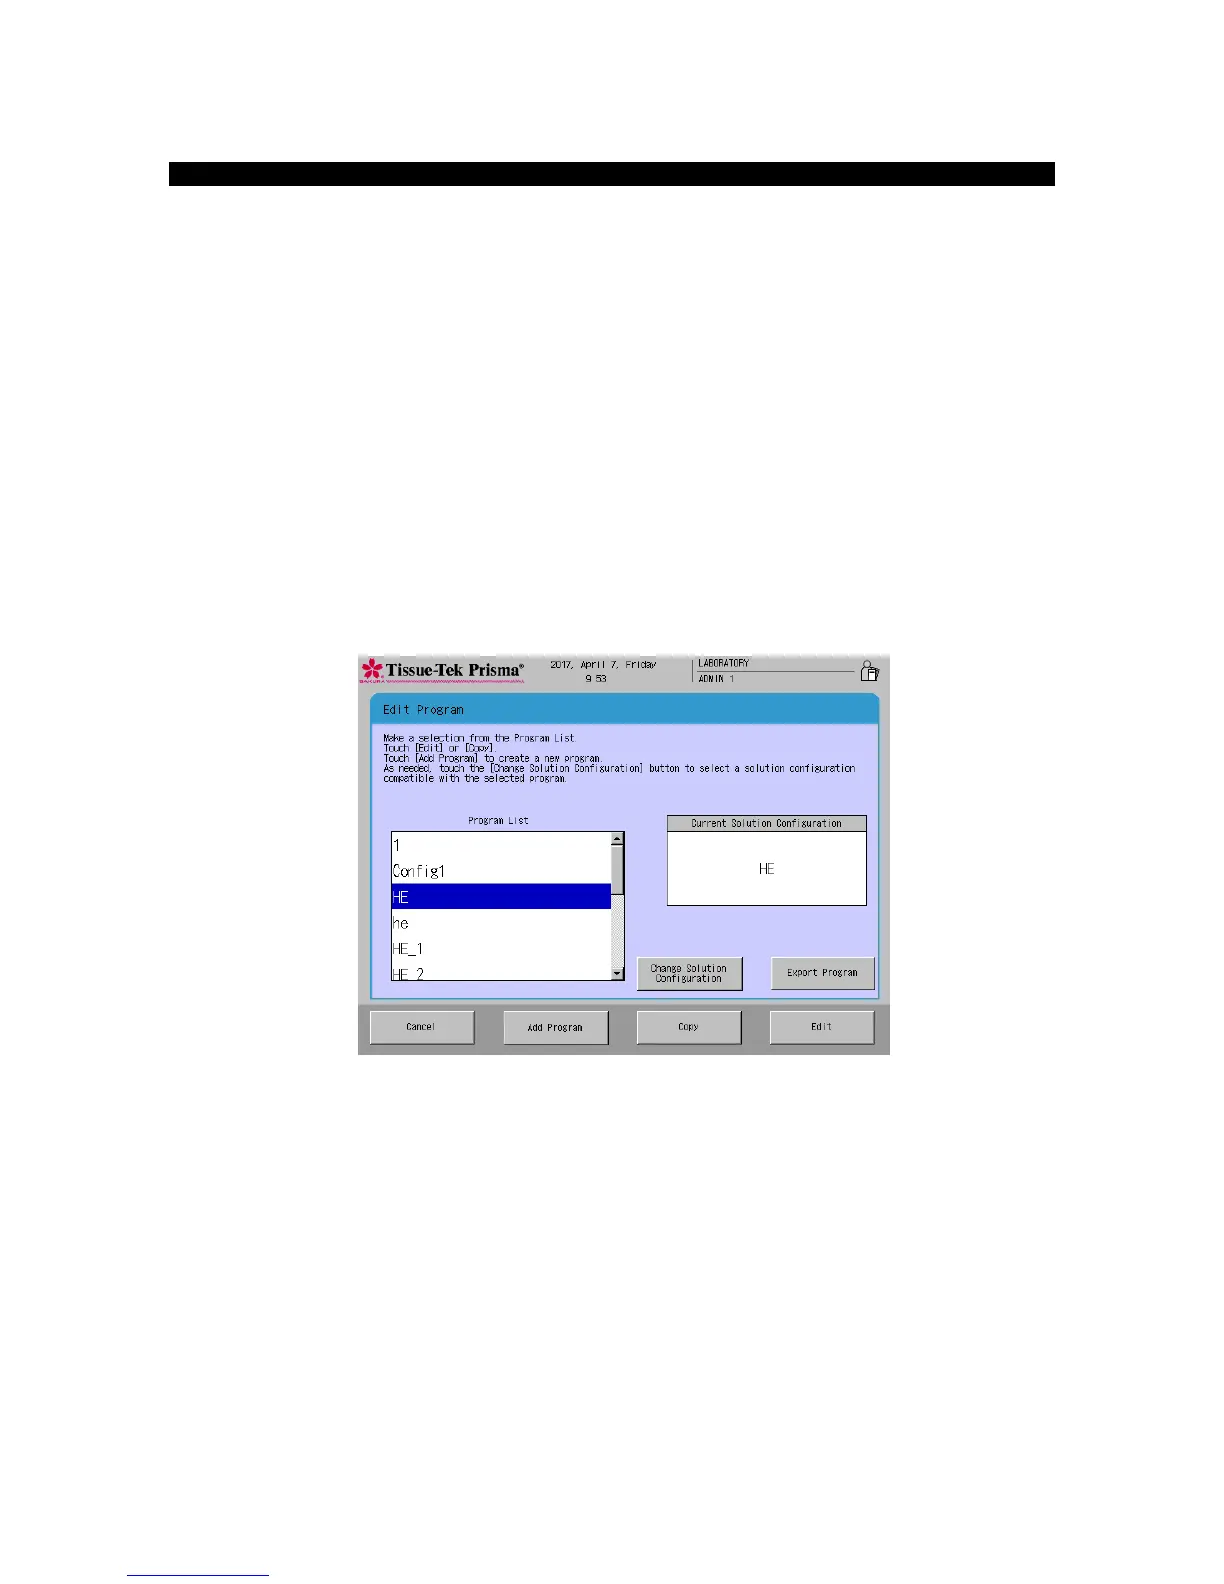
This section explains the procedure to edit an existing staining program.
1. Touch Menu at the bottom right of the Stain Process Monitor screen.
2. Select Edit Program from the Edit Menu.
3. Under Program List in the Select Program screen, touch and select the name of the staining program
you want to edit. The solution configuration used for the selected staining program is displayed on the
right. To change this solution configuration, touch the Change Solution Configuration key at the
bottom and select a new solution configuration under Solution Configuration List. To use the displayed
solution configuration, proceed to the next step.
4. Next, touch the Edit key. The Create Solution Configuration Name screen with the simple keyboard
appears. To change the staining program name currently saved, enter a new name from the onscreen
keyboard (using up to 20 characters). Once the staining program name has been entered, touch the
Save key. When the screen prompts you to enter an abbreviated staining program name, enter an
abbreviation from the onscreen keyboard and then touch the Save key to save the abbreviation. (Enter
the abbreviation using up to five characters.)
5. Touching the Save key proceeds to the operation explained under "Creating a Staining Program" on P.
2-26.